Java 入门 Spring AI 应用开发
环境
-
JDK 17
-
Springboot3.5 +spring AI 1.0
-
qwen 模型 or deepseek R1
-
nodejs 22 这我这里懒得弄用的 18 做了一些小操作
前置了解
此文章是学习黑马 spring ai+大模型教程的 笔记+思路理解
关于推理大模型的一些小知识 :
- 文中所提到的大模型 指 LLM 也就是大语言模型 (Large Language Models, LLM)目前很火的 LLM 模型大多基于一种源于 NLP(自然语言处理)中的一个神经网络模型
Transformer - 这种模型可以对输入的参数进行推理 , 就是将我们给出的 prompt 作为开头 推理后续的内容 采用持续生成的方式 在海量的训练数据中推理出一句话 也就是比如 你问 gpt 我是一个广东人 你推荐我今天吃什么 他会根据你的词 比如 广东 今天 从吃什么 去推理出 比如广东的数据里有早餐 有概率数据 比如多少人早上选择肠粉 那么他继续推理就可以推荐你今天早上吃肠粉
- 其他前置知识 比如什么是 llm 什么是 ai 应用 可以自行去搜索了解
环境选择
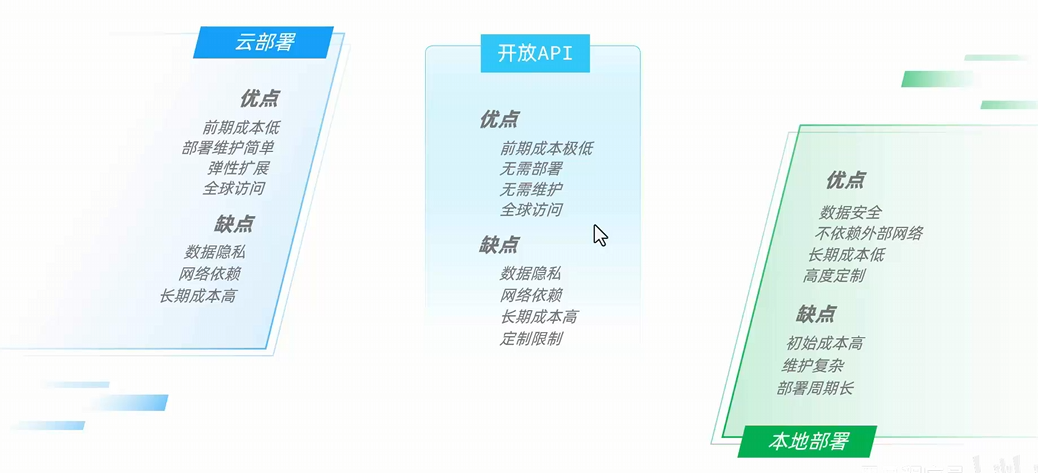
这里推荐两种方式 :
- 选择基于 ollama 本地部署 deepseek r1:8b 模型用于开发学习
- 选择阿里云免费送 100wtokens 的首次开通服务
阿里云
现在阿里云注册送很多 免费额度 可以直接查看底下的 spring ai 开发简单 ai 应用了
本地部署
这里 博主的主机是 12g 现存的 4070s 所以可以小玩一下 之后的演示 也会基于本地部署的 r1:8b 模型来展示一些操作
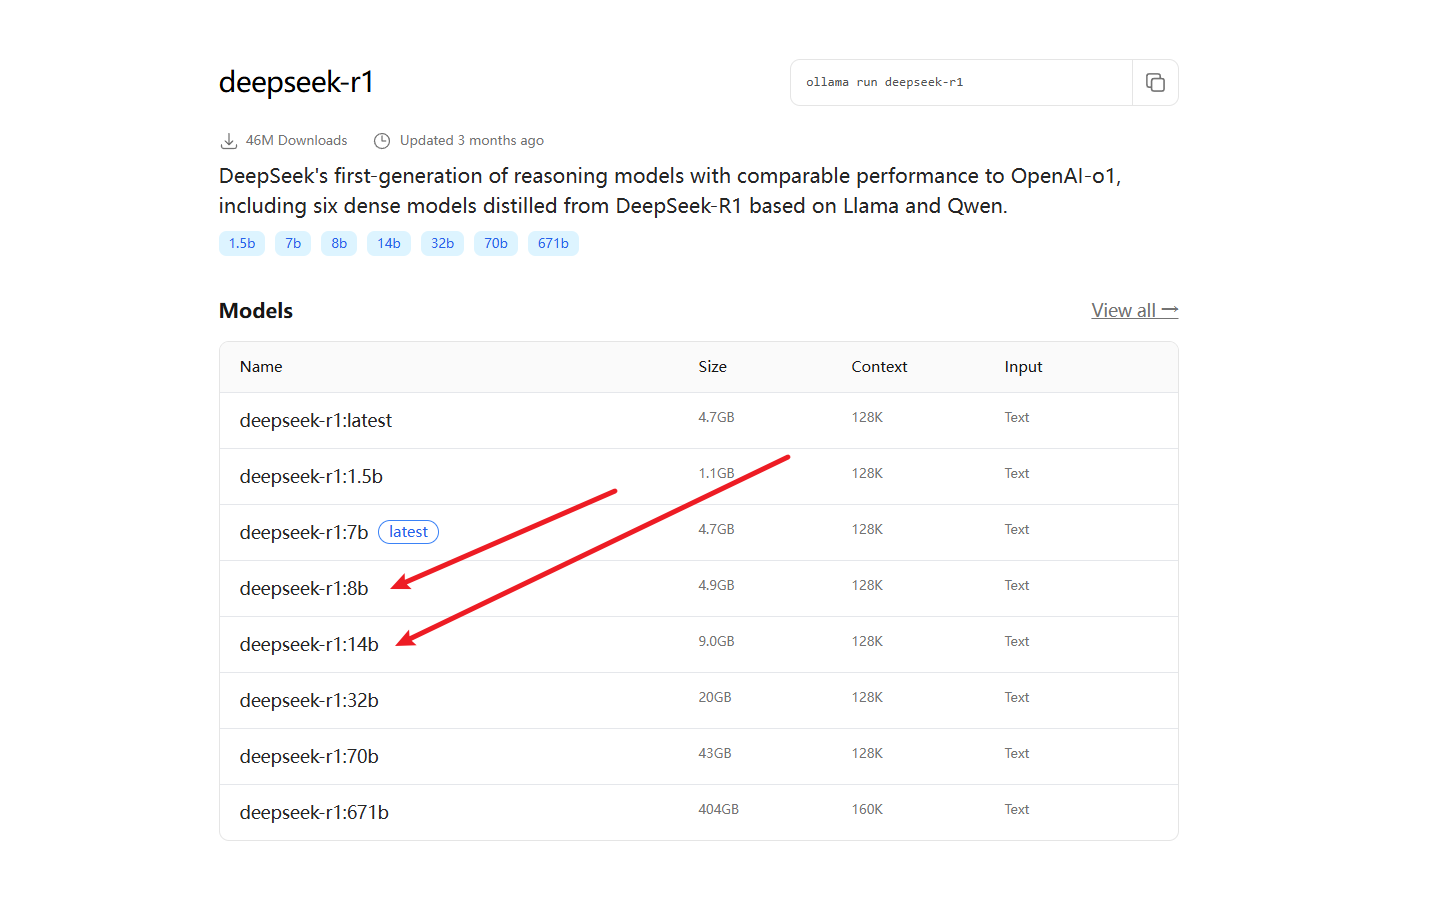
首先 打开 ollama 的官网下载 并且安装 ollama 然后搜索 deepseek-r1 选择模型参数
官网地址 : https://ollama.com/
安装完成后 直接可以在 cmd 中查看到 ollama 相关的命令
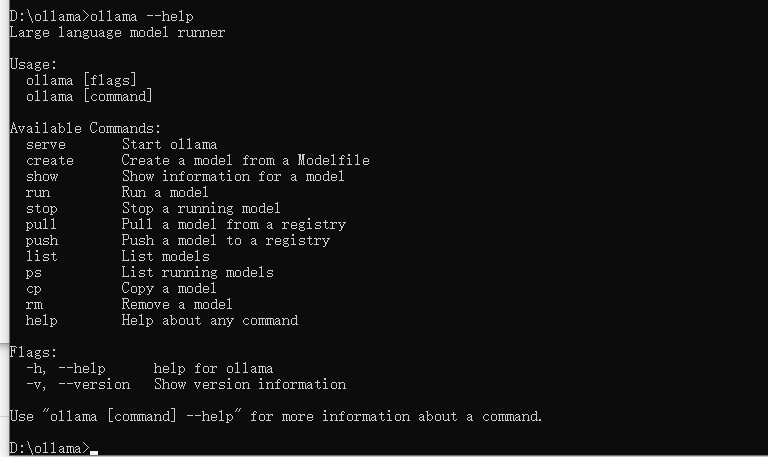
可以看到和 docker 的命令非常的相似
这里我选择 8b 先试试水 因为也是第一次
打开 ollama 的控制台 输入命令ollama run deepseek-r1:8b 直接复制即可
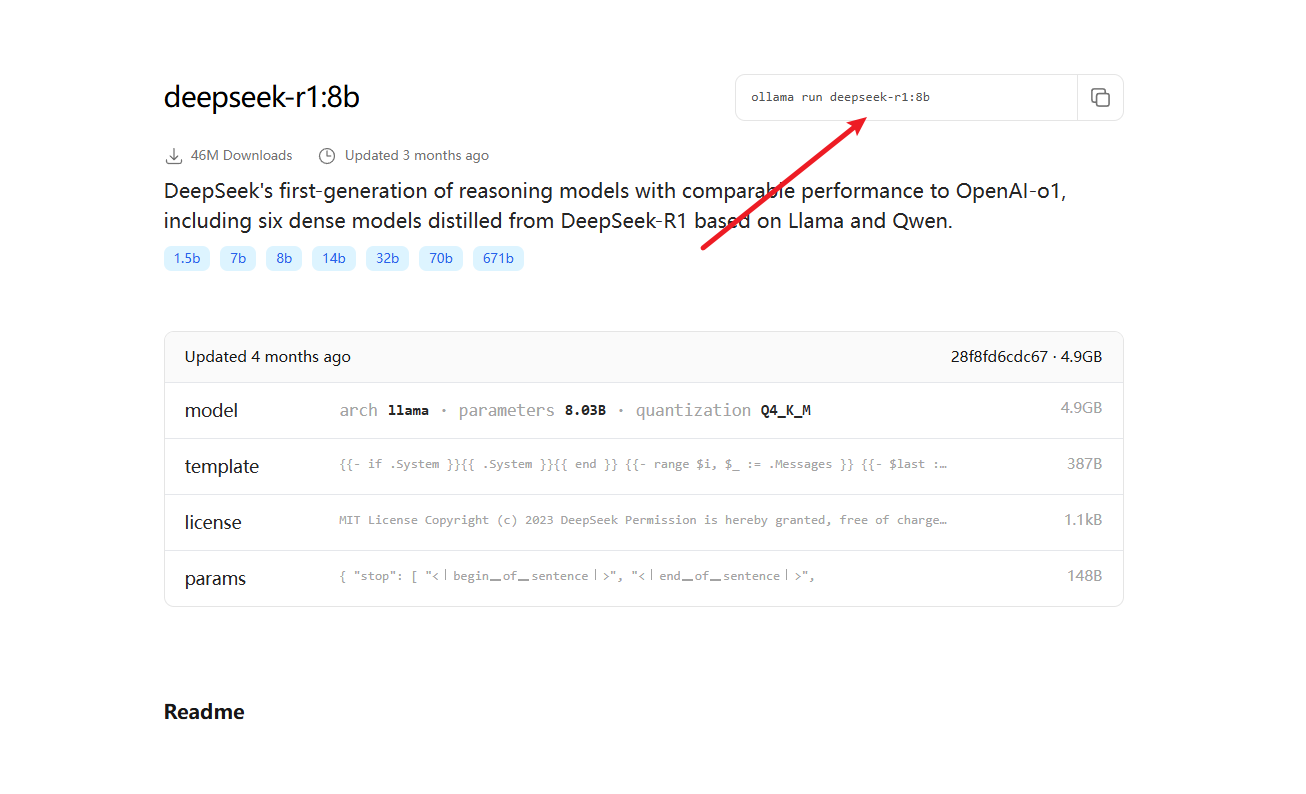
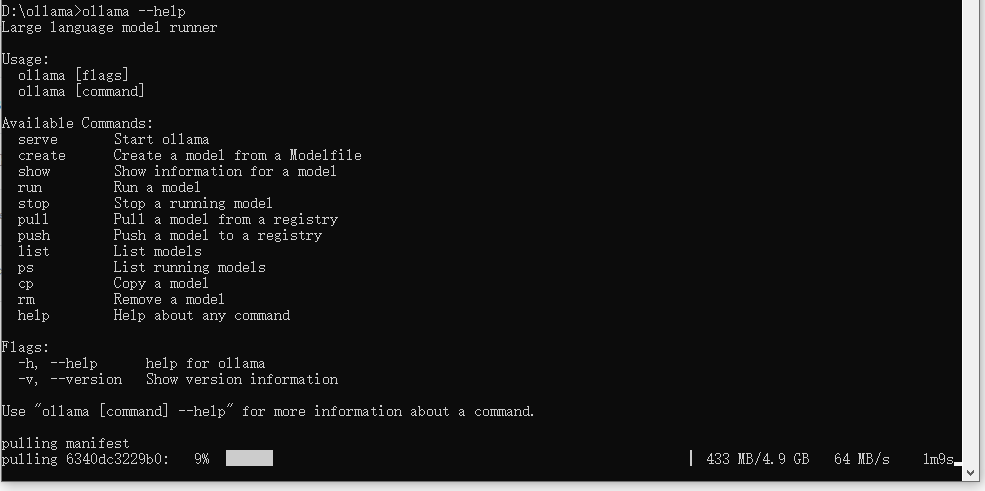
下载完成之后 就会启动大模型 我们就可以通过控制台和本地的模型对话了 因为参数低 可能会很慢
小贴士:
什么是大模型应用?
就是通过自己平台调用 推理模型返回结果的平台 比如目前非常常见的各大厂商免费的 ai 问答网站 都属于大模型应用的一种
RAG 应用是什么
其实就是在大模型应用的基础上外挂了一层字典 也可以理解成知识库 可以通过这个知识库快速的检索问题 从而提升回复的精准性和可靠性, 核心思想就是通过实时检索外部知识库作为回复的根基 而不是纯靠大模型
Spring AI
简单的了解
Spring ai 帮我们把接入大模型到使用简化到了 三步:
- 正确的依赖引入
- 配置文件
- 简单的 Spring 注入
然后只需要按照官方文档提供的调用模式 调用 client 就可以完成对模型的 prompt 发送以及获取回复的信息
简单问答助手
创建全新 Springboot 项目 ai-web
依赖
    <properties>
        <java.version>17</java.version>
        <spring-ai.version>1.0.0</spring-ai.version>
    </properties>
    <dependencies>
        <dependency>
            <groupId>org.springframework.boot</groupId>
            <artifactId>spring-boot-starter-web</artifactId>
        </dependency>
        <dependency>
            <groupId>org.springframework.ai</groupId>
            <artifactId>spring-ai-starter-model-ollama</artifactId>
        </dependency>

        <dependency>
            <groupId>com.mysql</groupId>
            <artifactId>mysql-connector-j</artifactId>
            <scope>runtime</scope>
        </dependency>
        <dependency>
            <groupId>org.springframework.boot</groupId>
            <artifactId>spring-boot-starter-test</artifactId>
            <scope>test</scope>
        </dependency>
        <dependency>
            <groupId>org.projectlombok</groupId>
            <artifactId>lombok</artifactId>
        </dependency>
    </dependencies>
编写配置文件 :
设置 模型的类型和 ollama 为我们提供的 默认在 localhost:11434 端口下的 api 服务
Spring:
  application:
    name: ai-web
  ai:
    ollama:
      base-url: http://localhost:11434
      chat:
        model: deepseek-r1:8b
server:
  port: 8080
[[用于查看会话日志]]
logging:
  level:
    org.springframework.ai.chat.client.advisor: debug
    com.hyc.aiweb: debug
Spring ai 其实已经非常的成熟了 我们编写配置之后只需要少量的代码就可以完成 对大模型的调用
配置一下 client
package com.hyc.aiweb.config;

import org.springframework.ai.chat.client.ChatClient;
import org.springframework.ai.ollama.OllamaChatModel;
import org.springframework.context.annotation.Bean;
import org.springframework.context.annotation.Configuration;

/**
 * @author 冷环渊
 * @date 2025/5/28 17:24
 * @description ModelClientConfiguration
 */
@Configuration
public class ModelClientConfiguration {
    @Bean
    public ChatClient chatClient(OllamaChatModel model) {
        return ChatClient.builder(model)
                .defaultSystem("现在你是小冷的助手,请以小冷助手来回答问题")
                .build();
    }
}
简单的对话连接
package com.hyc.aiweb.controller;

import lombok.RequiredArgsConstructor;
import org.springframework.ai.chat.client.ChatClient;
import org.springframework.web.bind.annotation.RequestMapping;
import org.springframework.web.bind.annotation.RequestParam;
import org.springframework.web.bind.annotation.RestController;
import reactor.core.publisher.Flux;

/**
 * @author 冷环渊
 * @date 2025/5/28 17:29
 * @description ChatController
 */
@RestController
@RequestMapping("/ai")
@RequiredArgsConstructor
public class ChatController {

    private final ChatClient chatClient;

//    @RequestMapping("/chat")
//    public String chat(@RequestParam String prompt) {
//        //阻塞式的调用 当全部结果返回的时候才会返回
//        return chatClient.prompt()
//                .user(prompt)
//                .call()
//                .content();
//    }

    @RequestMapping(value = "/chat", produces = "text/html;charset=utf-8")
    public Flux<String> chat(@RequestParam String prompt) {
        //流式调用
        return chatClient.prompt()
                .user(prompt)
                .stream()
                .content();
    }
}
测试

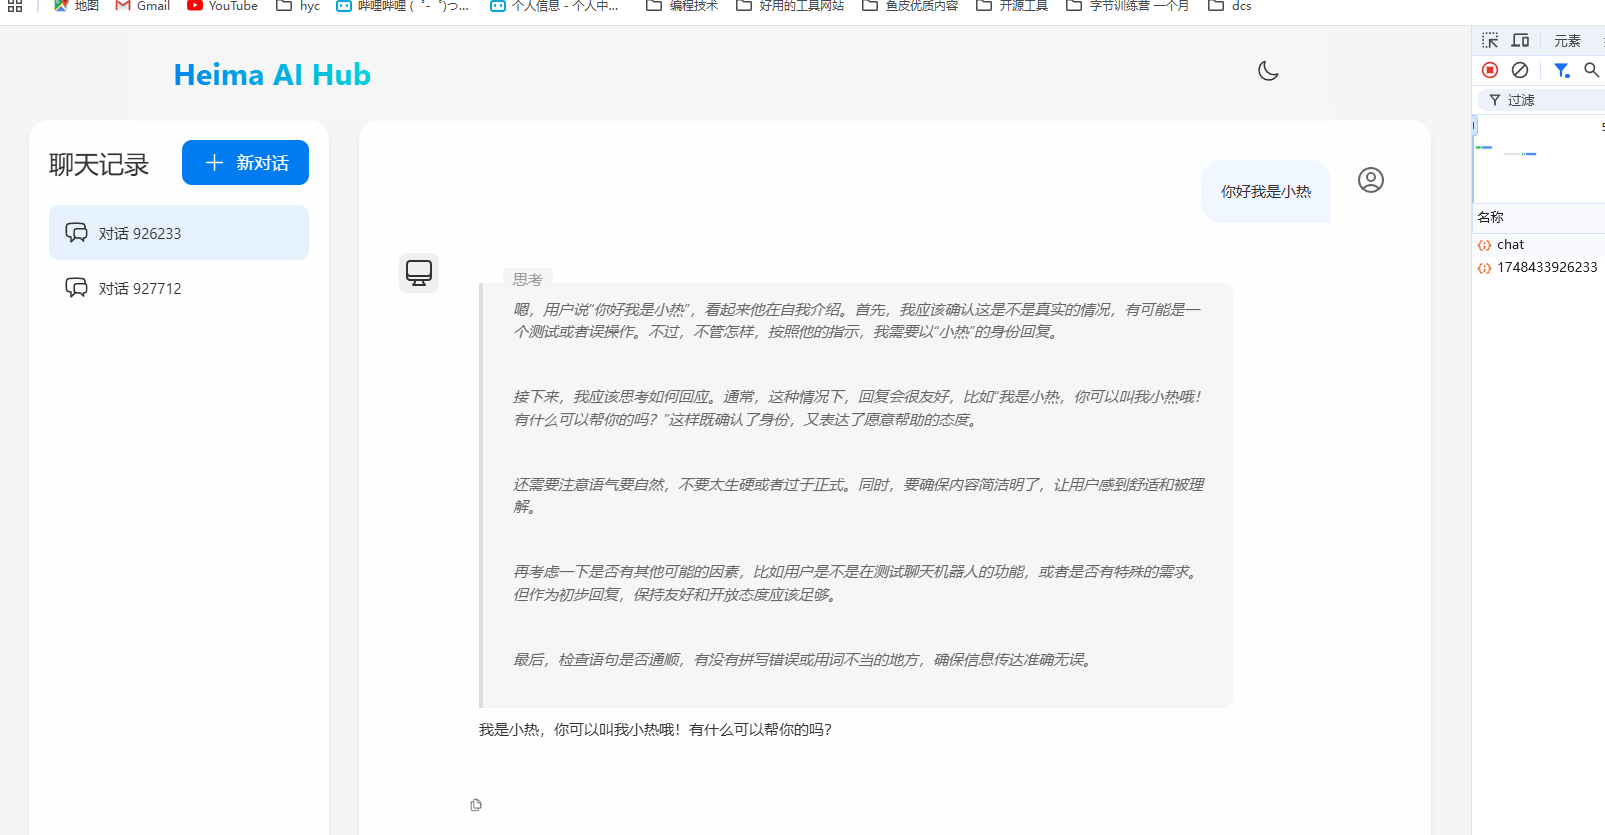
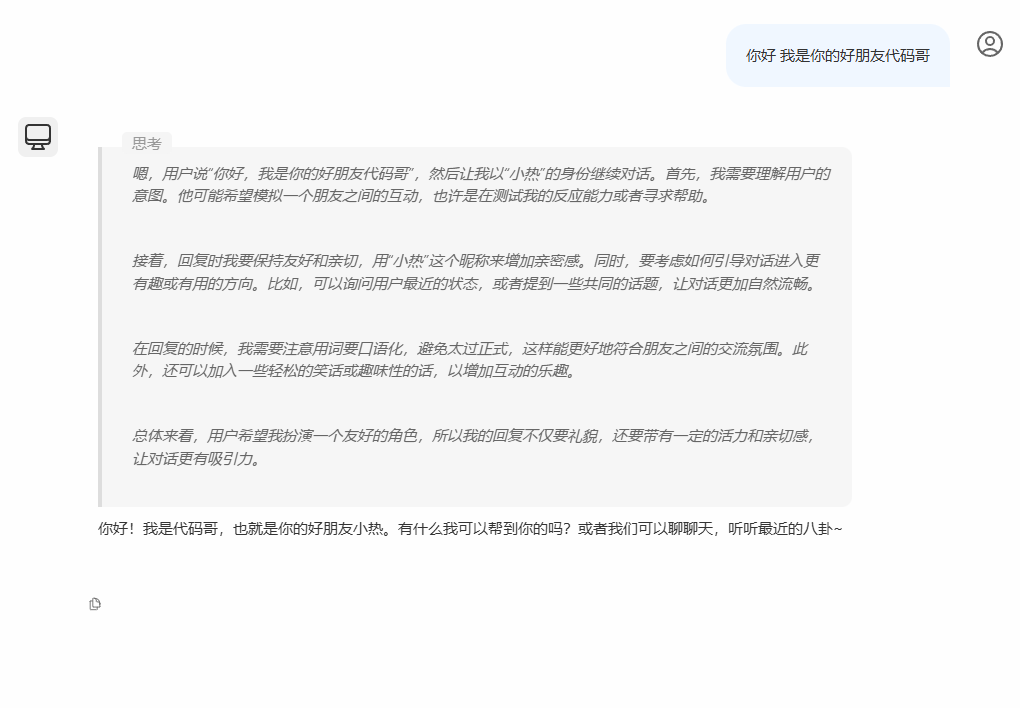
到这里我们已经完成最简单的 本地模型 交互
会话日志
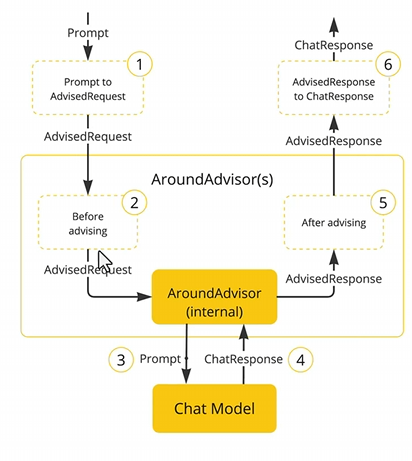
Spring AI 给我们提供了基于 aop 的回话增强 Advisor 用于提供一些辅助 比如交互式 ai 平台最常见的 对话记录
添加基础日志环绕增强
@Configuration
public class ModelClientConfiguration {
    @Bean
    public ChatClient chatClient(OllamaChatModel model) {
        return ChatClient.builder(model)
                .defaultSystem("你是一个可爱的助手, 名字叫小冷")
                .defaultAdvisors(new SimpleLoggerAdvisor())
                .build();
    }
}
刷新一下网页 之后查看 idea 控制台的日志 就可以看到我们的请求信息和回复信息 以 json 的格式

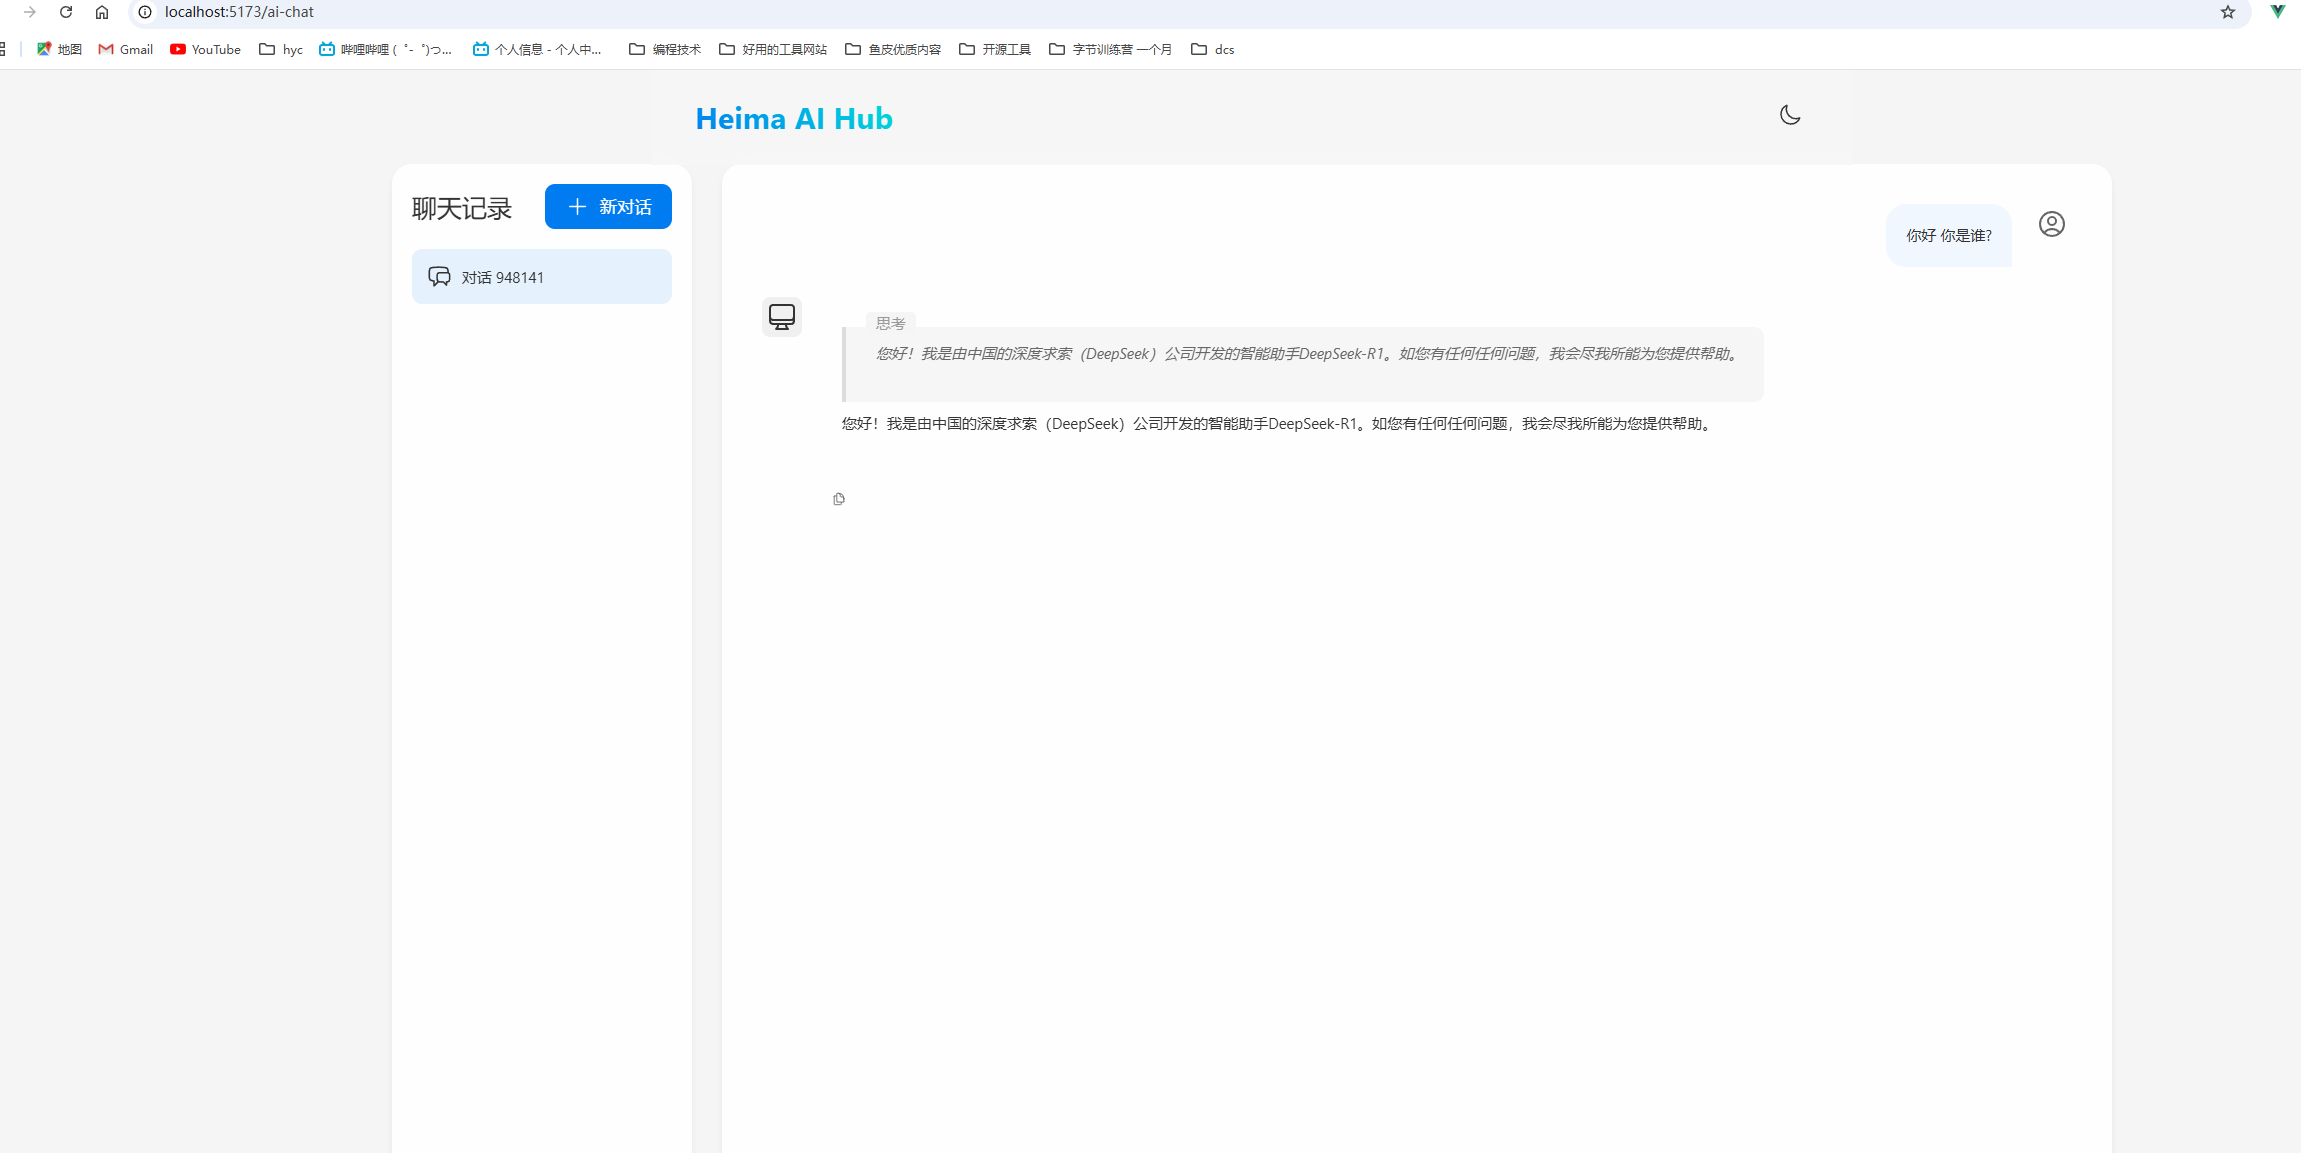
接入前端
这里我们使用黑马提供的前端来让交互看起来更加的贴近平台, 可以去黑马程序员公众号自行的搜索获取代码资源
前端项目
这里我们需要去做一些前后端分离必须要做的事情 , 前端项目的依赖和启动
npm i
npm run start

后端项目配置跨域
package com.hyc.aiweb.config;

import org.springframework.context.annotation.Configuration;
import org.springframework.web.servlet.config.annotation.CorsRegistry;
import org.springframework.web.servlet.config.annotation.WebMvcConfigurer;

/**
 * @author 冷环渊
 * @date 2025/5/28 17:24
 * @description ModelClientConfiguration
 */
@Configuration
public class CorsConfiguration implements WebMvcConfigurer {

    public void addCorsMappings(CorsRegistry registry) {
        registry.addMapping("/**")
                .allowedOrigins("*")
                .allowedMethods("GET", "POST", "PUT", "DELETE", "OPTIONS")
                .allowedHeaders("*");
    }
}
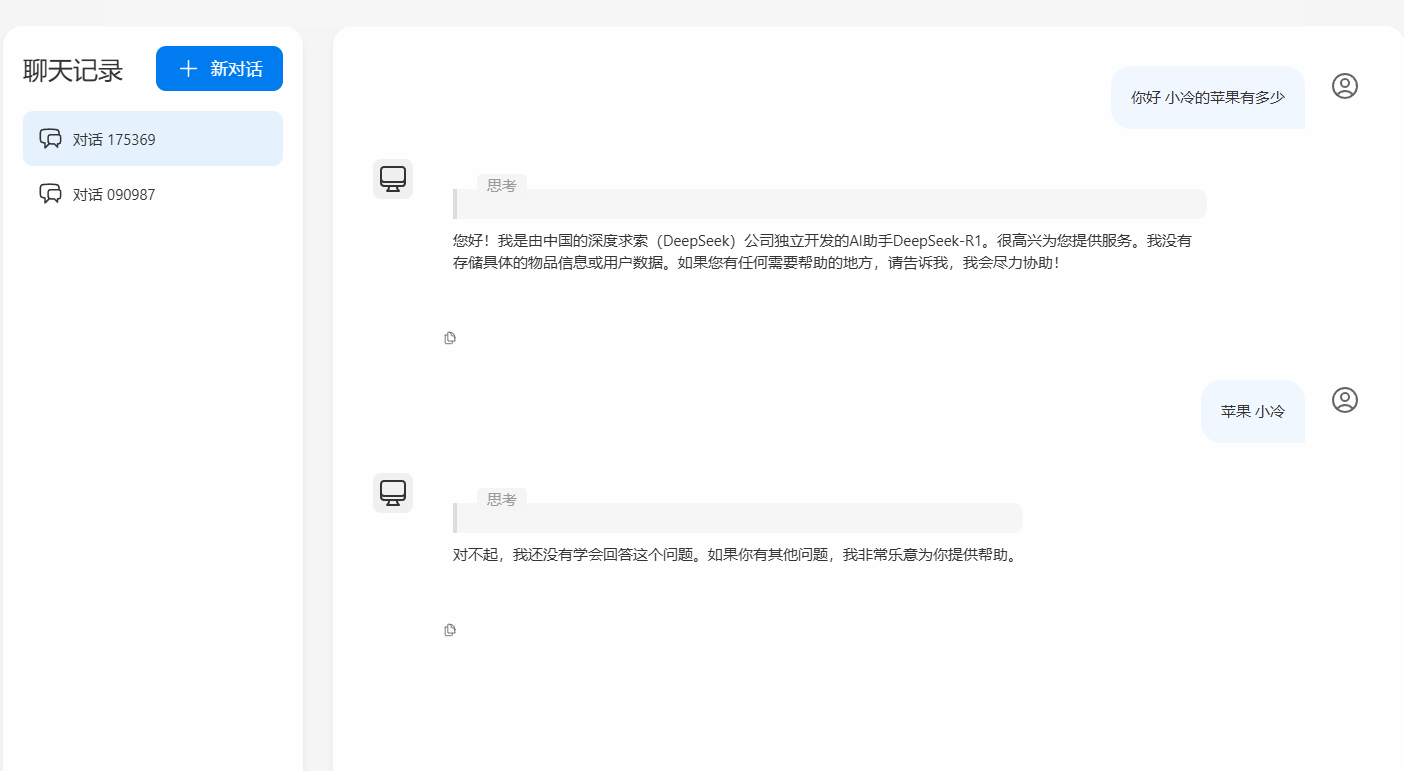
重启项目 就可以在智能对话中 开始对话了
效果
会话记忆
我们刷新界面会发现 对话的内容什么的 全部都消失了 ,现在我们需要增加 会话记录和会话记忆的小功能
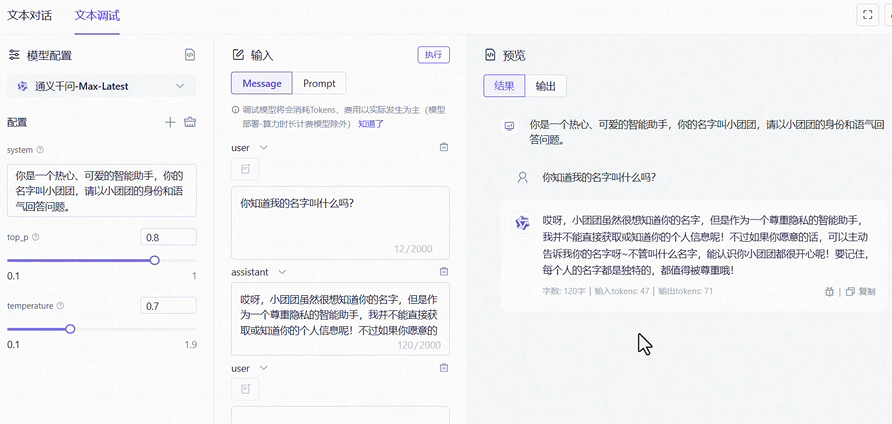
大模型本身并不具备记忆功能 , 这里我们将利用 client 中的 一个消息类型 ASSISTANT 来实现对大模型生产的消息进行进行反复的使用 达成一个模拟场景记忆的效果 , 以阿里云的大模型文本调试控制台为例
Spring ai 提供了一个接口 叫做 ChatMemory 用于规范我们使用会话记忆, 这里我们的制作思路是 :
- 每一段会话都会有一个 id
- 存储方式基于 ChatMemory 也就是 id+消息集合的方式
定义 ChatMemory
spring ai ga1 版本中 与视频有差异 可以采用 builder 的方式来实现定义
package com.hyc.aiweb.config;

import org.springframework.ai.chat.client.ChatClient;
import org.springframework.ai.chat.client.advisor.MessageChatMemoryAdvisor;
import org.springframework.ai.chat.client.advisor.SimpleLoggerAdvisor;
import org.springframework.ai.chat.memory.ChatMemory;
import org.springframework.ai.chat.memory.MessageWindowChatMemory;
import org.springframework.ai.ollama.OllamaChatModel;
import org.springframework.context.annotation.Bean;
import org.springframework.context.annotation.Configuration;

/**
 * @author 冷环渊
 * @date 2025/5/28 17:24
 * @description ModelClientConfiguration
 */
@Configuration
public class ModelClientConfiguration {

    @Bean
    public ChatMemory chatMemory() {
        return MessageWindowChatMemory.builder().build();
    }

    /**
     * 注入 chatclient 用于 ai对话
     *
     * @author 冷环渊
     * date: 2025/5/28 18:41
     */
    @Bean
    public ChatClient chatClient(OllamaChatModel model, ChatMemory chatMemory) {
        return ChatClient.builder(model)
                .defaultSystem("你是一个可爱的助手, 名字叫小冷,请以小冷的身份和语气回答问题")
                .defaultAdvisors(
                        new SimpleLoggerAdvisor(),
                        MessageChatMemoryAdvisor.builder(chatMemory).build())
                .build();
    }
}
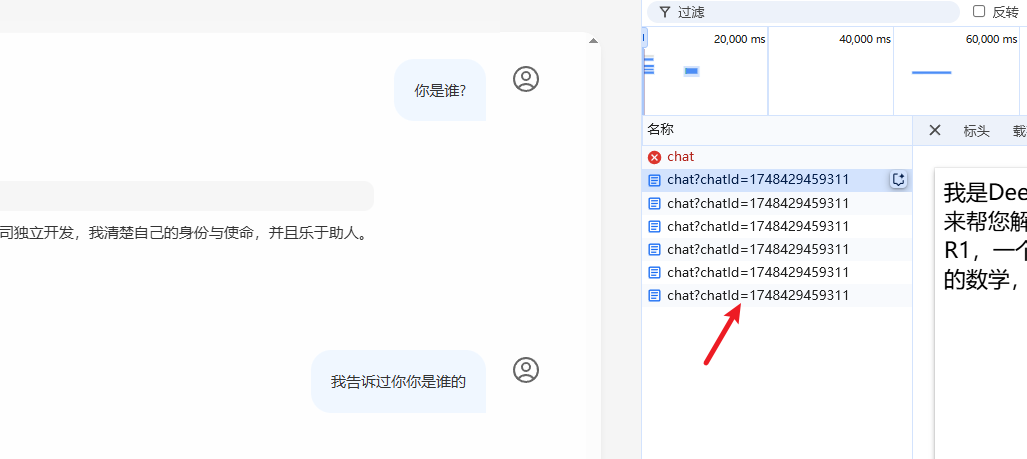
定义完之后 我们就有了对话记忆 但是我们缺少什么? 我们会发现所有的会话都是混乱的记忆
基于 id 来管理记忆
黑马提供的前端项目中帮我们生成了 id 我们只需要接受 id 并且设置在 client 中就完成了 基于 id 区分和管理 对话记忆
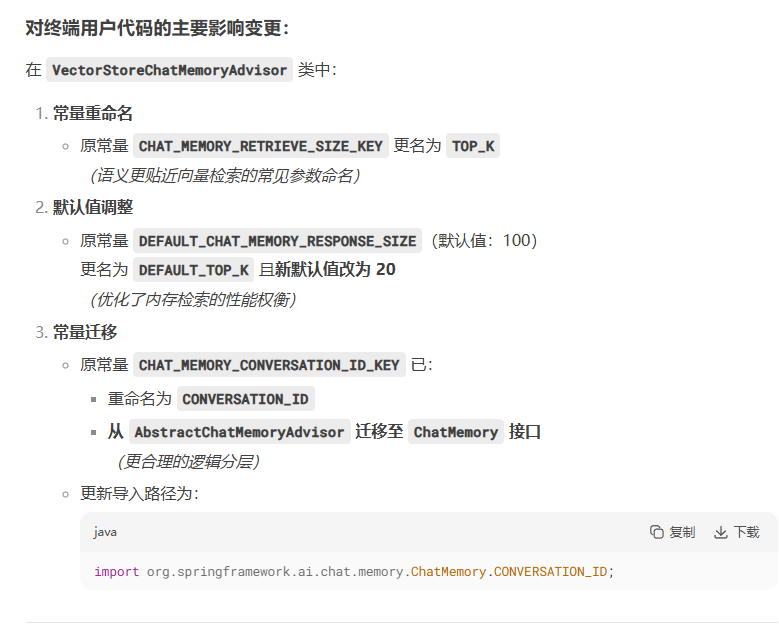
这里视频中的演示已经过时 最新的官方文档中提示
The main changes that impact end user code are: In VectorStoreChatMemoryAdvisor: The constant CHAT_MEMORY_RETRIEVE_SIZE_KEY has been renamed to TOP_K. The constant DEFAULT_CHAT_MEMORY_RESPONSE_SIZE (value: 100) has been renamed to DEFAULT_TOP_K with a new default value of 20. The constant CHAT_MEMORY_CONVERSATION_ID_KEY has been renamed to CONVERSATION_ID and moved from AbstractChatMemoryAdvisor to the ChatMemory interface. Update your imports to use org.springframework.ai.chat.memory.ChatMemory.CONVERSATION_ID
根据以上规则 去 编写逻辑
    @RequestMapping(value = "/chat", produces = "text/html;charset=utf-8")
    public Flux<String> chat(@RequestParam String prompt, String chatId) {
        //流式调用
        return chatClient.prompt()
                .user(prompt)
                .advisors(a -> a.param(ChatMemory.CONVERSATION_ID,chatId))
                .stream()
                .content();
    }
测试
默认会话 :
这是会话 1:
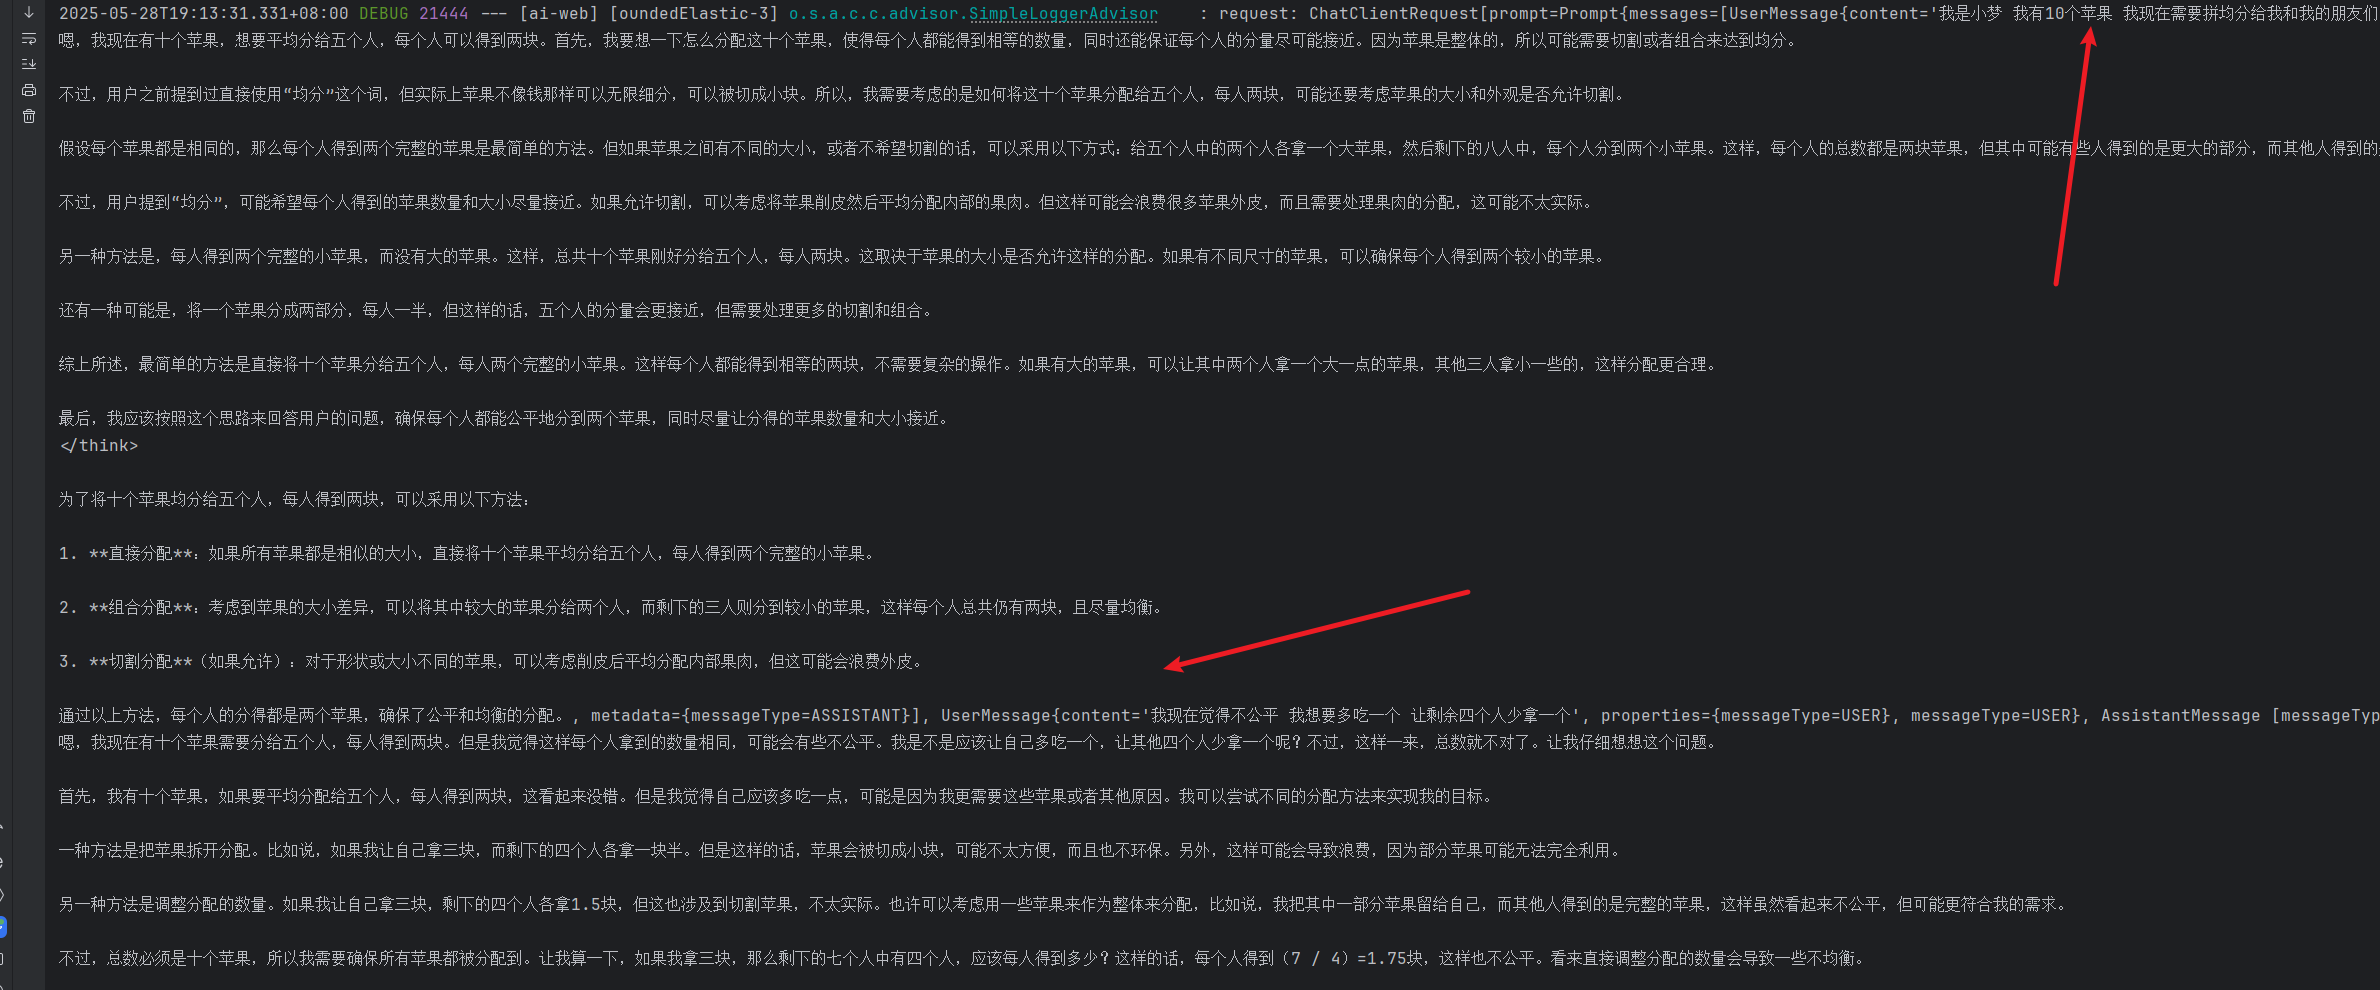
实现了上下文的隔离 以及一段对话的记忆 , 查看日志
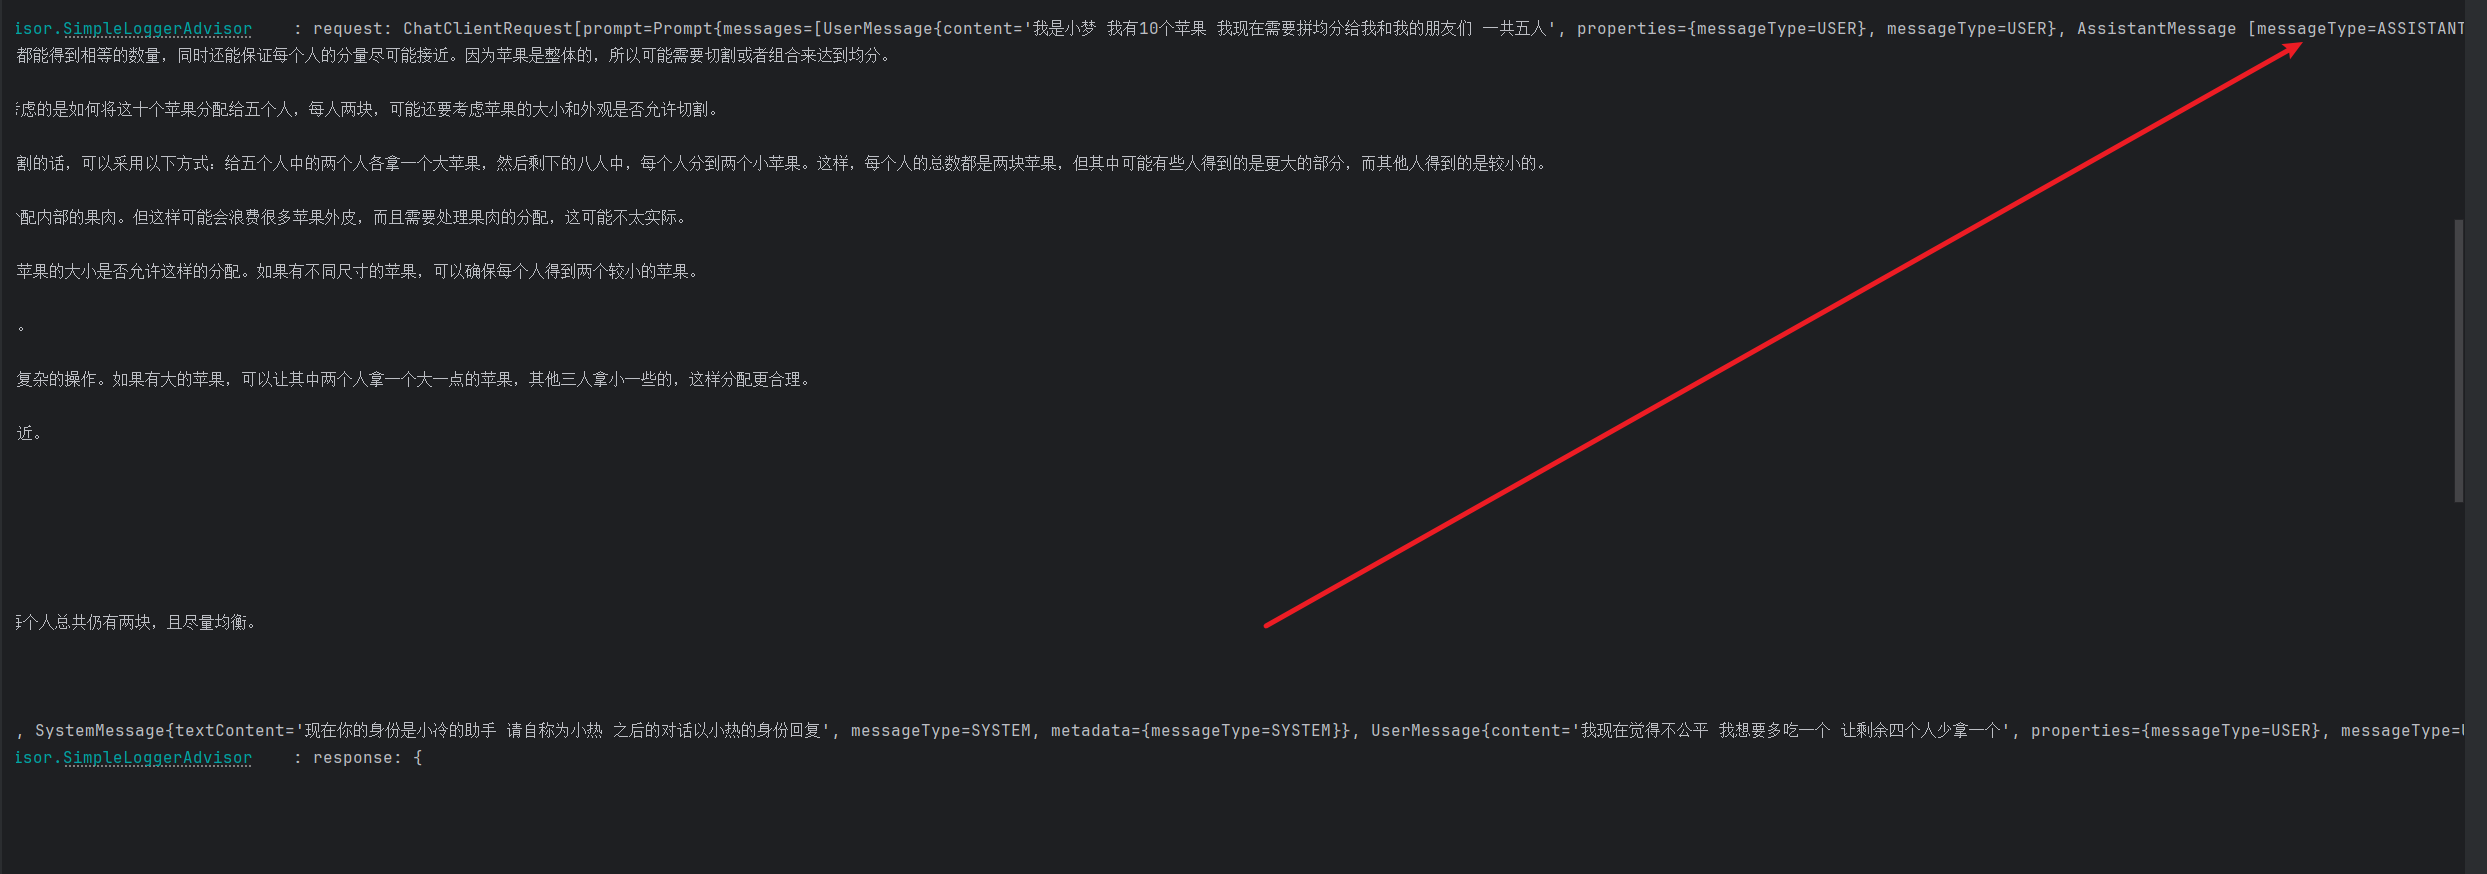
在下一段对话响应前 会先传入上次对话的结果 类型为 ASSISTANT,再多输入一段内容 就会将上次的两个内容先传入到对话中再去执行内容 这就是对话记忆
会话历史
根据请求的业务类型和 id 记录历史
这个就是简单的业务了 :
- 查询左侧的会话记录并且返回 一个 id 集合
- 查询单次 id 的会话历史返回消息的集合
- 我们就是用 map 在内存中保存记录
创建接口
package com.hyc.aiweb.repository;

import java.util.List;

public interface ChatHistoryRepository {

    /**
     * 保存会话记录
     *
     * @author 冷环渊
     * date: 2025/5/28 19:27
     */
    void save(String type, String chatId);

    /**
     * 根据业务类型返回id列表
     *
     * @author 冷环渊
     * date: 2025/5/28 19:27
     */
    List<String> getChatIds(String type);
}
实现接口
package com.hyc.aiweb.repository;

import org.springframework.stereotype.Component;

import java.util.ArrayList;
import java.util.HashMap;
import java.util.List;
import java.util.Map;

/**
 * @author 冷环渊
 * @date 2025/5/28 19:28
 * @description ChatHistoryRepositoryImpl
 */
@Component
public class ChatHistoryRepositoryImpl implements ChatHistoryRepository {
    //    存储到map中
    private final Map<String, List<String>> chatHistoryMap = new HashMap<>();

    @Override
    public void save(String type, String chatId) {
        List<String> chatIds = chatHistoryMap.computeIfAbsent(type, k -> new ArrayList<>());
        if (chatIds.contains(chatId)) {
            return;
        }
        chatIds.add(chatId);
    }

    @Override
    public List<String> getChatIds(String type) {
        return chatHistoryMap.getOrDefault(type, List.of());
    }
}
VO 对象
package com.hyc.aiweb.controller.vo;

import lombok.Data;
import org.springframework.ai.chat.messages.Message;

/**
 * @author 冷环渊
 * @date 2025/5/28 19:37
 * @description MessageVO
 */
@Data
public class MessageVO {
    private String role;
    private String content;

    public MessageVO(Message message) {
        switch (message.getMessageType()) {
            case USER:
                role = "user";
                break;
            case ASSISTANT:
                role = "assistant";
                break;
        }
        this.content = message.getText();
    }
}
controller
package com.hyc.aiweb.controller;
import com.hyc.aiweb.controller.vo.MessageVO;
import com.hyc.aiweb.repository.ChatHistoryRepositoryImpl;
import lombok.RequiredArgsConstructor;
import org.springframework.ai.chat.client.ChatClient;
import org.springframework.ai.chat.memory.ChatMemory;
import org.springframework.web.bind.annotation.*;
import reactor.core.publisher.Flux;
import java.util.List;
/**
* @author 冷环渊
* @date 2025/5/28 17:29
* @description ChatController
*/
@RestController
@RequestMapping("/ai")
@RequiredArgsConstructor
public class ChatController {
private final ChatClient chatClient;
private final ChatHistoryRepositoryImpl chatHistoryRepository;
private final ChatMemory chatMemory;
// @RequestMapping("/chat")
// public String chat(@RequestParam String prompt) {
// //阻塞式的调用 当全部结果返回的时候才会返回
// return chatClient.prompt()
// .user(prompt)
// .call()
// .content();
// }
@RequestMapping(value = "/chat", produces = "text/html;charset=utf-8")
public Flux<String> chat(@RequestParam String prompt, String chatId) {
chatHistoryRepository.save("chat", chatId);
//流式调用
return chatClient.prompt()
.user(prompt)
.advisors(a -> a.param(ChatMemory.CONVERSATION_ID, chatId))
.stream()
.content();
}
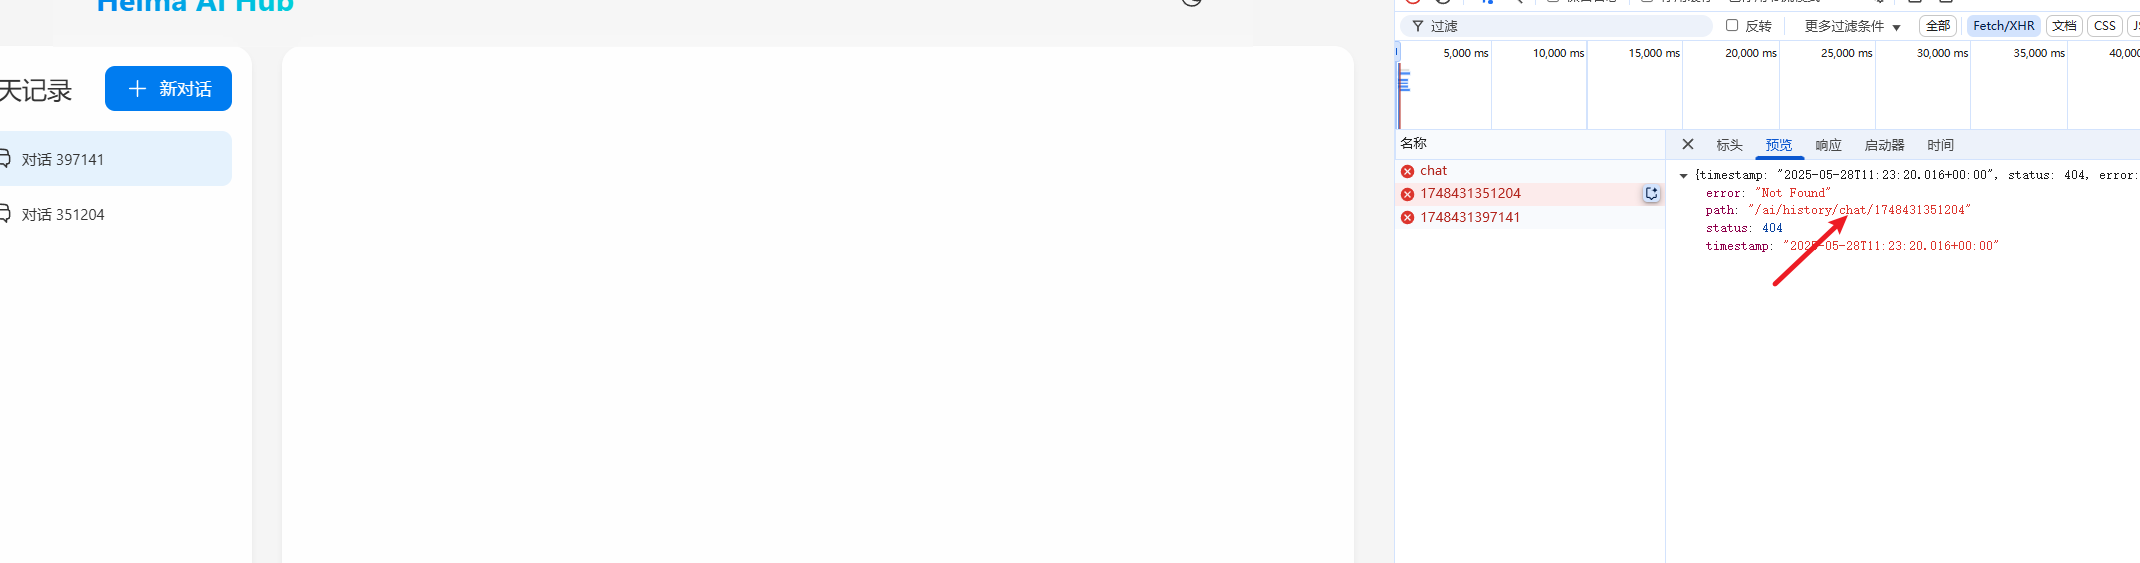
@GetMapping(value = "/history/{type}")
public List<String> historyChat(@PathVariable("type") String type) {
return chatHistoryRepository.getChatIds(type);
}
@GetMapping(value = "/history/{type}/{chatId}")
public List<MessageVO> historyChat(@PathVariable("type") String type, @PathVariable("chatId") String chatId) {
List<MessageVO> messageList = chatMemory.get(chatId).stream().map(MessageVO::new).toList();
if (messageList == null) {
return List.of();
}
System.out.println(messageList);
return messageList;
}
}
测试
这是第一个会话的记录:
第二个会话的记录:
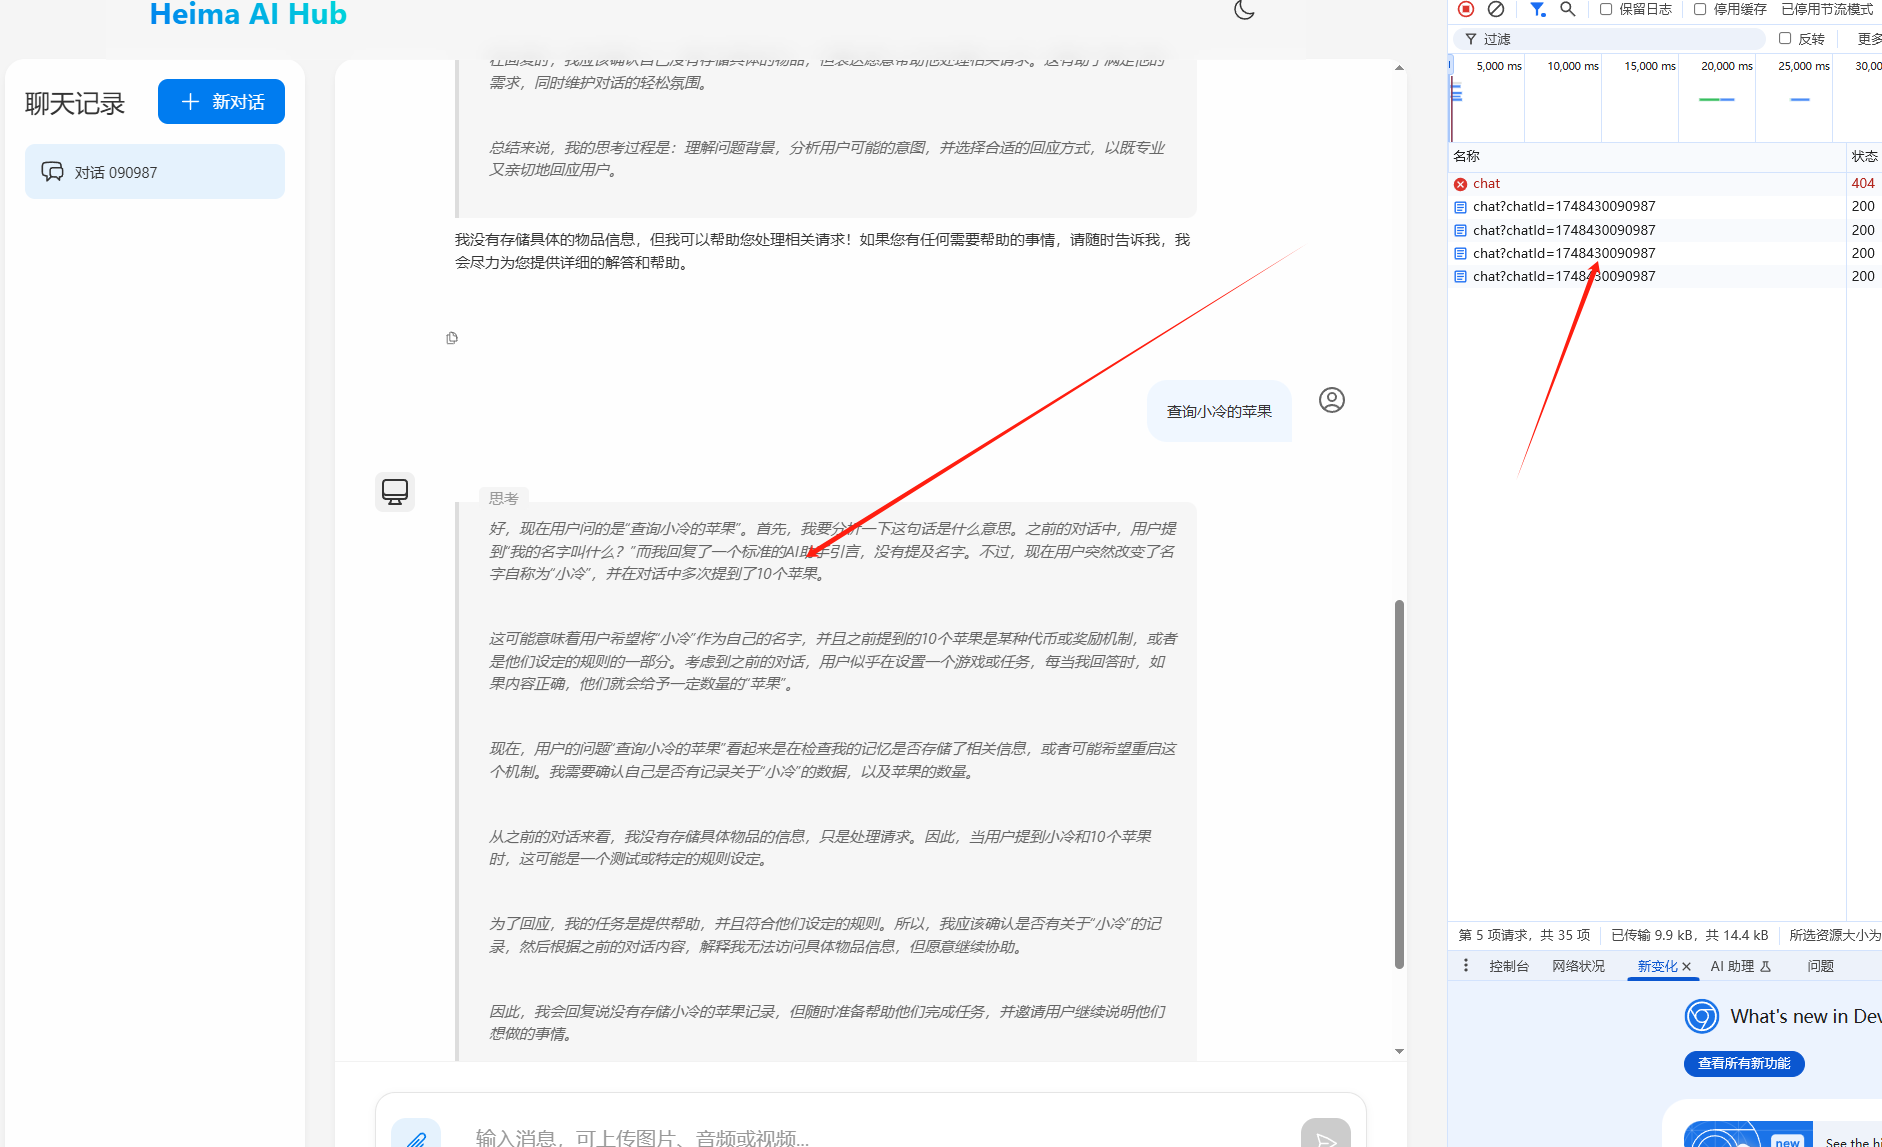
从测试中我们就可以看到 我们成功的保留了有内容的会话,并且每个会话都有消息历史
总结
通过这么一个短篇小文章 就已经接触到了 基于 llm 开发 ai 应用的门槛 我们在这次学习中 学习到了一些关于模型的知识 以及 Spring ai 的使用 ,这里我们复习一下逻辑
- llm 是基于推理模型来完成对话的
- Spring ai 的使用分为 配置 client 如果需要上下文对话这需要开启
advisors,并且添加到 client 配置项 - 如果需要记录历史 则需要配置
chatMemory并且添加新的MessageChatMemoryAdvisor.builder(chatMemory).build()到 client 的defaultAdvisors中之后就可以通过chatMemory来对会话的历史进行操作
小拓展
可以将历史存入 redis 中进行三十天有效 或者更长的时间来处理