godot 游戏引擎
安装环境
本次学习采用的是最新版 4.4.1 使用语言为: csharp+GDS
.net 版本为 8
代码编辑器为 vs code
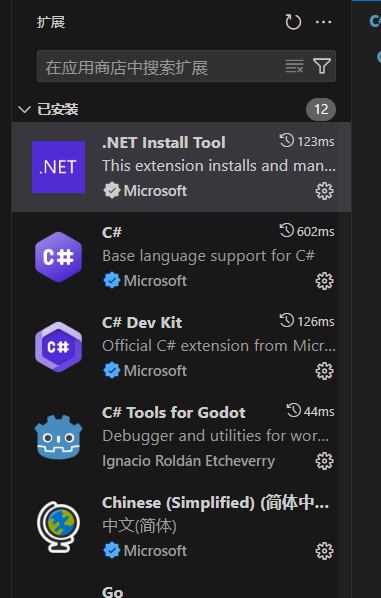
vsc 插件如下
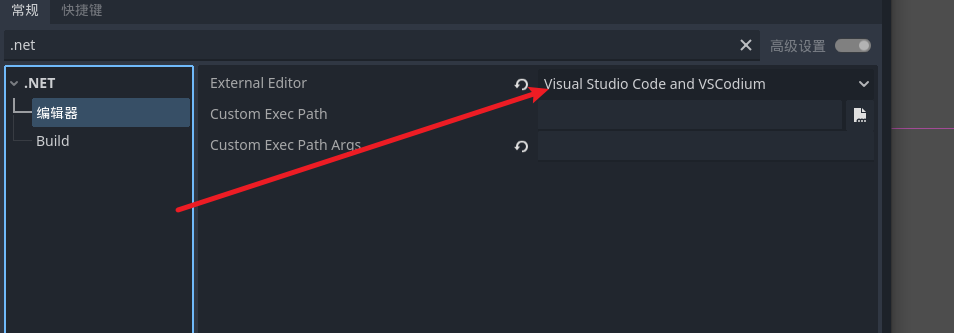
设置 godot 脚本编辑器的启动项
Godot学习
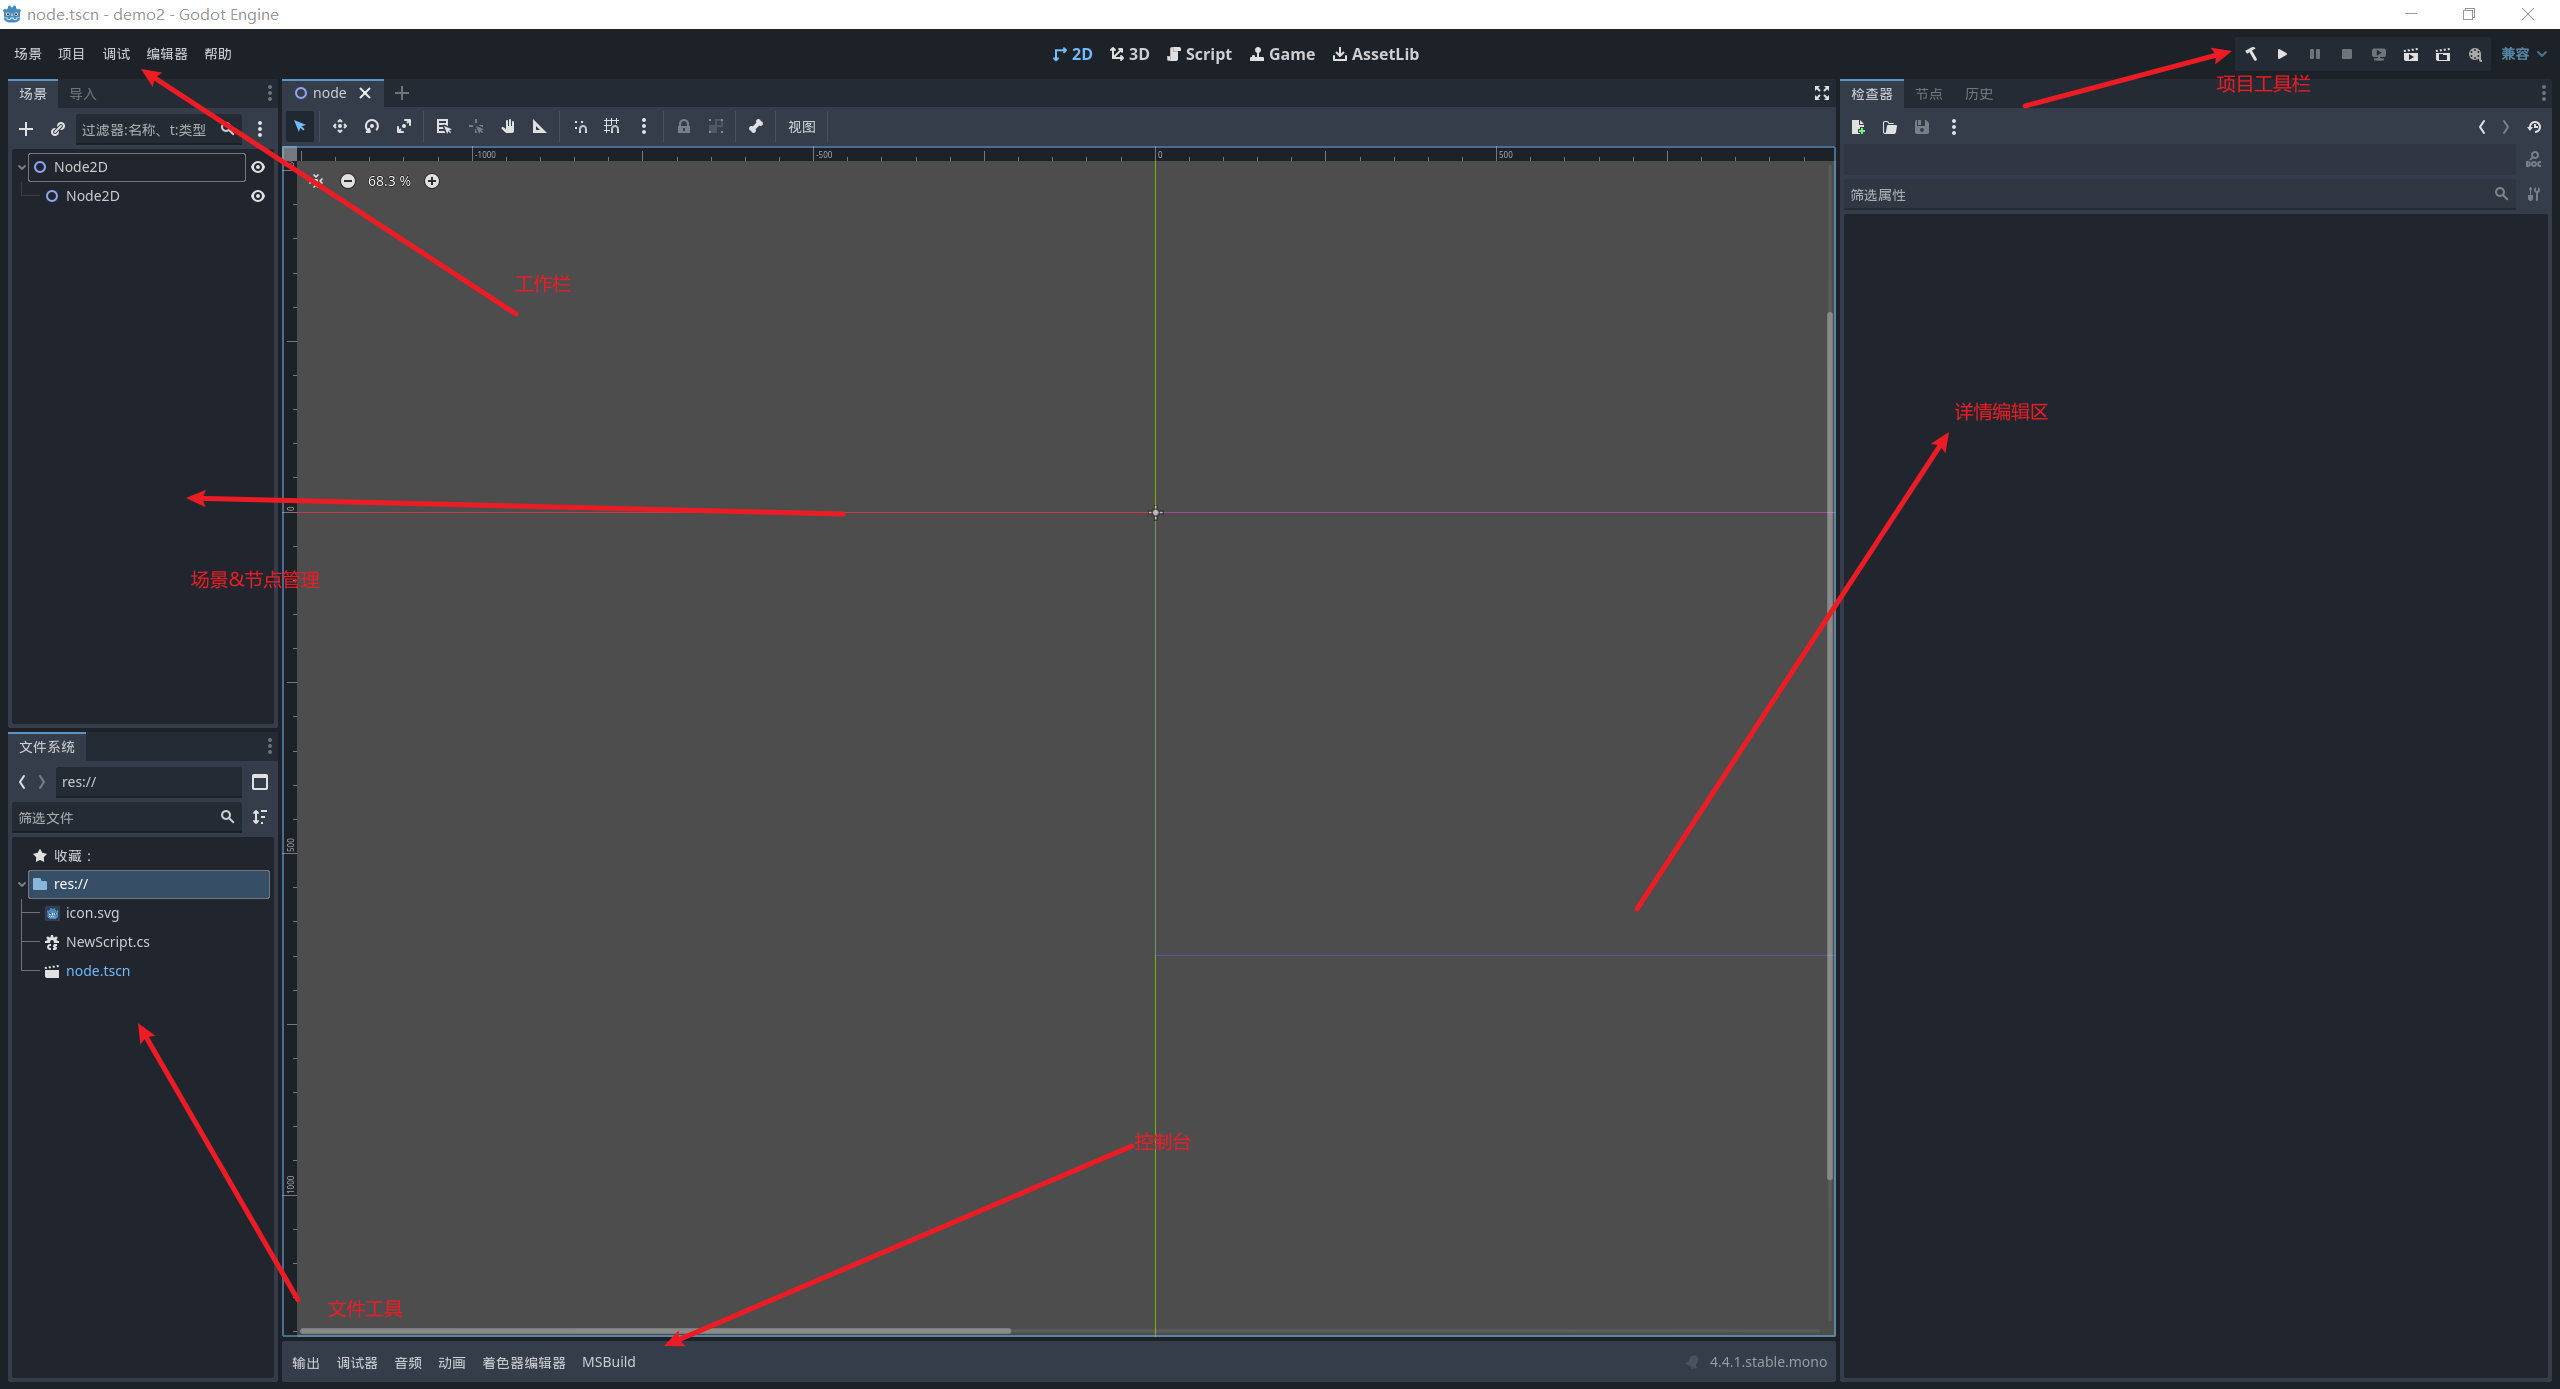
认识界面
启动 godot 创建一个基础的项目
场景和节点
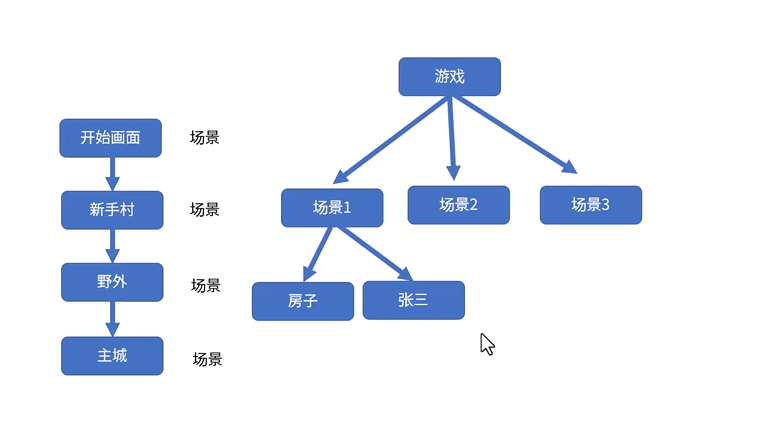
理解游戏思路其实我们开发游戏本质就是 创建无数个场景和节点 进行有趣的交互
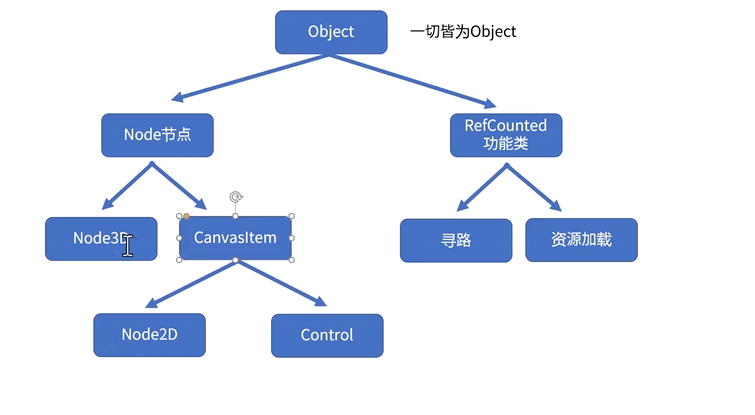
godot 中我们的节点以树来称呼, 可以称为节点树 思路与日常的代码开发大致相同, 基于继承
我们的场景其实就是节点树 由无数的节点组成为一个场景
节点中的继承关系
功能类是无法作为节点的 它为我们提供一些好用的功能
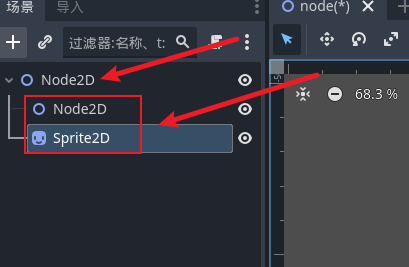
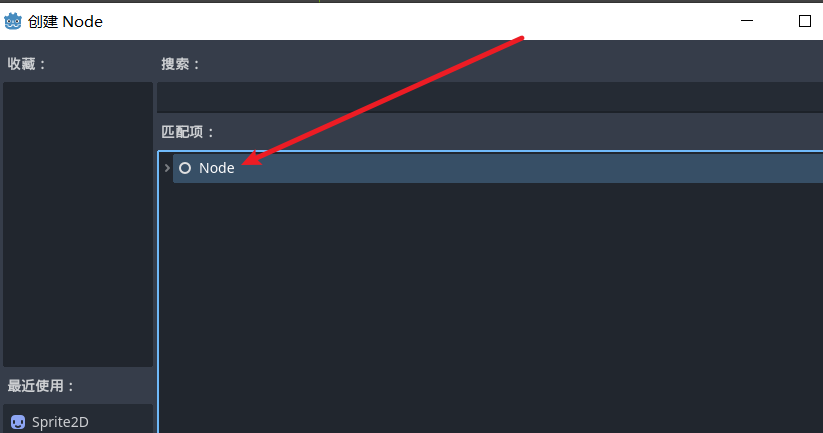
我们实际创造的是 node :
脚本
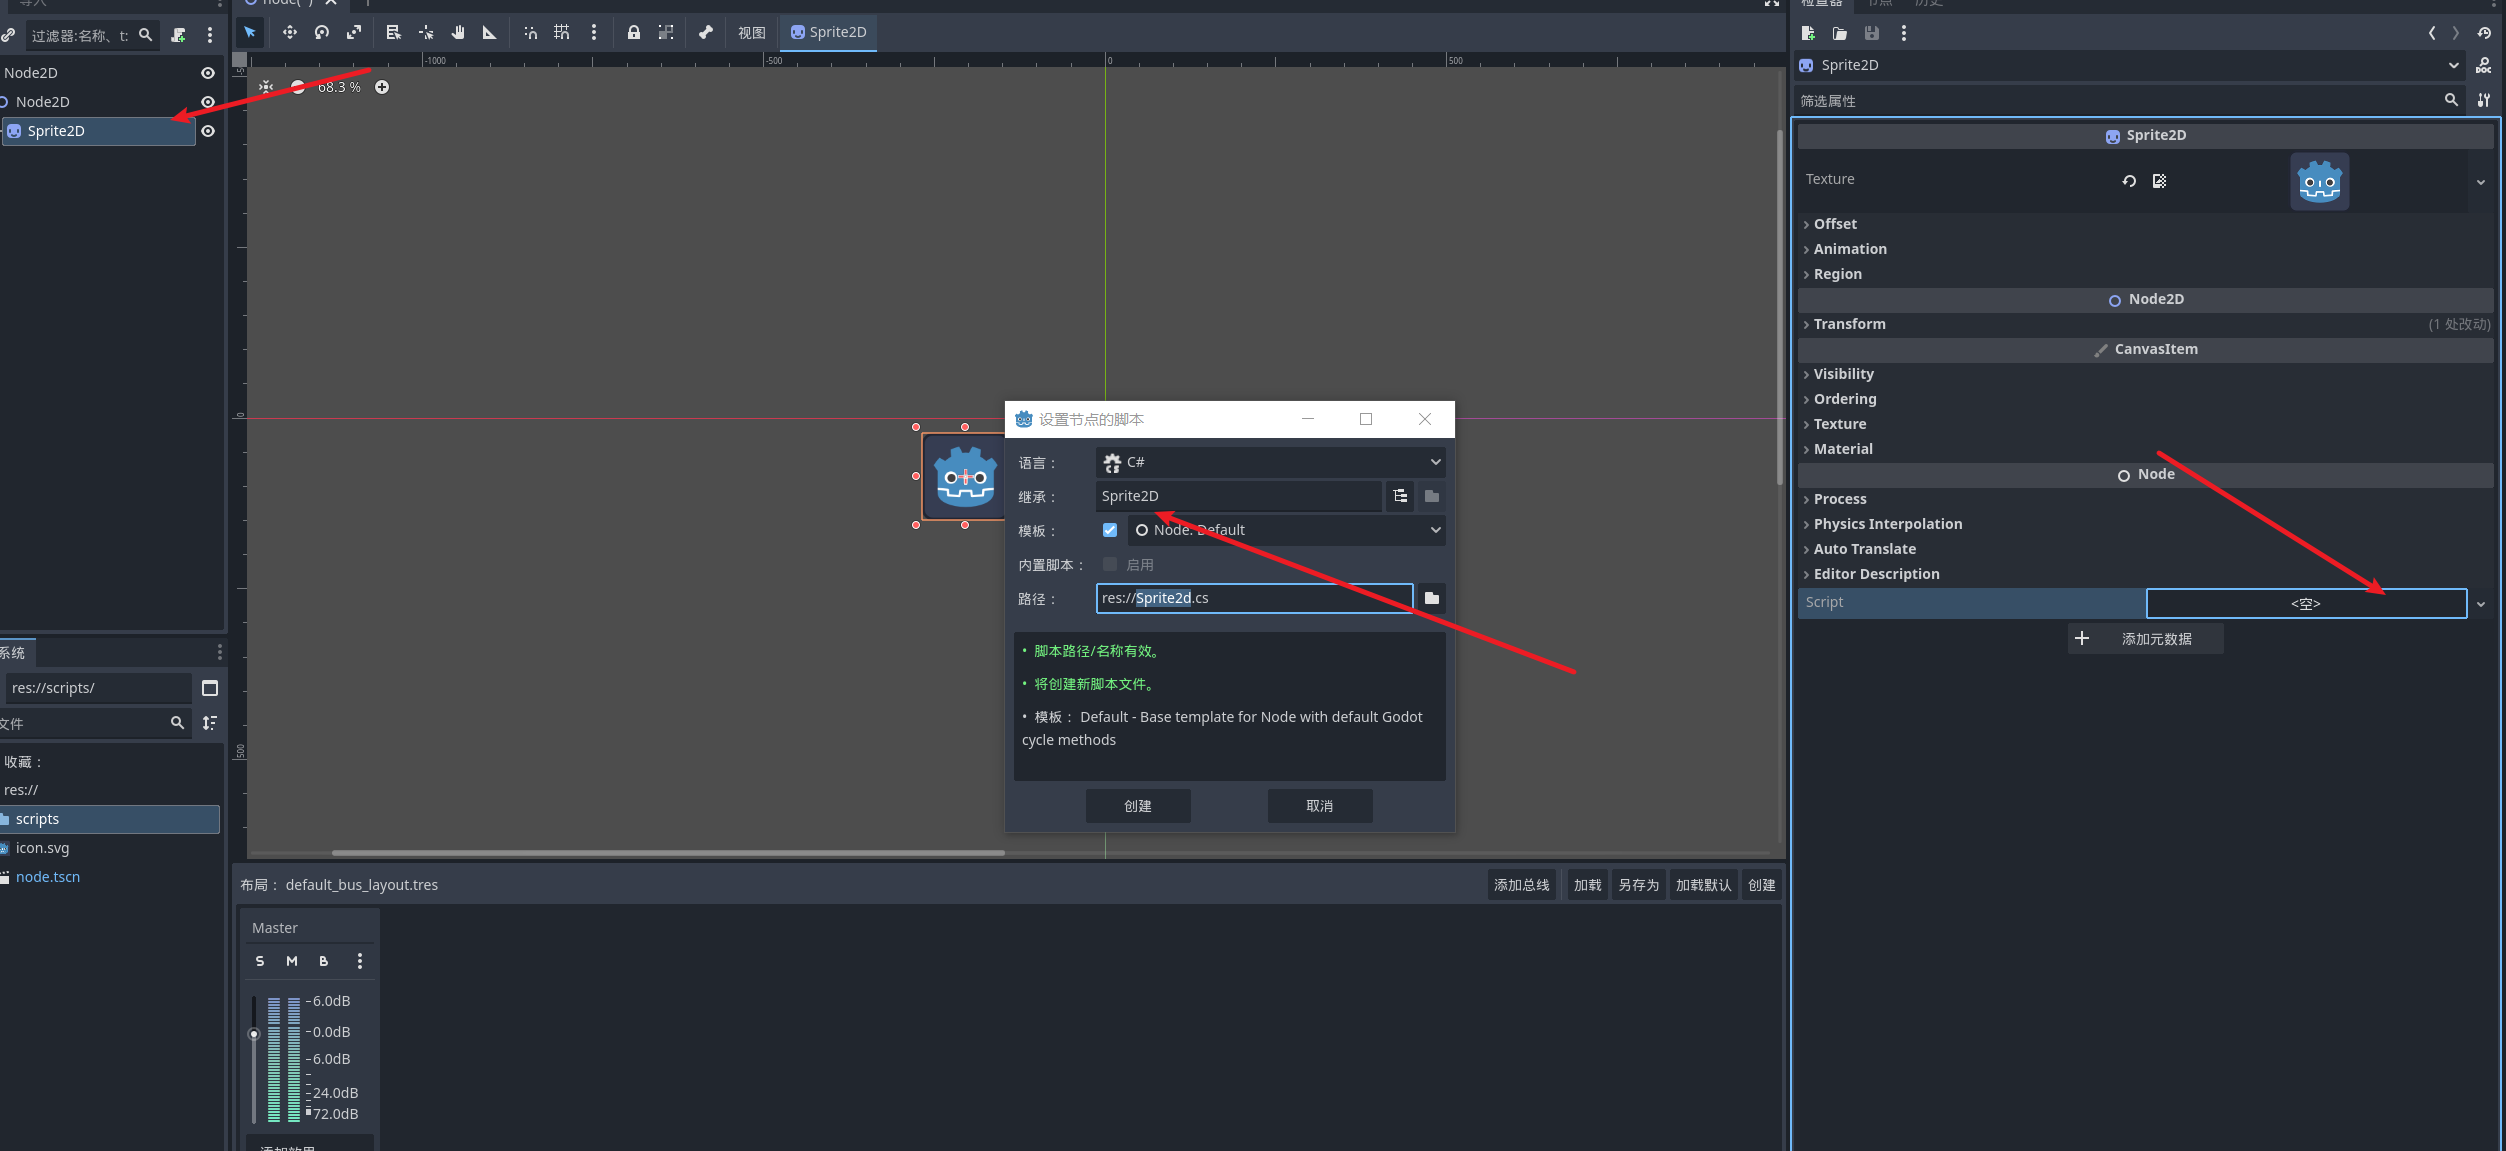
通常我们使用选择 node 并且在 node 的详细页面来创建脚本
当然我们也可以直接在文本区创建脚本然后和 node 绑定
生命周期方法
脚本从生效到销毁的过程中 会有一些比较重要的方法
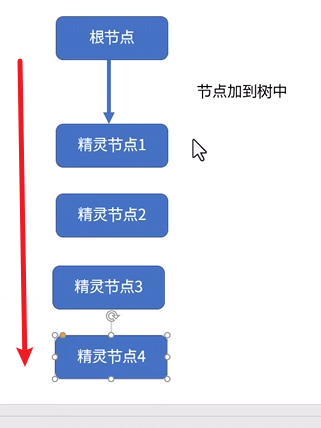
entertree
节点添加到节点树的时候会调用这个方法 可以用于初始化
正序创建如果有多个节点的话 按照加入节点树的顺序调用
  public override void _EnterTree()
    {
        base._EnterTree();
    }
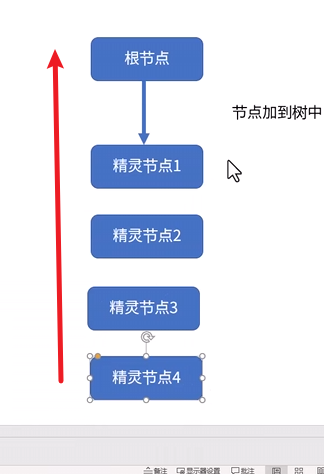
Ready
在节点加载完成的时候触发, 类似于递归的调用 从最底部的节点逐步回调
初始化推荐在 ready 中使用
public override void _Ready()
	{
	}
_ExitTree
退出节点树(销毁) 一般这里处理节点销毁的逻辑
   public override void _ExitTree()
    {
        base._ExitTree();
    }
_Process
每一帧都会调用一次这个方法 回传进来帧延时,
可以用来写及时逻辑
public override void _Process(double delta)
	{
	}
_PhysicsProcess
每一次和物理有关的计算会调用 , 比如起跳 落地等
  public override void _PhysicsProcess(double delta)
    {
        base._PhysicsProcess(delta);
    }
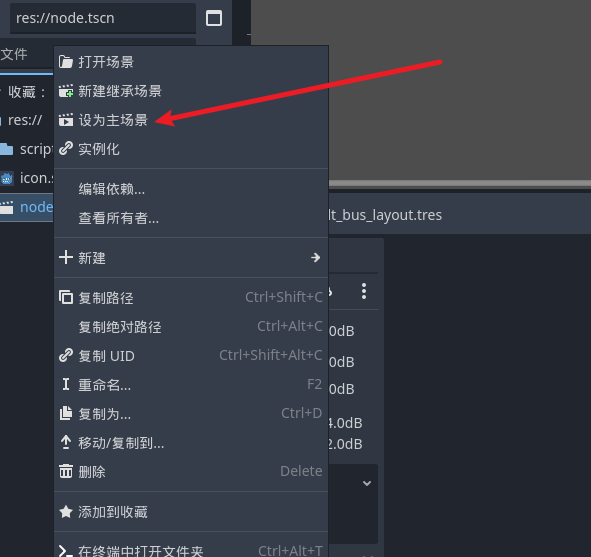
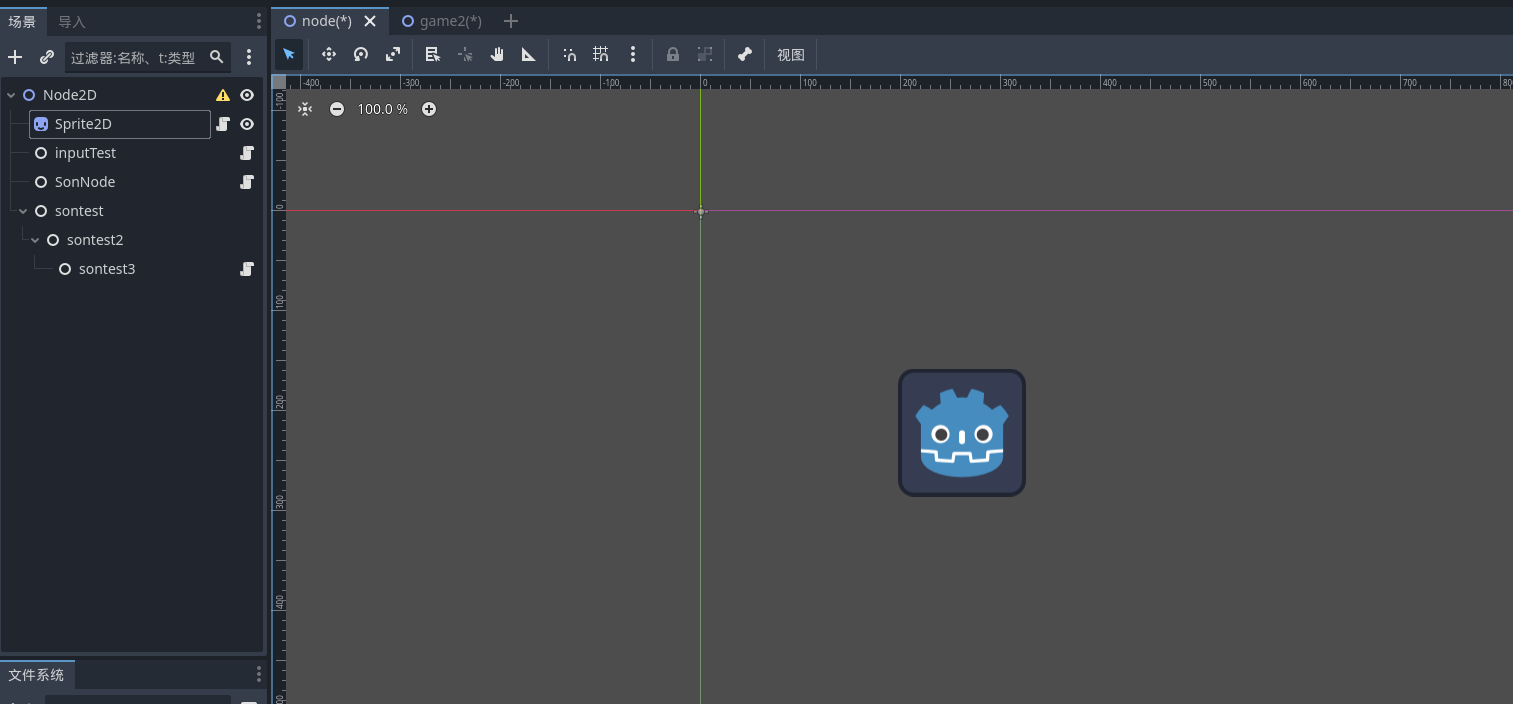
启动场景

这里的第一个 icon 是启动主场景 ,第二个是当前场景
主场景设置:
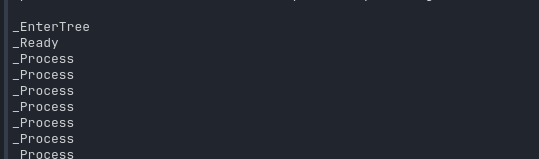
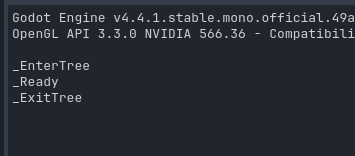
我们在方法中加入输出语句,
然后启动场景就可以很清晰的看到生命周期的调用了
   // 1. 节点添加到节点树的时候会调用这个方法 可以用于初始化 正序创建如果有多个节点的话
    public override void _EnterTree()
    {
        base._EnterTree();
        GD.Print("_EnterTree");
    }

	//2. 这个是节点加载完成的时候会触发的方法 也可以用于初始化(推荐)
	public override void _Ready()
	{
         GD.Print("_Ready");
	}

	//
	public override void _Process(double delta)
	{
         GD.Print("_Process");
	}
输出结果
关于销毁
using Godot;
using System;

public partial class MySprite : Sprite2D
{

        float timer = 5;
    // 1. 节点添加到节点树的时候会调用这个方法 可以用于初始化 正序创建如果有多个节点的话
    public override void _EnterTree()
    {
        base._EnterTree();
        GD.Print("_EnterTree");
    }

	//2. 这个是节点加载完成的时候会触发的方法 也可以用于初始化(推荐)
	public override void _Ready()
	{
         GD.Print("_Ready");
	}

	//
	public override void _Process(double delta)
	{
        //  GD.Print("_Process");
     timer -=  (float)delta;
    //  timer归0 销毁节点
    if (timer<=0)
    {
        timer = 100;
        this.QueueFree();
    }
	}


    public override void _PhysicsProcess(double delta)
    {
        base._PhysicsProcess(delta);
    }

    public override void _ExitTree()
    {
        base._ExitTree();
          GD.Print("_ExitTree");
    }

}
输入
键盘事件
这里我们要用到的是 godot 中的Input对象 来获取 player 的设备输入
比如我们来监听一下 键盘上的按键
using Godot;

public partial class InputTest : Node
{
    // Called when the node enters the scene tree for the first time.
    public override void _Ready()
    {
    }

    // Called every frame. 'delta' is the elapsed time since the previous frame.
    public override void _Process(double delta)
    {
        if (Input.IsKeyPressed(Key.B)) GD.Print("按下了b");
    }
}
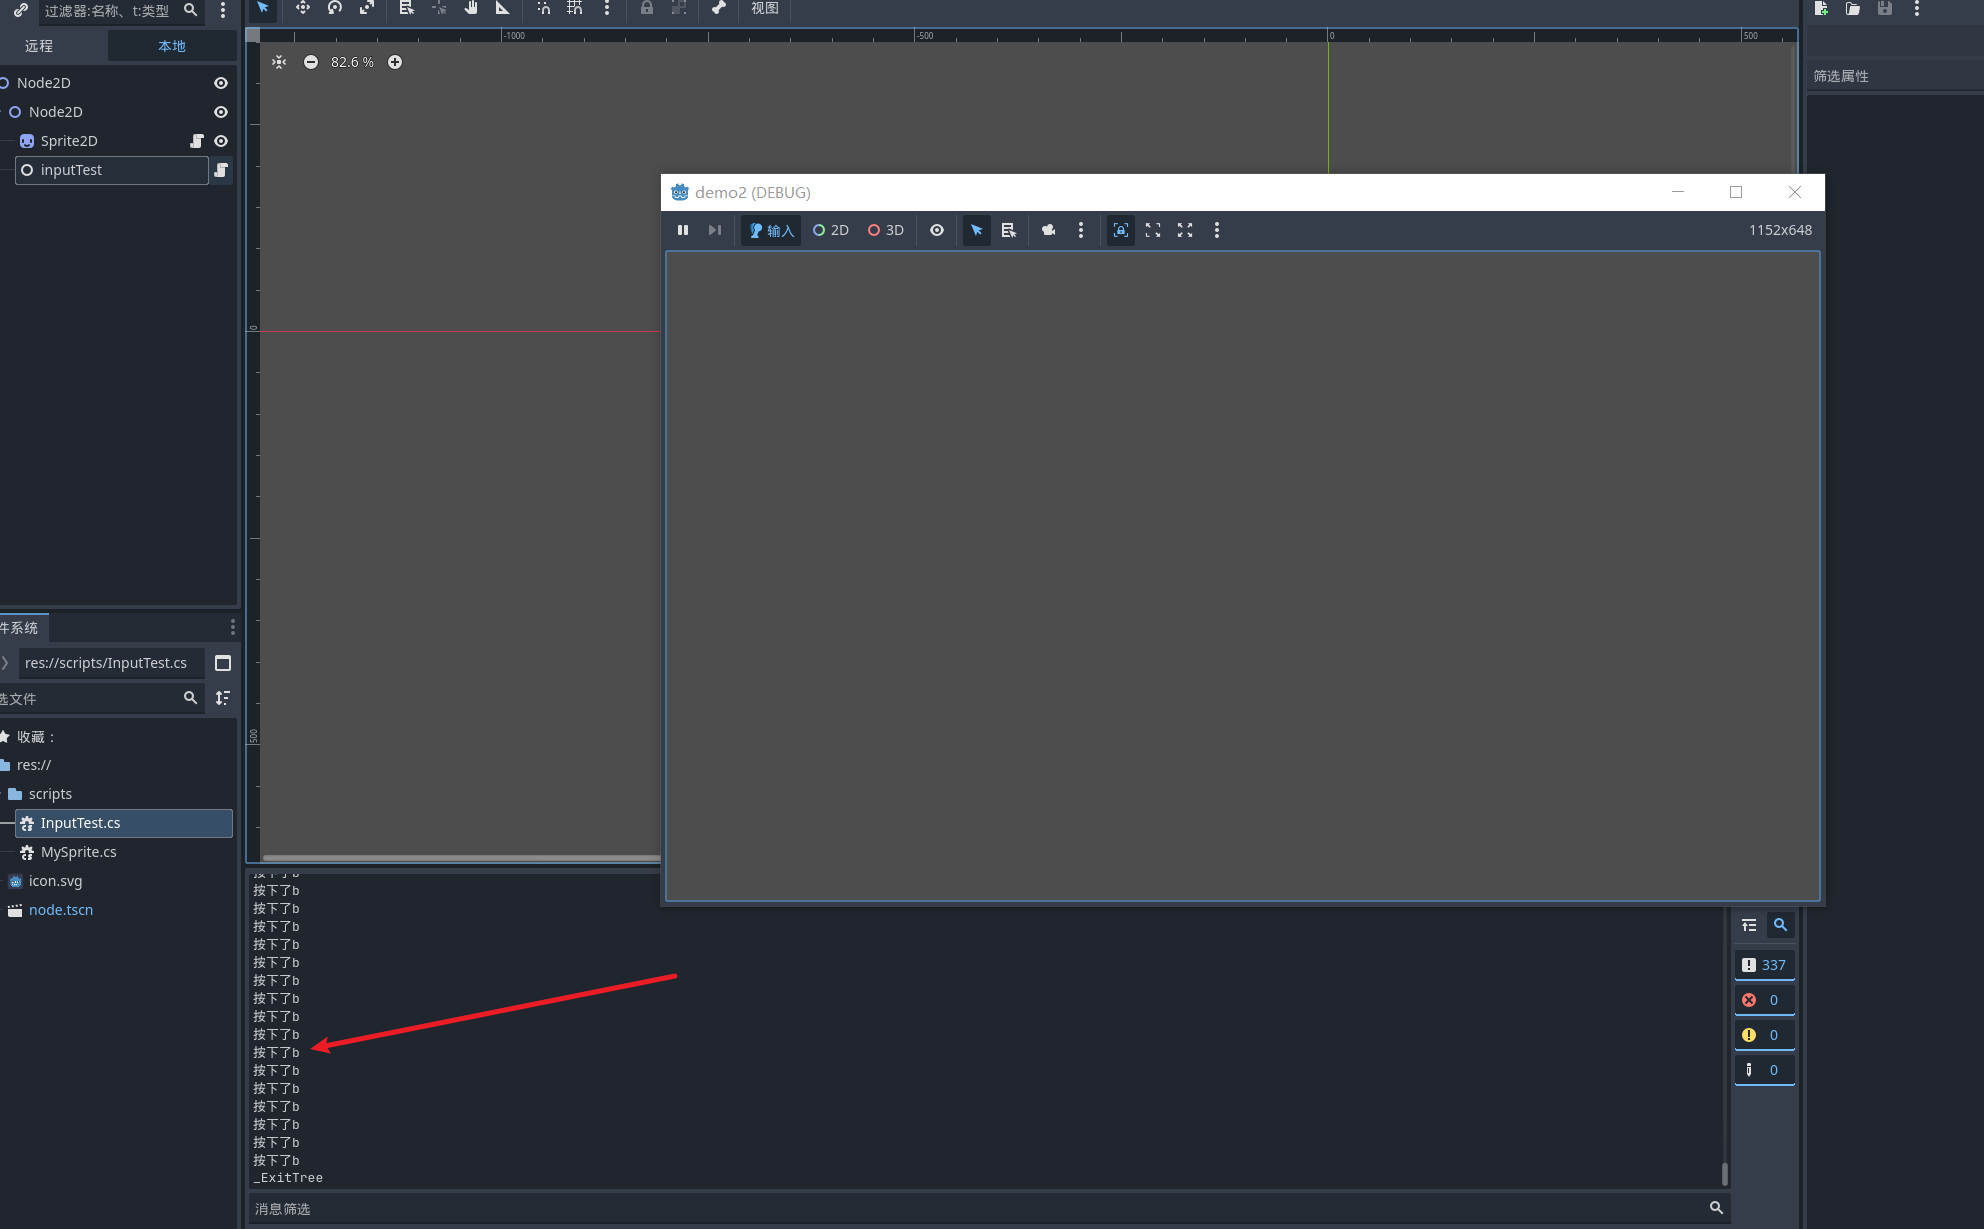
你看我们每一帧都会出触发一次按键 b 但是事实上我们只需要一次 或者是按下的时候去使用
这里就有一个新的方法, _input(inputEvent)
public override void _Input(InputEvent @event)
{
base._Input(@event);
if (@event is InputEventKey key)
{
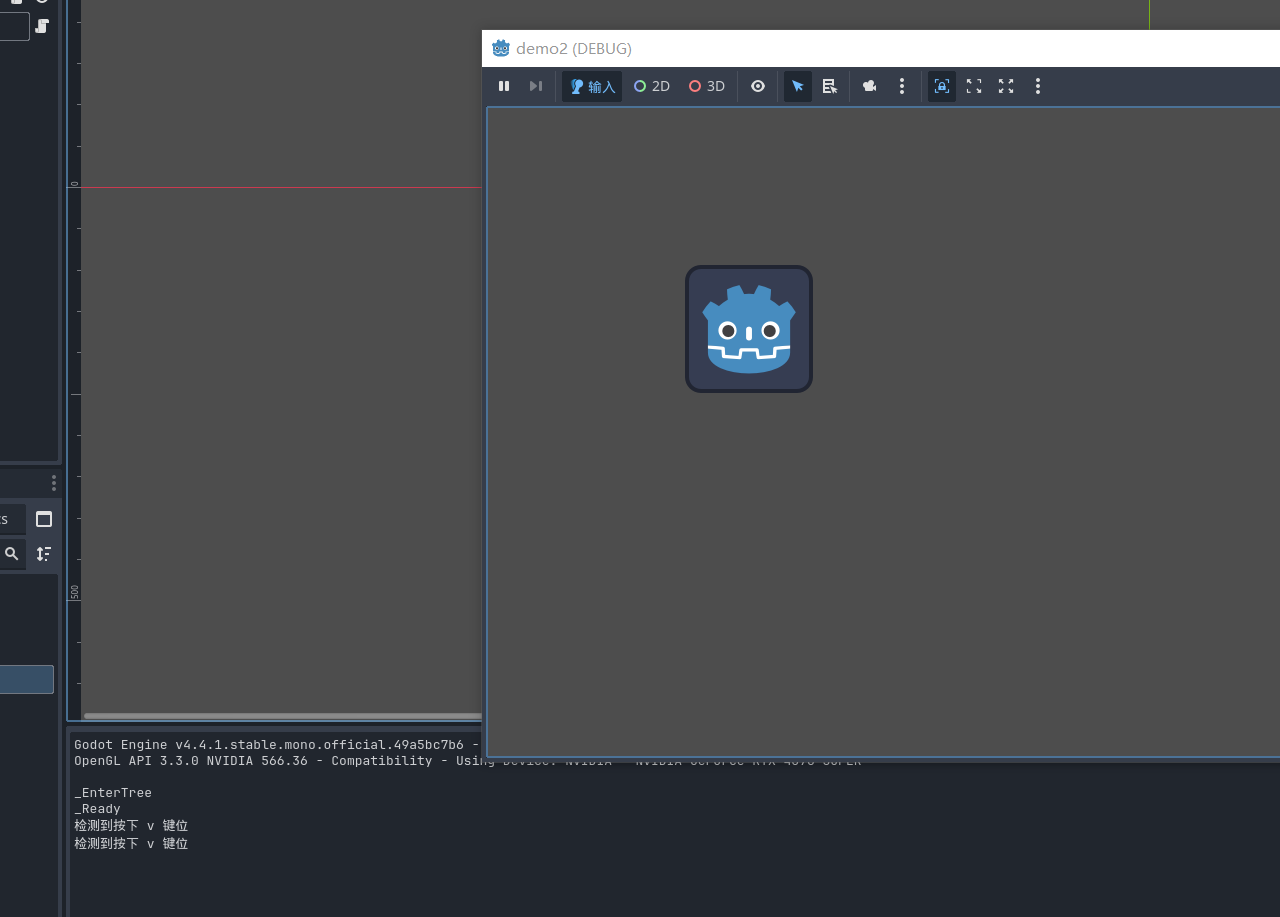
if (key.Keycode == Key.V)
{
GD.Print("检测到按下 v 键位");
}
}
}
这里我们再次启动项目 点按 v 键
更多关于 keyinputevent 的检测
public override void _Input(InputEvent @event)
{
base._Input(@event);
if (@event is InputEventKey key)
{
if (key.Keycode == Key.V)
{
// 判断当前是否持续按压
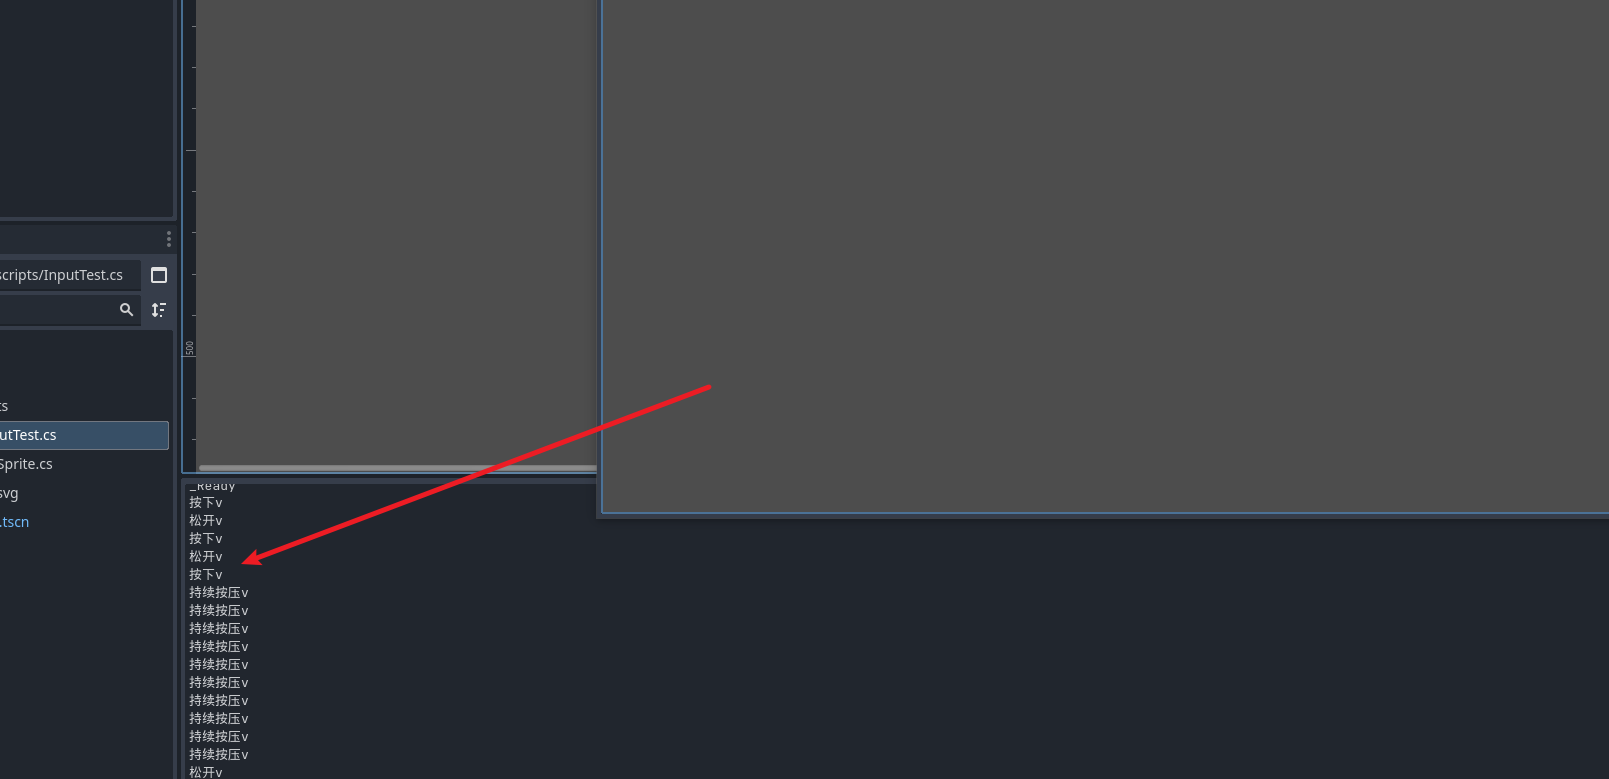
if (key.IsEcho())
{
GD.Print("持续按压v");
}
// 判断当前是否是按下瞬间
else if (key.IsPressed())
{
GD.Print("按下v");
}
// 判断当前是否是抬起瞬间
else if (key.IsReleased())
{
GD.Print("松开v");
}
}
}
}
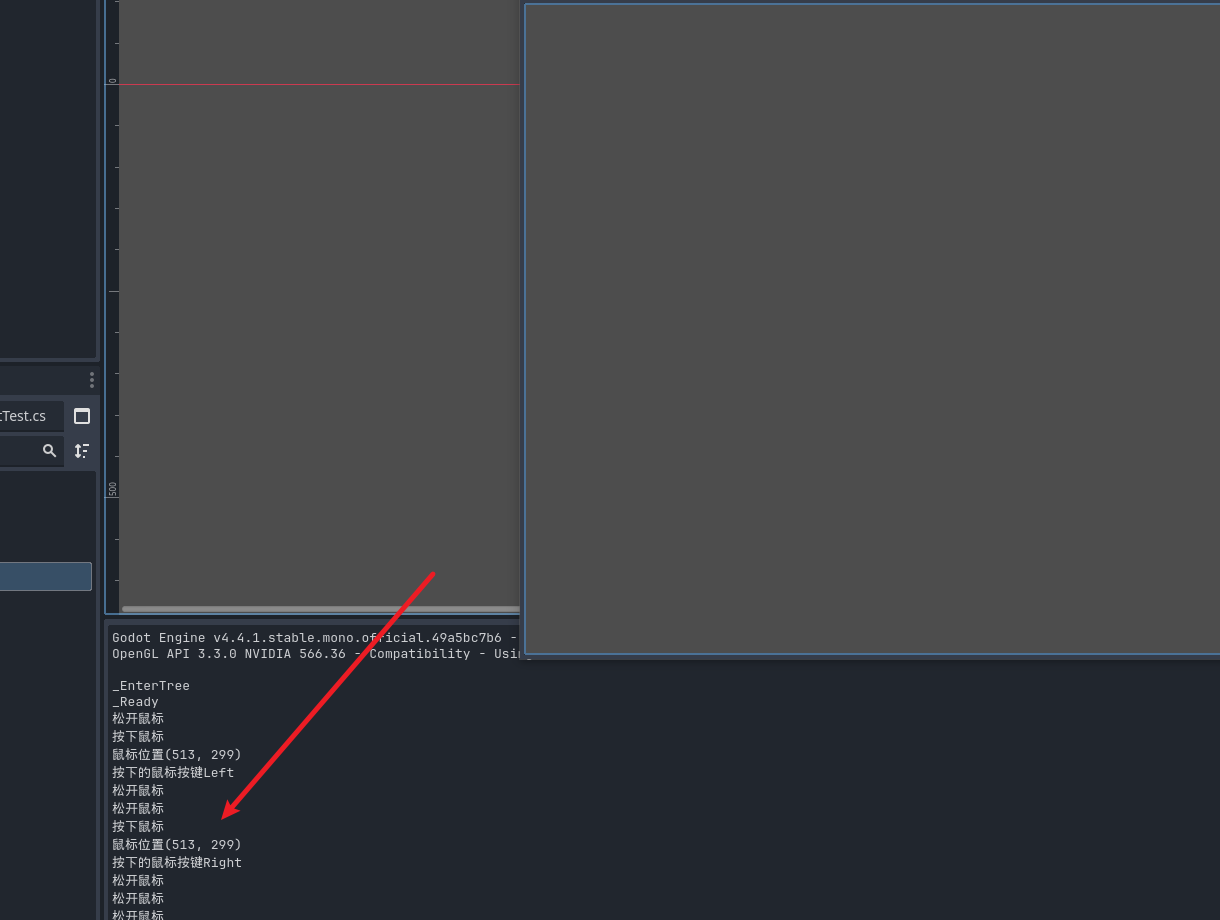
鼠标事件
同样的我们也可以照猫画虎来检测鼠标事件
 if(@event is InputEventMouse mouse){
            if(mouse.IsEcho()){
              GD.Print("长按鼠标");
            }else if(mouse.IsPressed()){
                  GD.Print("按下鼠标");
                GD.Print("鼠标位置"+mouse.Position);
                GD.Print("按下的鼠标按键"+mouse.ButtonMask);
            }else if(mouse.IsReleased()){
                  GD.Print("松开鼠标");
            }
        }
效果
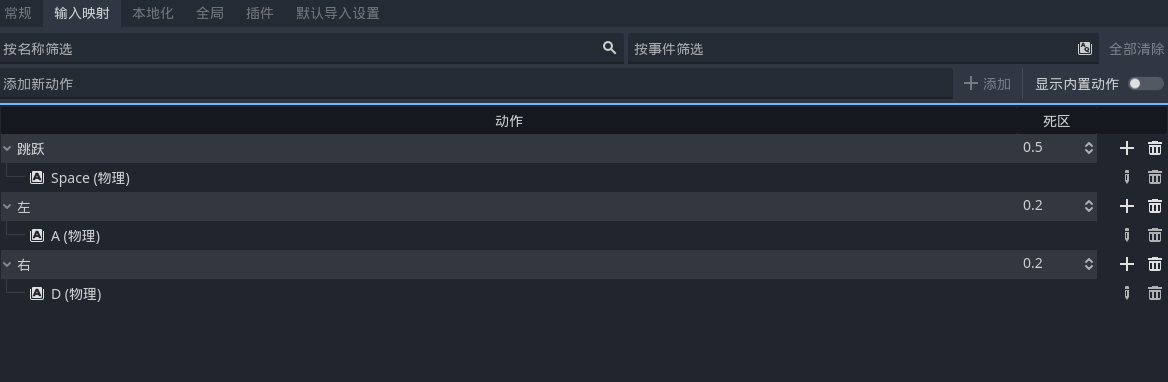
输入映射(常用)
我们还有第二种方式 来将按键和虚拟的按键进行绑定
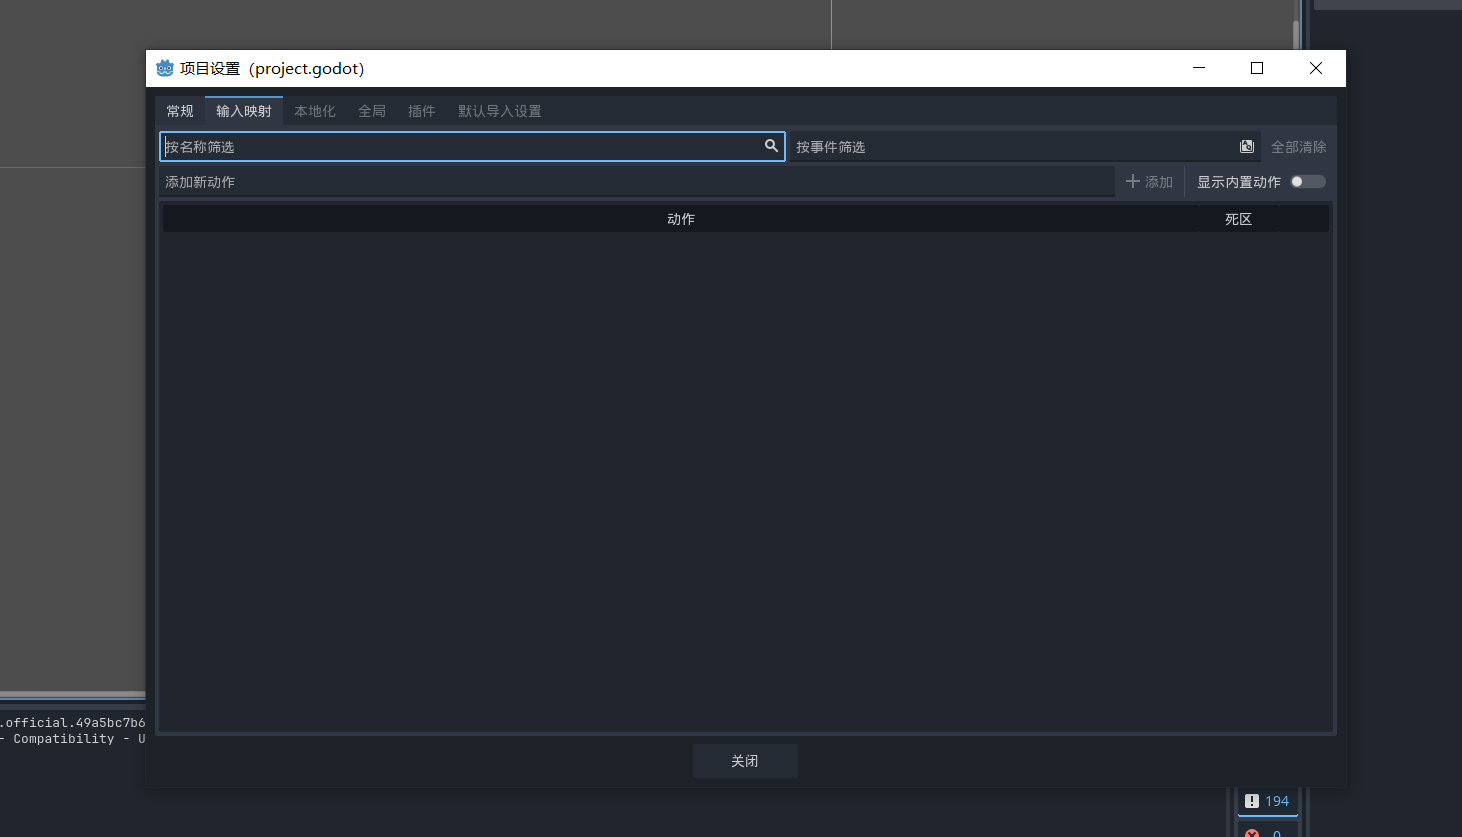
比如跳跃按键
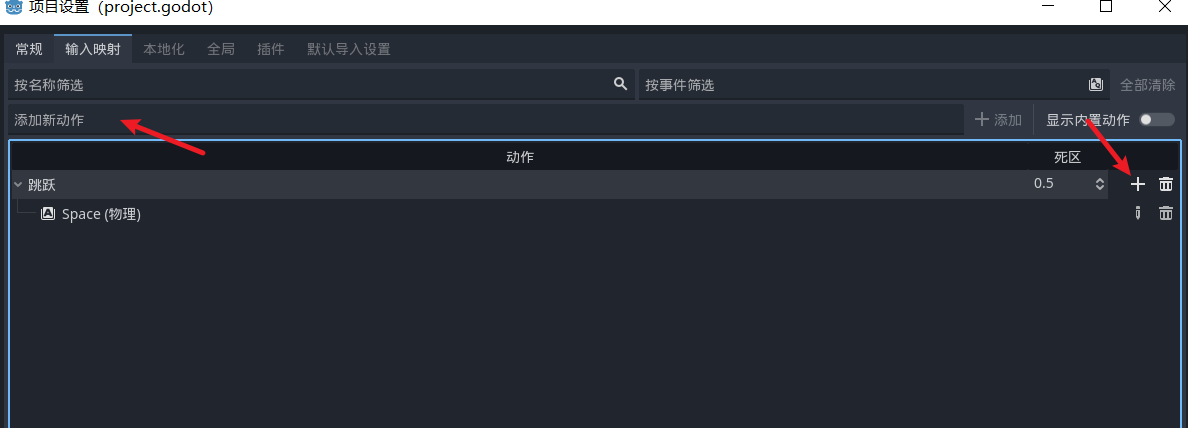
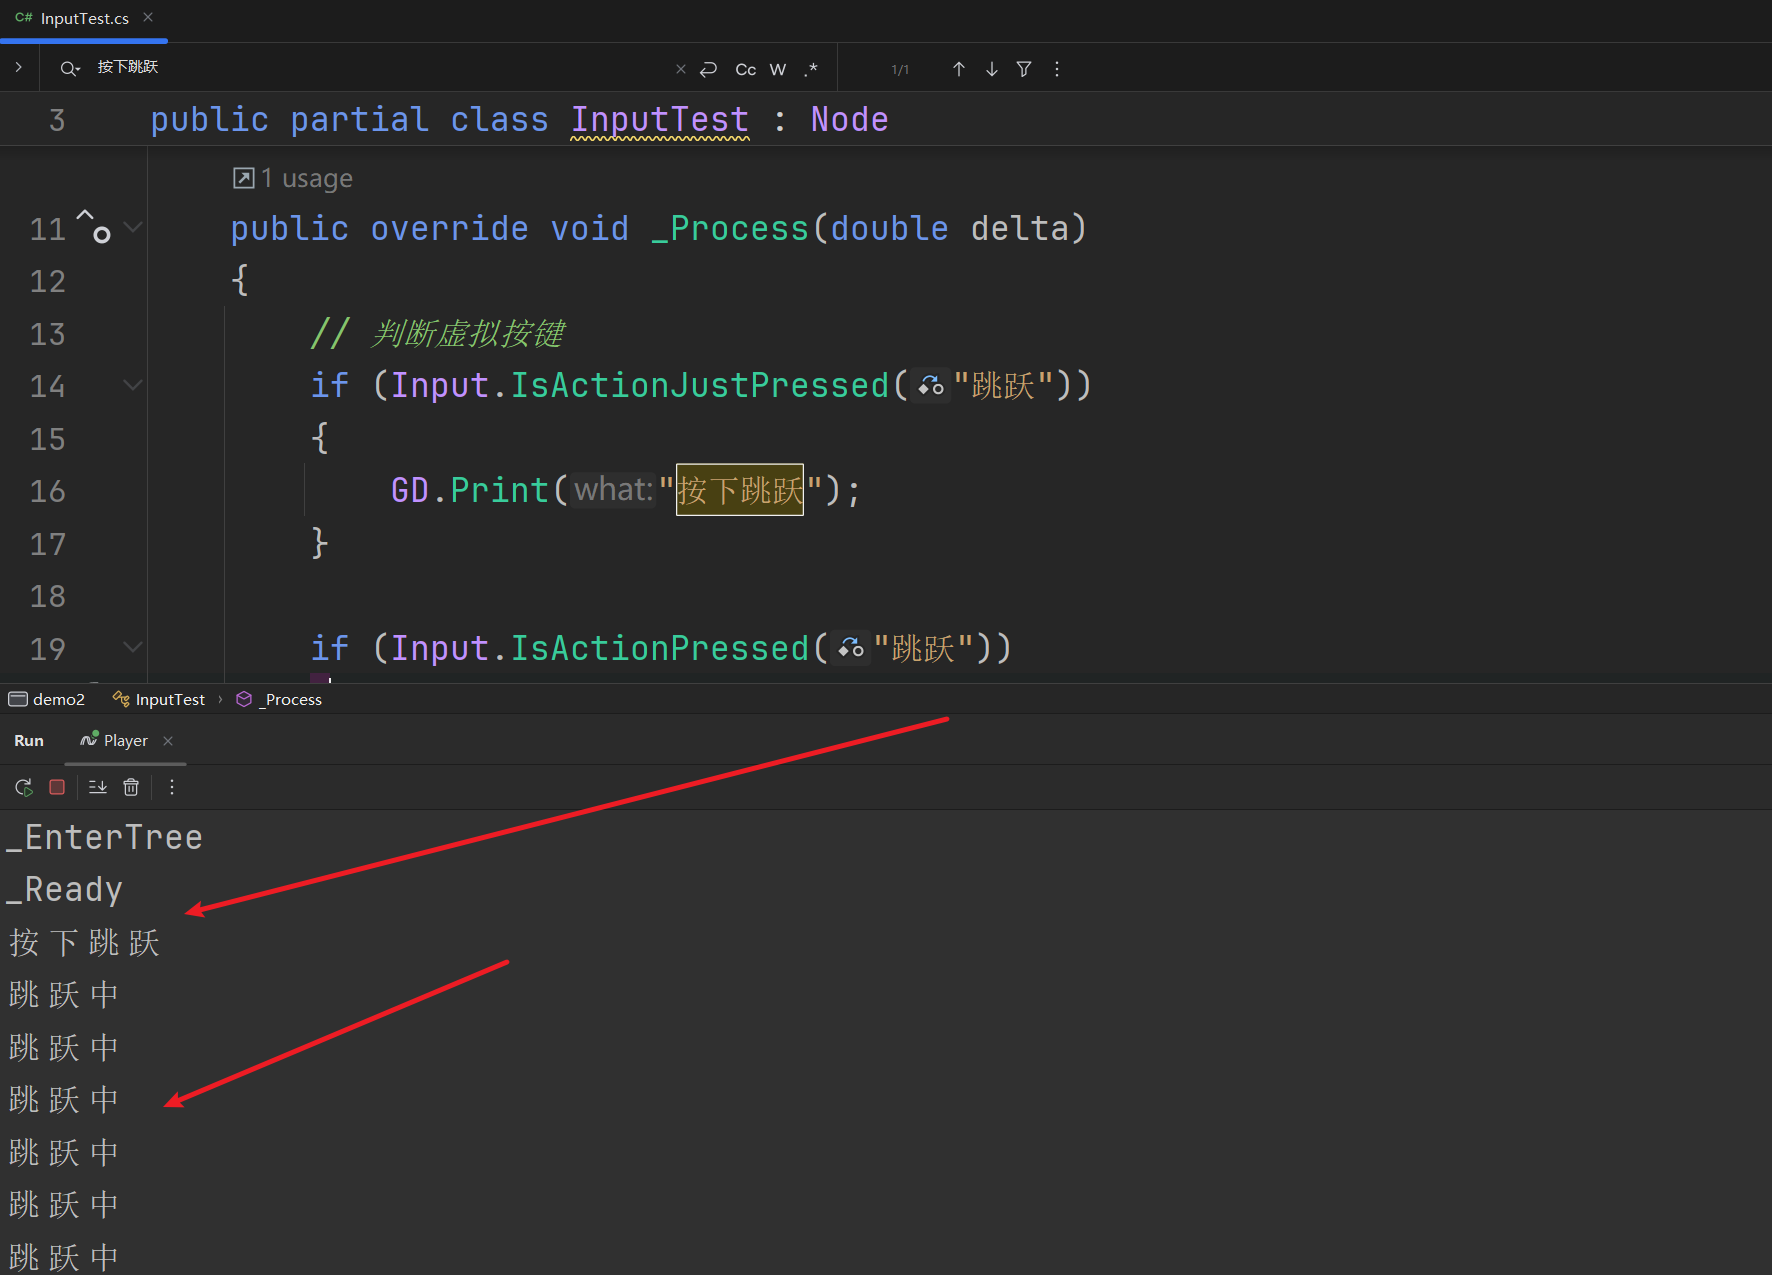
这样就绑定好了, 之前我们倾向于基于event来判断 ,因为在帧生成中判断会有问题, 而虚拟按键中我们就可以使用帧生成方法来判断了
public override void _Process(double delta)
{
// 判断虚拟按键
if (Input.IsActionJustPressed("跳跃"))
{
GD.Print("按下跳跃");
}
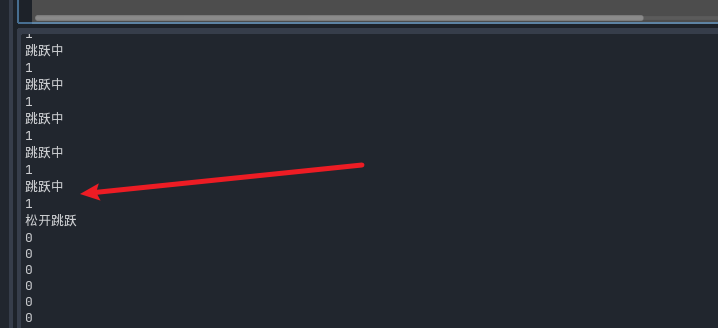
if (Input.IsActionPressed("跳跃"))
{
GD.Print("跳跃中");
}
if (Input.IsActionJustReleased("跳跃"))
{
GD.Print("松开跳跃");
}
}
效果
虚拟按键不止可以监听这种状态 还有特殊的方法可以帮助我们监听,
相当于是一个状态轴
- 按下 1
- 松开 0

使用Input.GetActionStrength方法 拿到按下的状态值
    float actionStrength = Input.GetActionStrength("跳跃");
        GD.Print(actionStrength);
我们可以发现这是一个 0-1 的轴 只有两种状态能触发 实际上 godot 还给我们准备了有 -1 0 1 的三种状态的情况
左右两个按键代表了-1 和 1 如果都没有按则为 0
很经典的就是我们的向左移动 or 向右移动
添加新的虚拟映射

   float axis = Input.GetAxis("left", "right");
        GD.Print("往那边走了 " + axis);
我们通过GetAxis方法来设置这个状态轴 这个时候控制台就可以输出了

通常的游戏开发中我们需要获得上下左右四个方向的位置 godot 也提供了方式
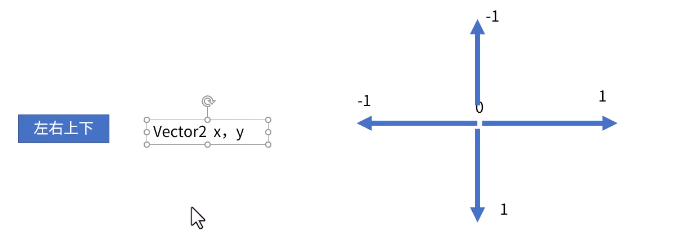
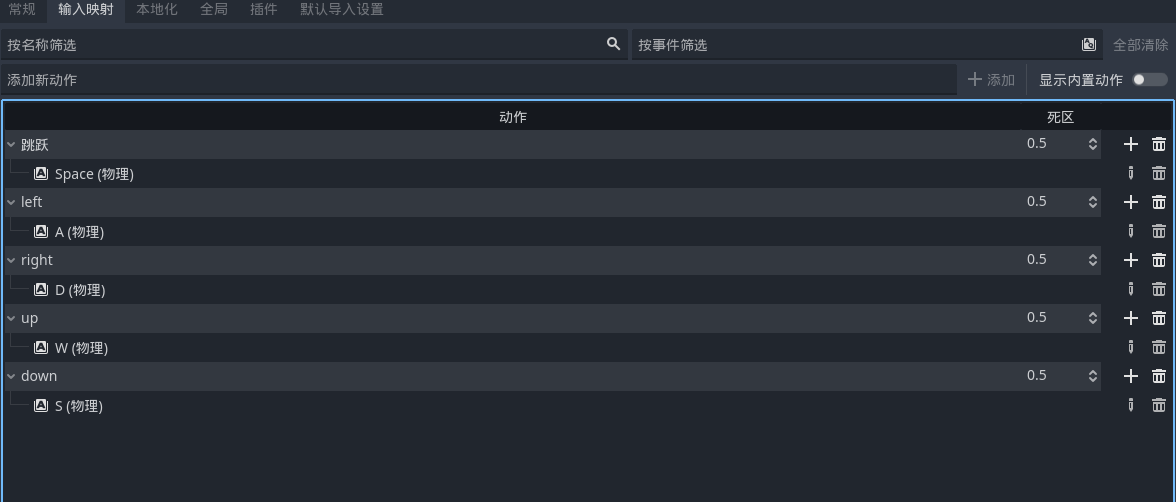
设置好按键上下 就可以去监听了 方法参数的顺序为 左右 上下
  public override void _Process(double delta)
    {
Vector2 vector2 = Input.GetVector("left", "right", "up", "down");
        GD.Print(vector2);
  }
由于一直在输出 效果很难截图完整 只需要正确的设置好映射就直接可以展示的
节点(重要)
我们知道节点都是在节点树上的 他一定是有继承关系的
那么我们该如何获取到父节点 子节点 然后操作呢 比如父子通信之类的
比如我们创建一个新的节点用于学习父子关系 同时创建一个测试节点
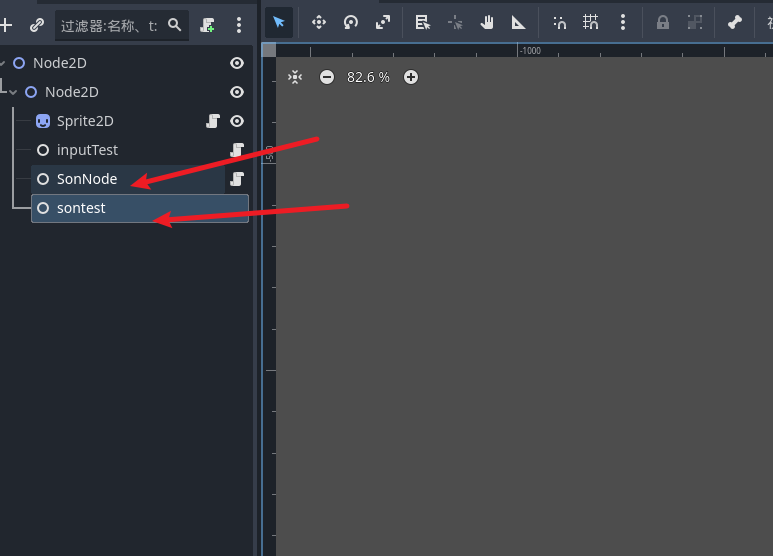
给 sonNode添加脚本然后放入内容 按下左键就释放 sontest 节点
using Godot;
using System;

/*
 * 用于学习 节点的父子关系
 *
 */
public partial class sonNode : Node
{
    // Called when the node enters the scene tree for the first time.
    public override void _Ready()
    {
    }

    // Called every frame. 'delta' is the elapsed time since the previous frame.
    public override void _Process(double delta)
    {
        // 按下键盘左键拿到节点
        if (Input.IsActionJustPressed("left"))
        {
            // 拿到当前场景的根节点
            Node root = this.GetTree().CurrentScene;
            Node findChild = root.FindChild("sontest");
            findChild.QueueFree();
        }
    }
}
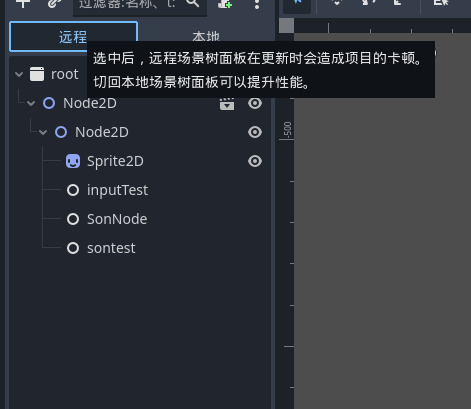
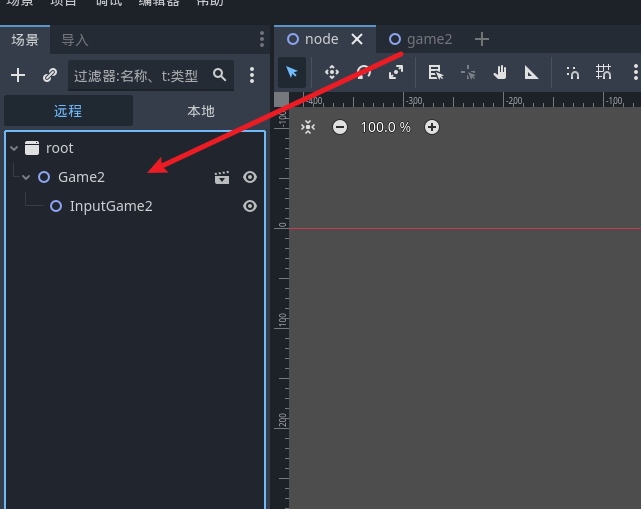
项目启动后 点击远程

然后按下 a 键 查看是否会让 sontest 消失
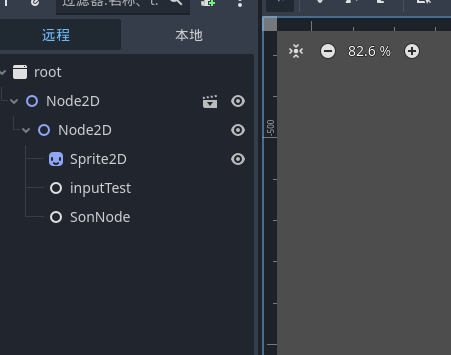
可以看到 sontest 也是成功释放了 这是最基础的对节点的操作
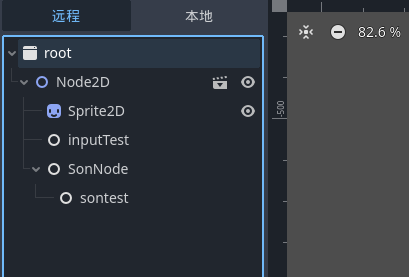
变为子节点
接下来我们来尝试将同级节点变为子节点
  public override void _Process(double delta)
    {
        // 按下键盘左键拿到节点
        if (Input.IsActionJustPressed("left"))
        {
            // 拿到当前场景的根节点
            Node root = this.GetTree().CurrentScene;
            Node findChild = root.FindChild("sontest");
            // findChild.QueueFree();
            root.RemoveChild(findChild);
            // // 将test加入到当前节点中
            this.AddChild(findChild);
        }
    }
现在的节点结构
按下左键后
这里我们将 node2d 的节点网上挪一个单位, 方便操作
创建节点
接下来我们设置按下右键来创造节点
 public override void _Process(double delta)
    {
        // 按下键盘左键拿到节点
        if (Input.IsActionJustPressed("left"))
        {
            // 拿到当前场景的根节点
            Node root = this.GetTree().CurrentScene;
            Node findChild = root.FindChild("sontest");
            // findChild.QueueFree();
            root.RemoveChild(findChild);
            // // 将test加入到当前节点中
            this.AddChild(findChild);
        }

        if (Input.IsActionJustPressed("right"))
        {
            //获取节点树
            Node root = this.GetTree().CurrentScene;
            //创建节点
            Node2D node2D = new Node2D();
            node2D.Name = "CreateNode";
            //加入节点树
            root.AddChild(node2D);
        }
    }
启动项目 然后按下键盘 d 键
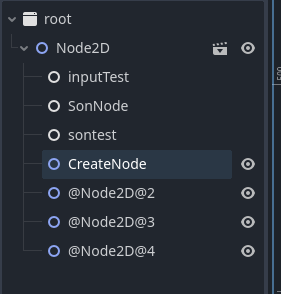
可以看到我们按一次 d 键就会在根目录下 创建一个节点
更快速的操作
多层级的节点操作 我们之前的代码中直接从 root 节点来往下获取, 其实我们可以使用getParent方法和泛型来快速获取到父节点 ,
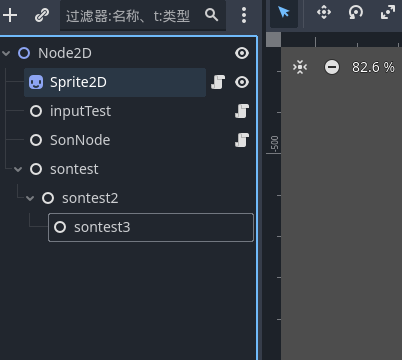
我们给 sontest3 加入一个脚本
using Godot;
using System;

public partial class sonTest3 : Node
{
    // Called when the node enters the scene tree for the first time.
    public override void _Ready()
    {
    }

    // Called every frame. 'delta' is the elapsed time since the previous frame.
    public override void _Process(double delta)
    {
        if (Input.IsActionJustPressed("up"))
        {
            // 可以使用getNode通过树路径快速的拿到节点
            Node node = GetNode("/root/Node2D/inputTest");
            GD.Print("当前拿到的节点" + node.Name);
        }
    }
}
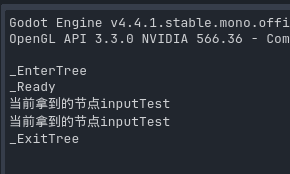
这里我们按下 w 就会去获取到对应路径的 node 节点
效果
节点的详细面板
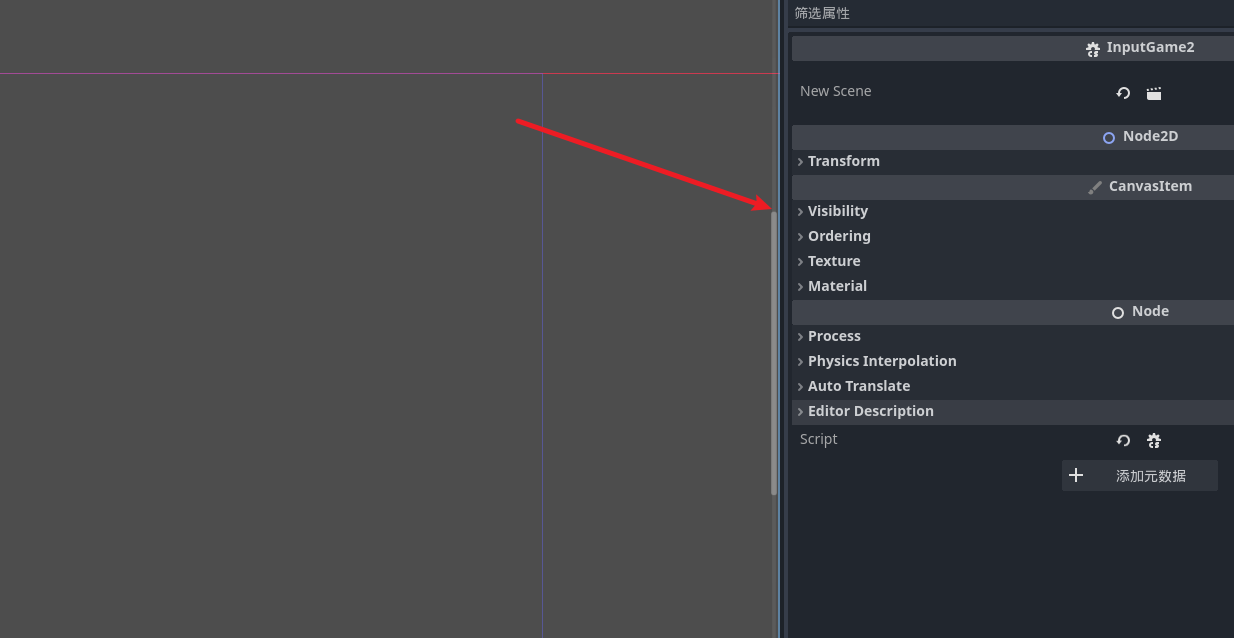
从上到下分别是
- 控制显示
- 显示层级
- 纹理
- 材质
node2d
- 坐标向量
- 旋转角度
- 缩放
- 倾斜
节点常用属性
创建一个新的节点
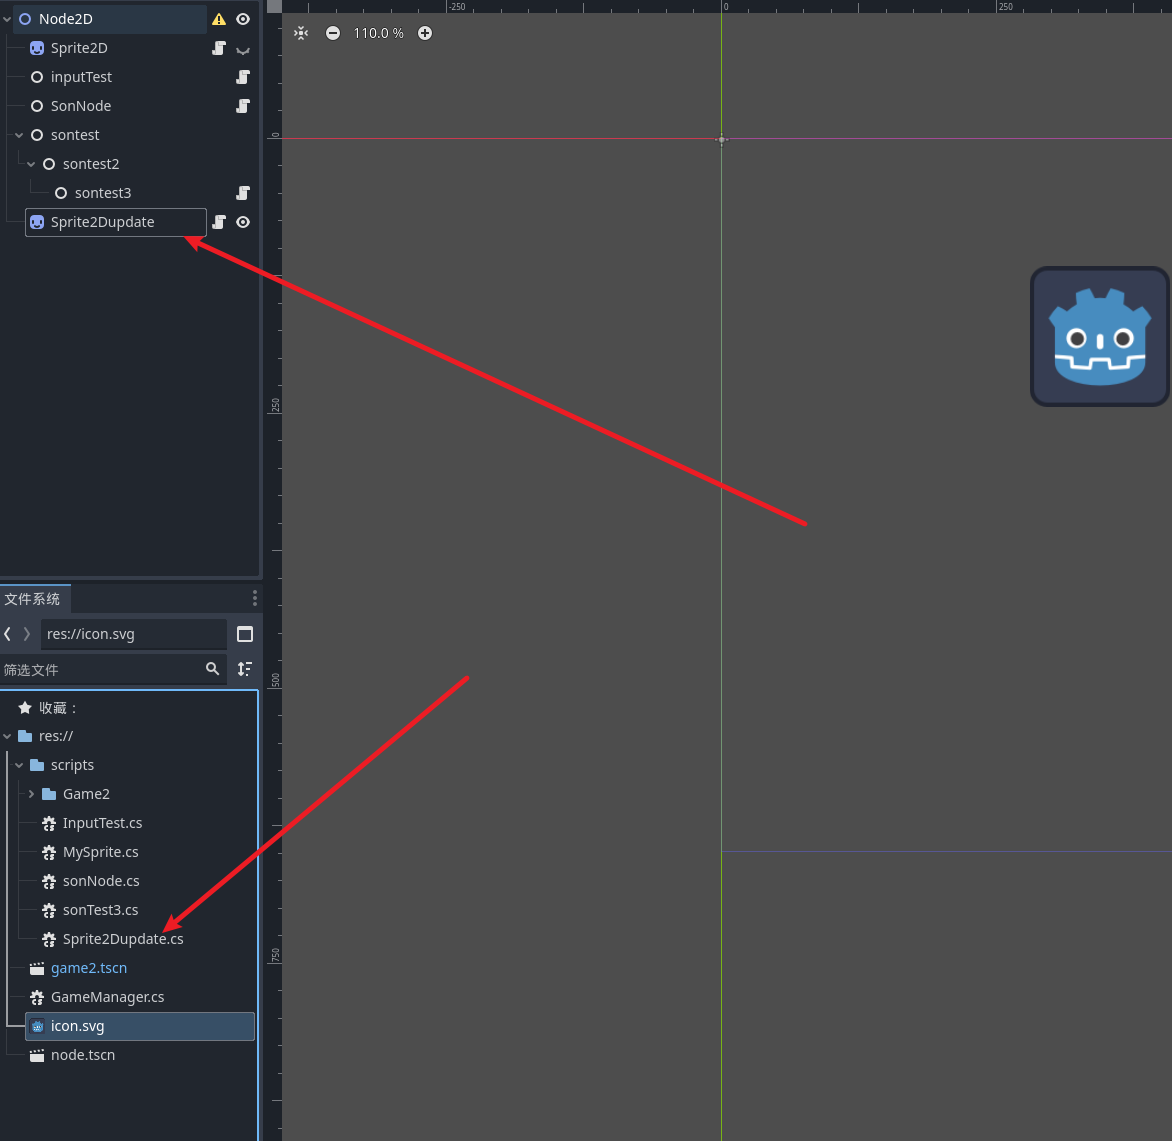
using Godot;
using System;
public partial class Sprite2Dupdate : Sprite2D
{
// Called when the node enters the scene tree for the first time.
public override void _Ready()
{
//canvas的常用属性
this.Visible = false;
//渲染顺序
this.ZIndex = 10;
this.ZAsRelative = false;
}
// Called every frame. 'delta' is the elapsed time since the previous frame.
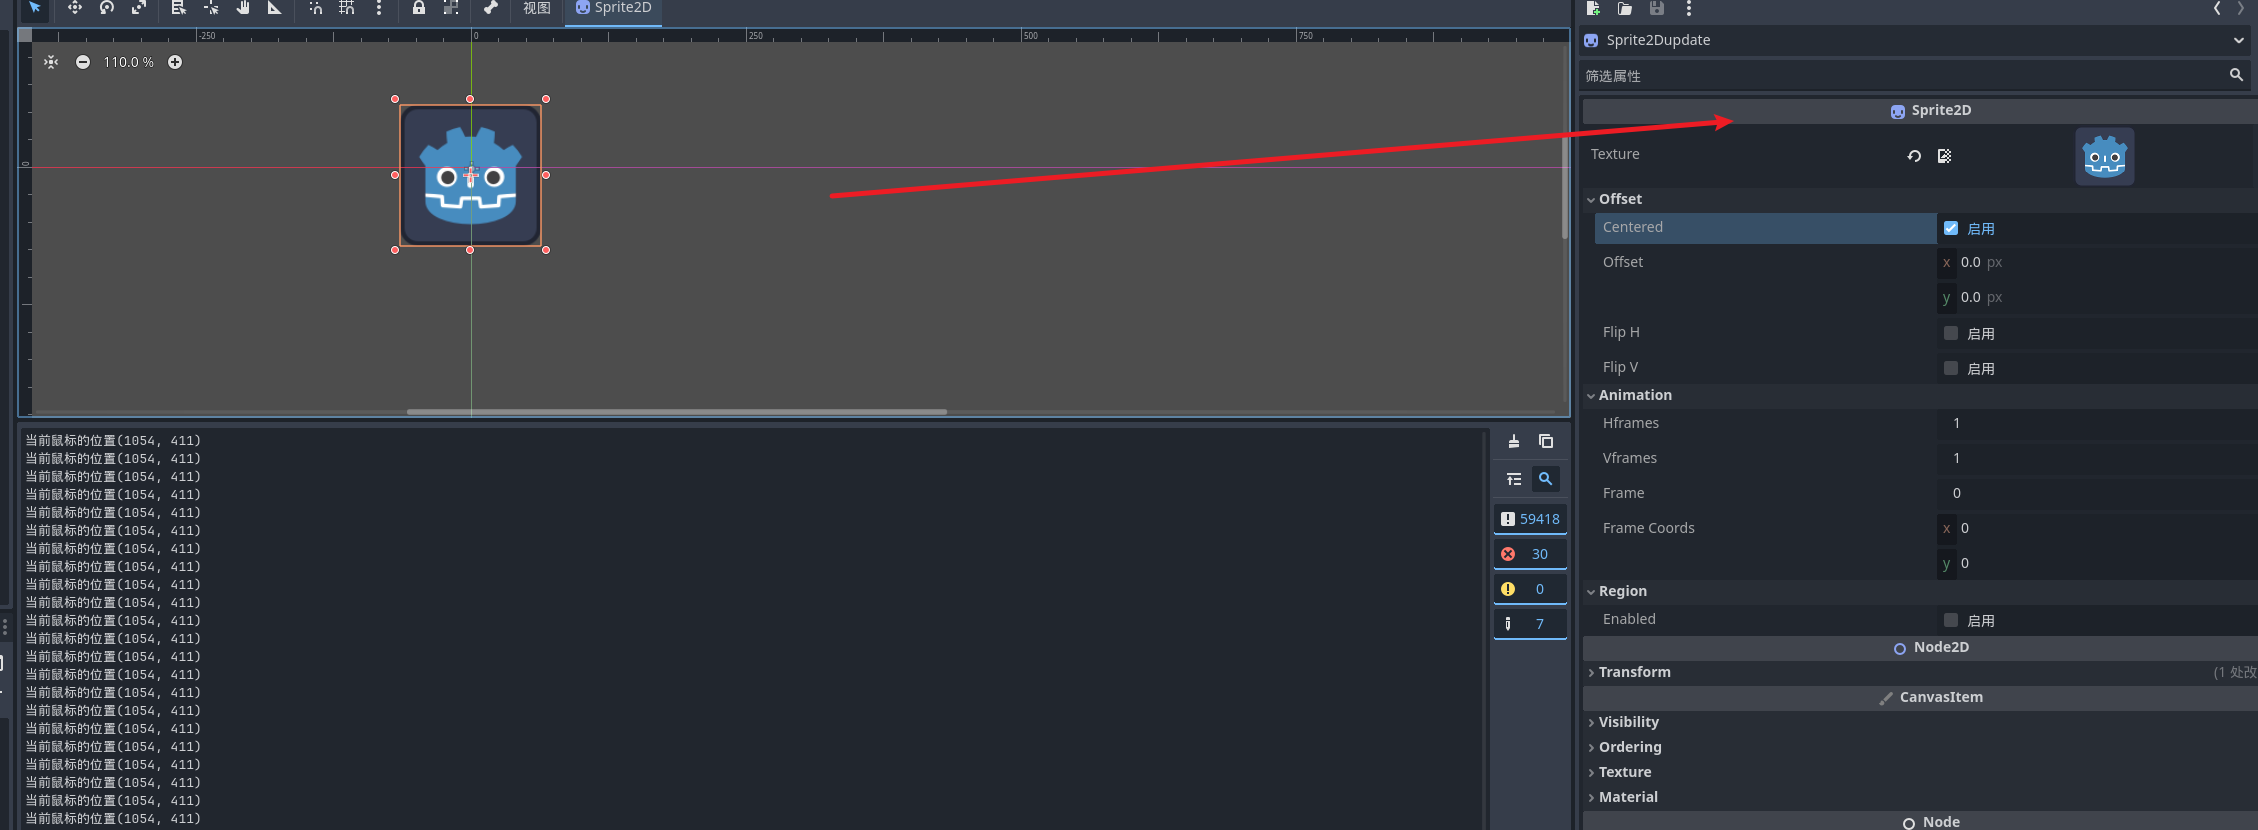
public override void _Process(double delta)
{
Vector2 globalMousePosition = GetGlobalMousePosition();
GD.Print("当前鼠标的位置" + globalMousePosition);
}
}
你会发现我们的设置的svg图标并没有展示 并且控制台实时的打印鼠标位置
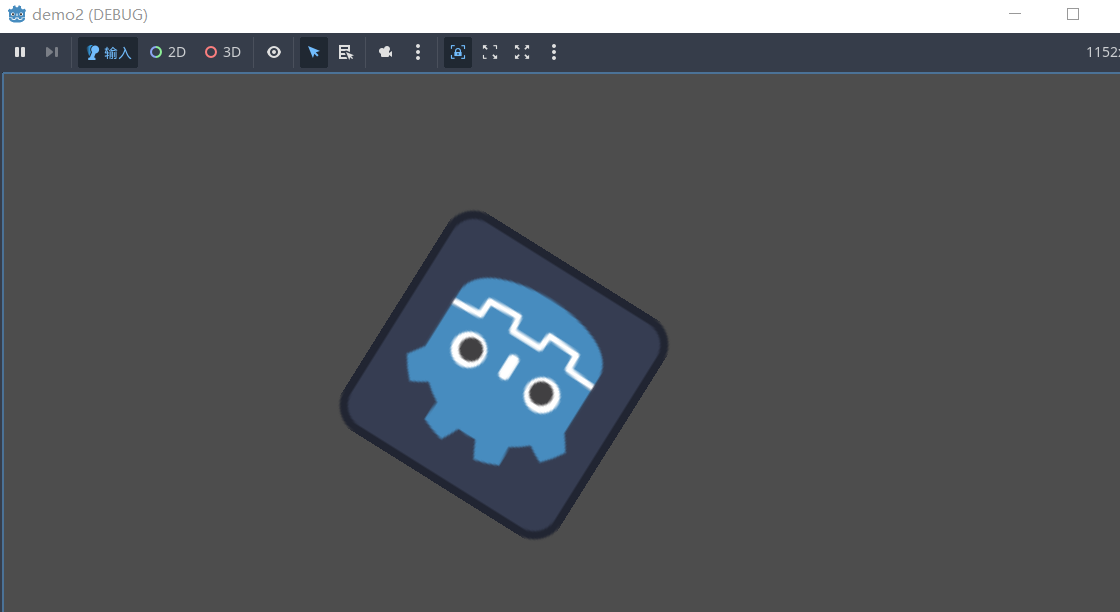
Node2d属性调整
using Godot;
using System;

public partial class Sprite2Dupdate : Sprite2D
{
    // Called when the node enters the scene tree for the first time.
    public override void _Ready()
    {
        //canvas的常用属性
        this.Visible = true;
        //渲染顺序
        this.ZIndex = 10;
        this.ZAsRelative = false;

        //node2d常用的属性
        //位置
        Position = new Vector2(500, 300);
        //旋转
        Rotation = 0.2f;
        //缩放
        Scale = new Vector2(2, 2);
        //倾斜
        Skew = 30;
    }

    // Called every frame. 'delta' is the elapsed time since the previous frame.
    public override void _Process(double delta)
    {
        Vector2 globalMousePosition = GetGlobalMousePosition();
        GD.Print("当前鼠标的位置" + globalMousePosition);
    }
}
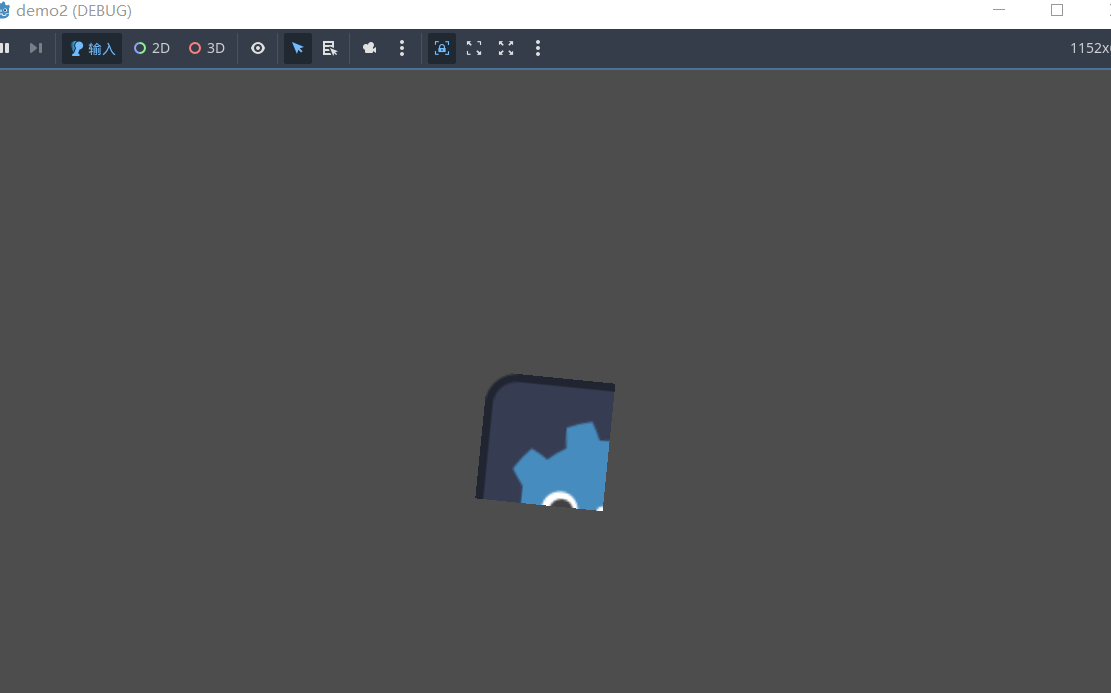
变换后的节点
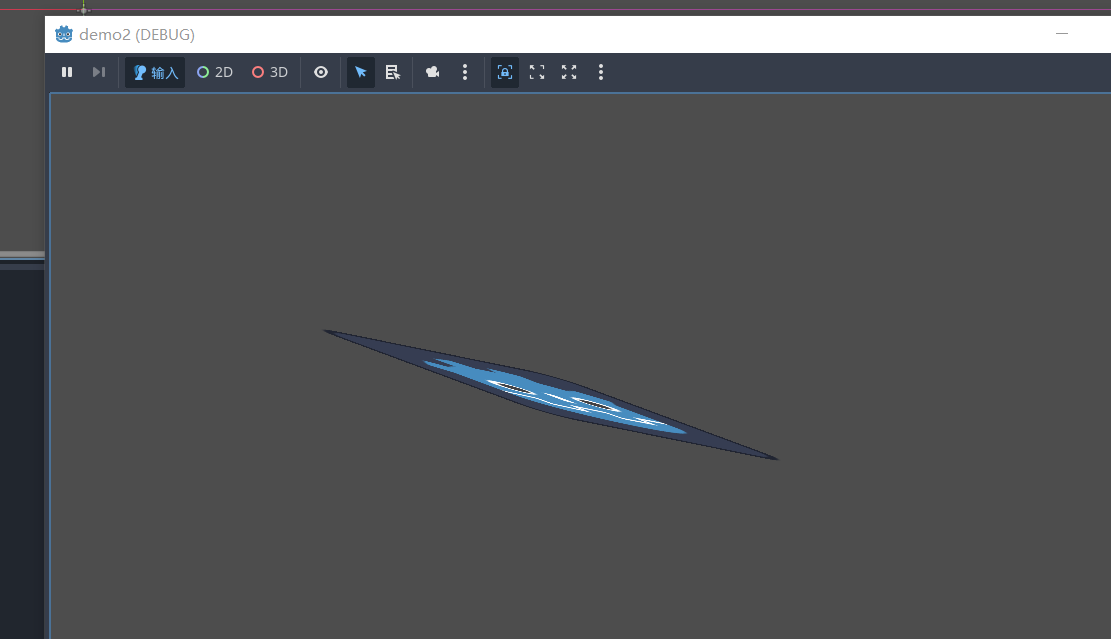
设置看向某个点
    // Called every frame. 'delta' is the elapsed time since the previous frame.
    public override void _Process(double delta)
    {
        Vector2 globalMousePosition = GetGlobalMousePosition();
        LookAt(globalMousePosition);
        GD.Print("当前鼠标的位置" + globalMousePosition);
    }
效果
你就会发现 图标跟着你的鼠标位置不断的旋转方向
精灵节点
三个属性
- 偏移量
- 动画(一般动画不会使用这个属性)
- 缩放
代码设置属性
using Godot;
using System;

public partial class Sprite2Dupdate : Sprite2D
{
    [Export] public Texture2D NewtTexture2D;

    double timer = 0;

    // Called when the node enters the scene tree for the first time.
    public override void _Ready()
    {
        //canvas的常用属性
        this.Visible = true;
        //渲染顺序
        this.ZIndex = 10;
        this.ZAsRelative = false;

        //node2d常用的属性
        //位置
        Position = new Vector2(500, 300);
        //旋转
        Rotation = 0.1f;
        //缩放
        Scale = new Vector2(2, 2);
        //倾斜
        // Skew = 30;

        //精灵节点的设置
        //纹理
        Texture = NewtTexture2D;
        //中心点 or 左上角
        Centered = false;
        //偏移
        Offset = new Vector2(0, 0);
        //反转
        //水平
        FlipH = false;
        //垂直
        FlipV = false;
        //动画
        Hframes = 2;
        Vframes = 2;
        Frame = 0;
    }

    // Called every frame. 'delta' is the elapsed time since the previous frame.
    public override void _Process(double delta)
    {
        // Vector2 globalMousePosition = GetGlobalMousePosition();
        // LookAt(globalMousePosition);
        // GD.Print("当前鼠标的位置" + globalMousePosition);

        // 计时器
        timer += delta;
        //每一秒更换一个图像
        if (timer > 1)
        {
            //充值计时器
            timer = 0;
            int index = Frame + 1;
            if (index > 3) index = 0;
            Frame = index;
        }
    }
}
效果
启动后你会发现你的图片被分成了四帧动画
节点分组管理
比如 有五个节点 一个player 四个boss 我们通过按键 销毁所有的boss 该如何去操作呢?
创建一个新的场景,并且设置为主场景
我们添加五个精灵节点
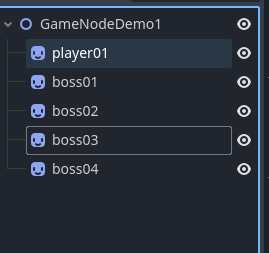
大多数的时候 我们的节点名都是动态创建的 那么我们该如何快速的获取同类型的节点呢 ==分组==
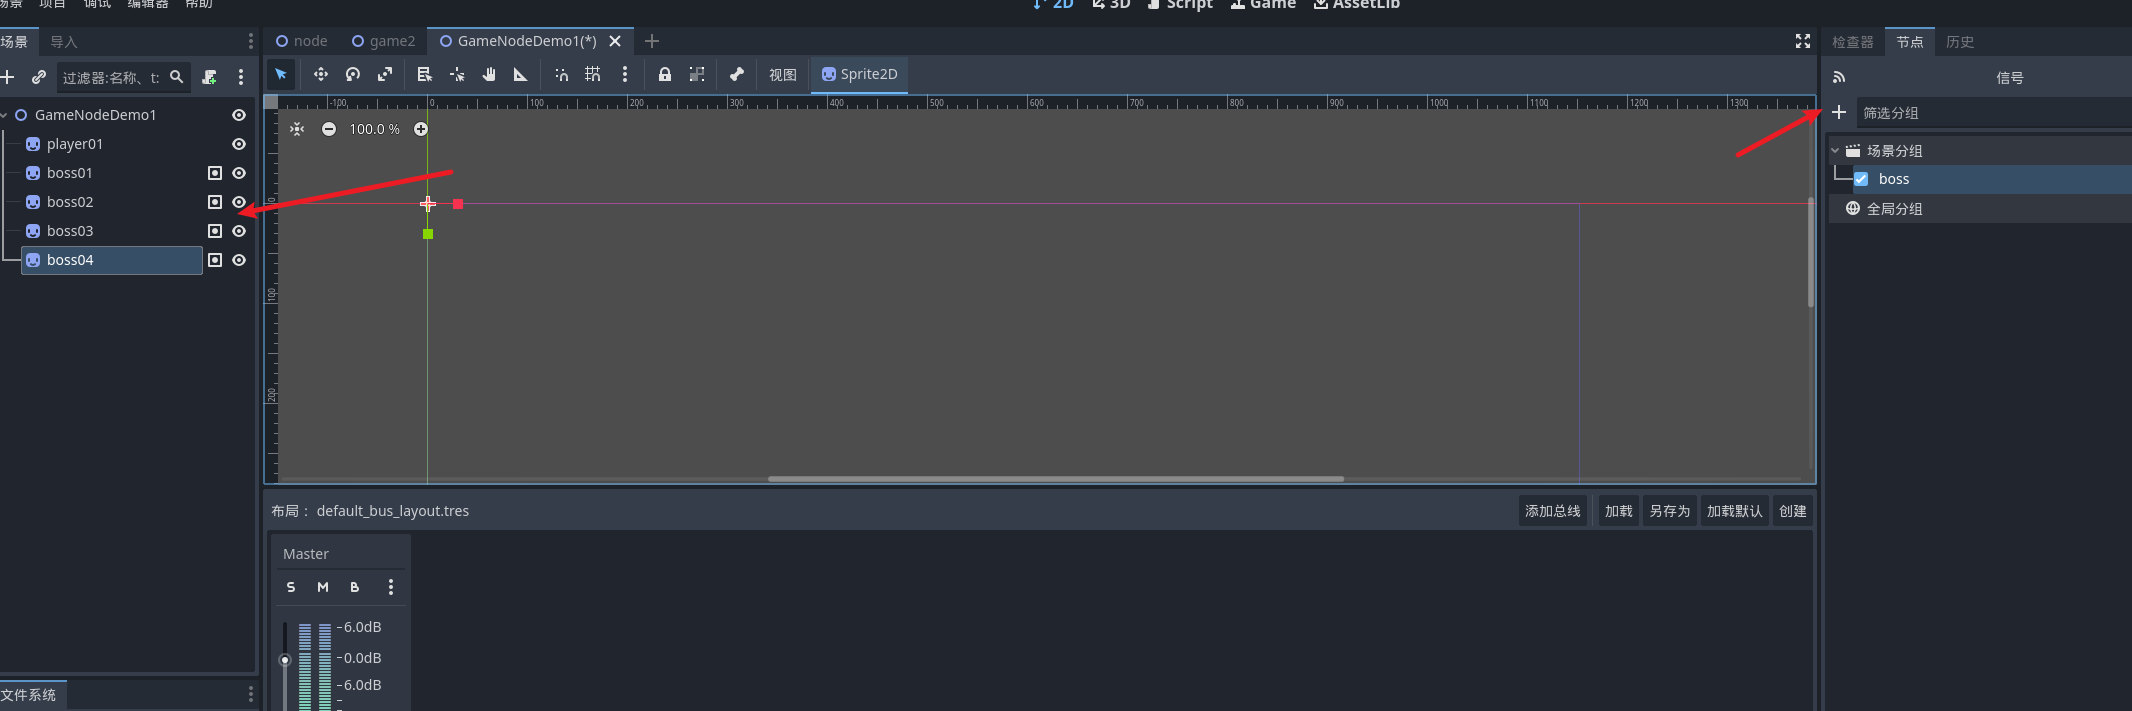
创建分组将boss都加入到分组中 , 并且给player01创建一个脚本
using Godot;
using System;
using Godot.Collections;

public partial class Player01 : Sprite2D
{
    // Called when the node enters the scene tree for the first time.
    public override void _Ready()
    {
    }

    // Called every frame. 'delta' is the elapsed time since the previous frame.
    public override void _Process(double delta)
    {
        //按下右键击杀全部敌人
        if (Input.IsActionJustPressed("right"))
        {
            //获取到分组中的全部节点
            var boss = GetTree().GetNodesInGroup("boss");
            foreach (Node node in boss)
            {
                node.QueueFree();
            }
        }
    }
}
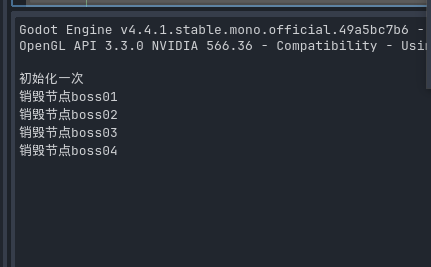
启动以后按下右键全部销毁敌人
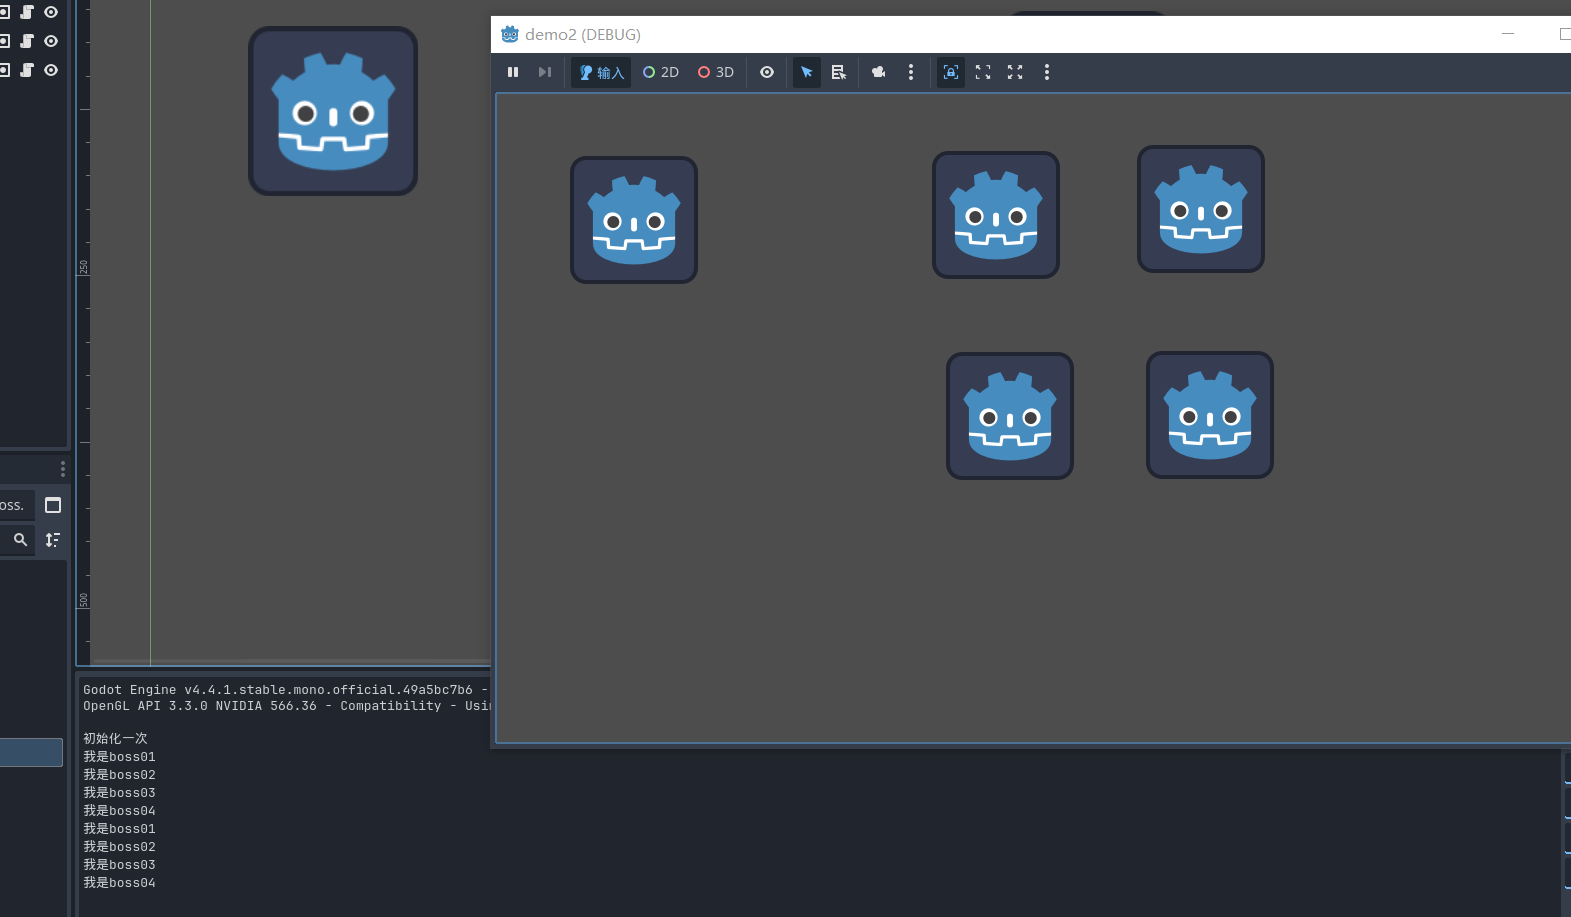
调用分组节点方法
创建一个boss脚本加入到四个节点中,添加一个自定义方法
    public void test()
    {
        GD.Print("我是" + Name);
    }
我现在需要按下 键盘a 也就是虚拟键盘left 触发所有boss的test方法
using Godot;
using System;
using Godot.Collections;

public partial class Player01 : Sprite2D
{
    // Called when the node enters the scene tree for the first time.
    public override void _Ready()
    {
    }

    // Called every frame. 'delta' is the elapsed time since the previous frame.
    public override void _Process(double delta)
    {
        //按下右键击杀全部敌人
        if (Input.IsActionJustPressed("right"))
        {
            //获取到分组中的全部节点
            var boss = GetTree().GetNodesInGroup("boss");
            foreach (Node node in boss)
            {
                GD.Print("销毁节点", node.Name);
                node.QueueFree();
            }
        }

        if (Input.IsActionJustPressed("left"))
        {
            var boss = GetTree().GetNodesInGroup("boss");
            this.GetTree().CallGroup("boss","test");
        }
    }
}
效果
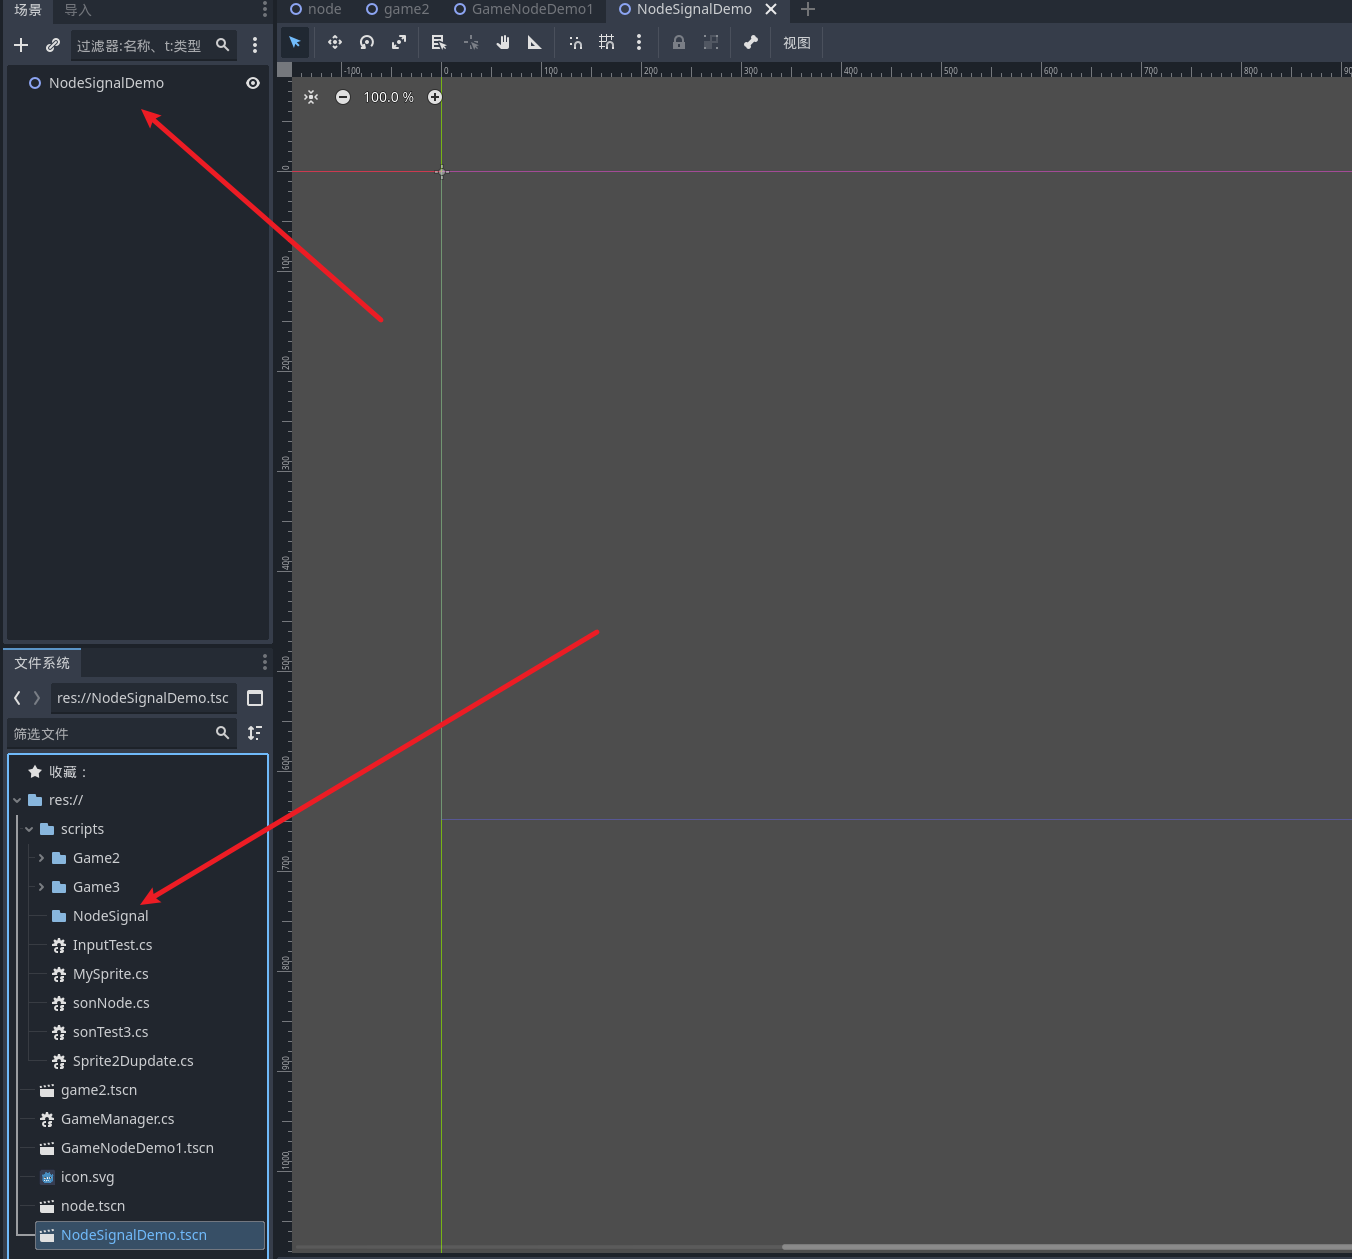
节点通信(信号)
创建新的游戏场景NodeSignalDemo并且设置为主场景 新增文件夹 NodeSignal 之后我们有关这一小节的节点脚本都将放到这里
静态链接
创建一个button节点并且创建一个button脚本绑定和一个精灵节点 用于学习和演示
点击详细面板的节点可以看到有很多很多信号可以选择 比如按钮的按下 释放 等等
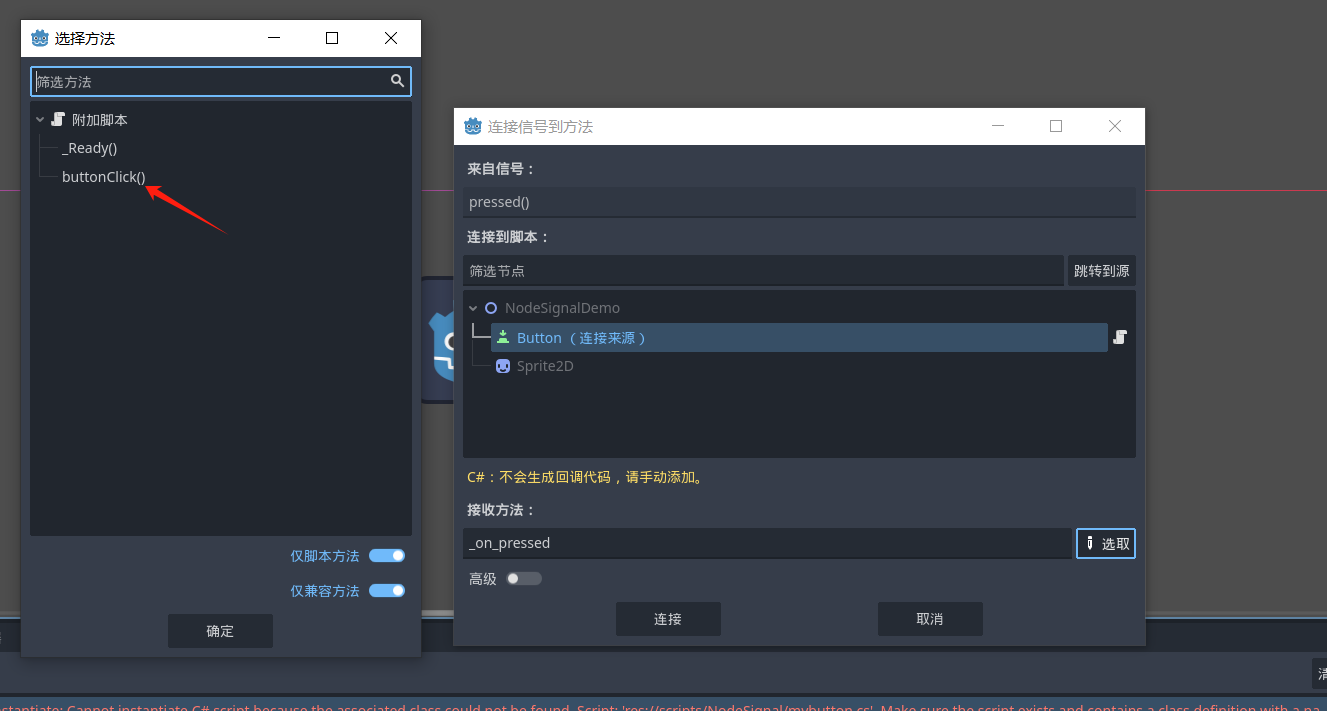
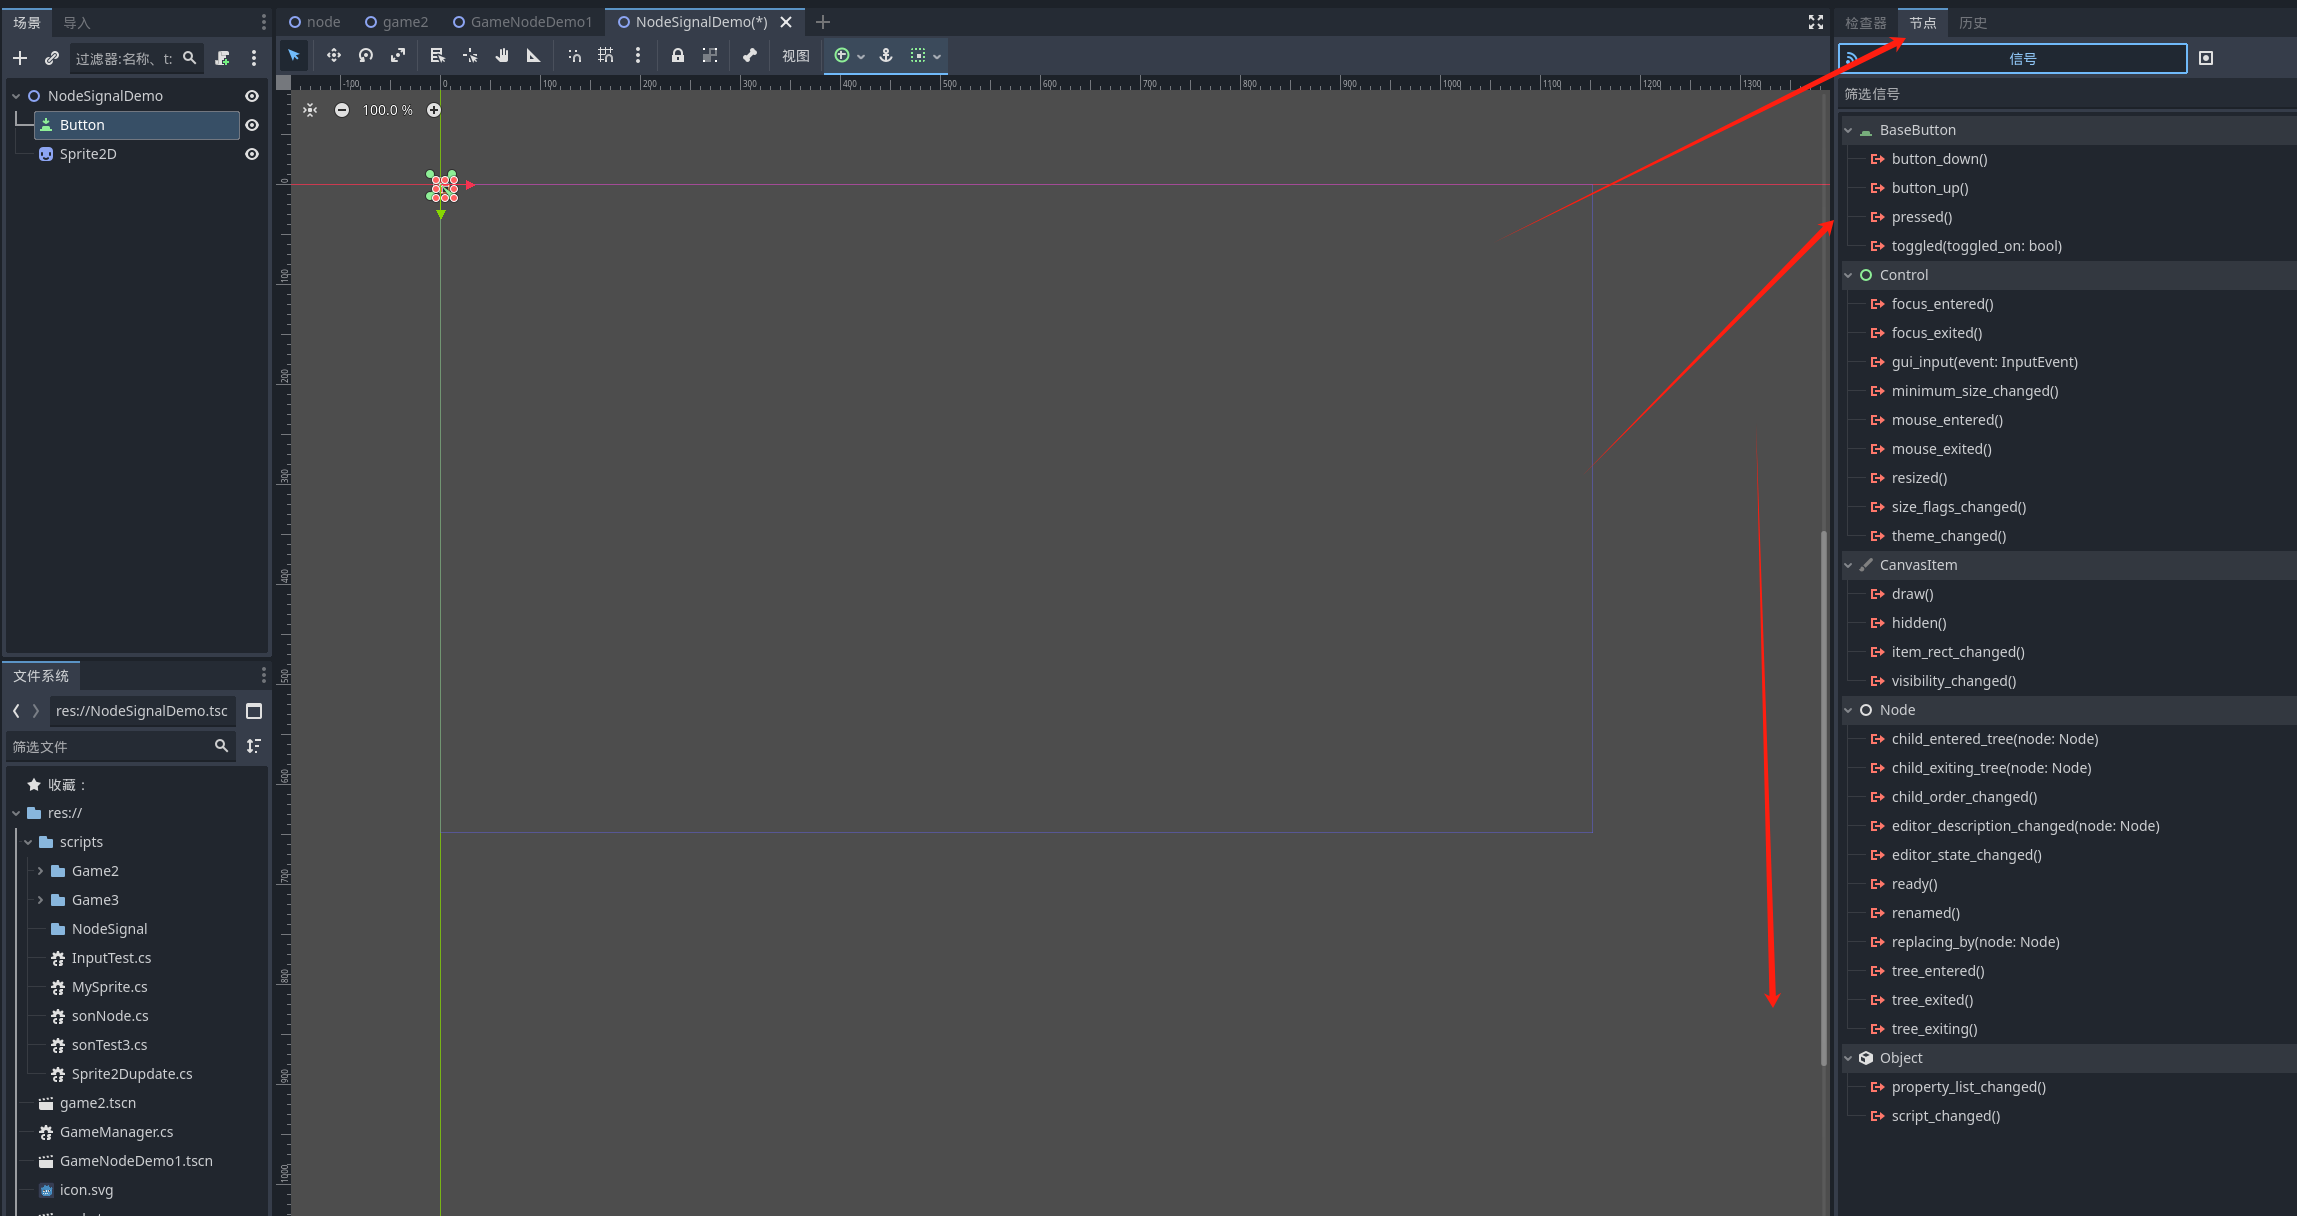
在脚本中新增一个方法
    //按钮按下触发
       public void buttonClick()
    {
        //找到精灵节点并删除
        Node2D sp2d = GetNode<Node2D>("/root/NodeSignalDemo/Sprite2D");
        sp2d.QueueFree();
    }
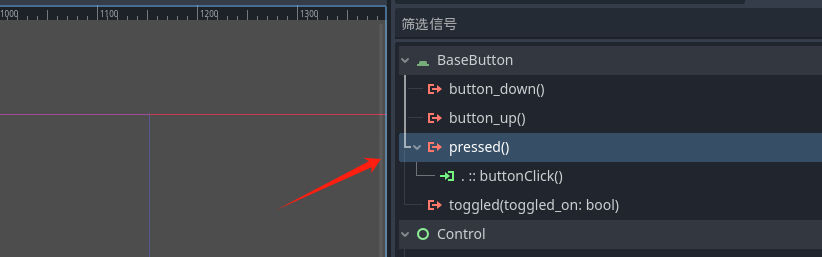
之后去godot的信号窗口将方法绑定到按钮按下 这里选取可能会出现无法选择的方式 我们可以手动将方法名加入到绑定中
动态链接
通过代码的方式将方法设置到信号中, 先手动的把释放信号断开连接改为用代码动态的连接
代码
using Godot;
using System;

public partial class mybutton : Godot.Button
{
    // Called when the node enters the scene tree for the first time.
    public override void _Ready()
    {
        Connect("pressed", new Callable(this, "buttonClick"));
    }

    //按钮按下触发
    public void buttonClick()
    {
        //找到精灵节点并删除
        Node2D sp2d = GetNode<Node2D>("/root/NodeSignalDemo/Sprite2D");
        sp2d.QueueFree();
    }
}
启动测试 就可以看到效果
自定义信号
基于 cs的委托机制 实现自定义信号 ,我们再创建2个节点
自定义信号的工作方式与内置信号相同:它们显示在“节点”选项卡中,你可以像连接其他信号一样连接到它们。
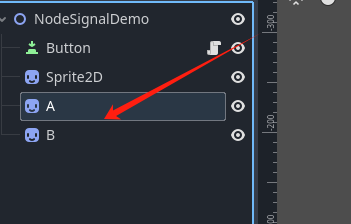
给A绑定一个脚本 ,然后我们期望按下按键 A 就可以使用自定义的信号
MySignalEventHandler godot会将EventHandler 前的名称获取为信号的名称
using Godot;
using System;

public partial class A : Sprite2D
{
    [Signal]
    public delegate void MySignalEventHandler();

    // Called when the node enters the scene tree for the first time.
    public override void _Ready()
    {
    }

    // Called every frame. 'delta' is the elapsed time since the previous frame.
    public override void _Process(double delta)
    {
        if (Input.IsActionJustPressed("left"))
        {
            //触发信号
            EmitSignal("MySignal");
        }
    }
}
我们在A中创建一个委托 并且将信号暴露 这样我们在godot面板中就可以看到我们暴露的信号了 可以向设置系统信号一样设置这个型号
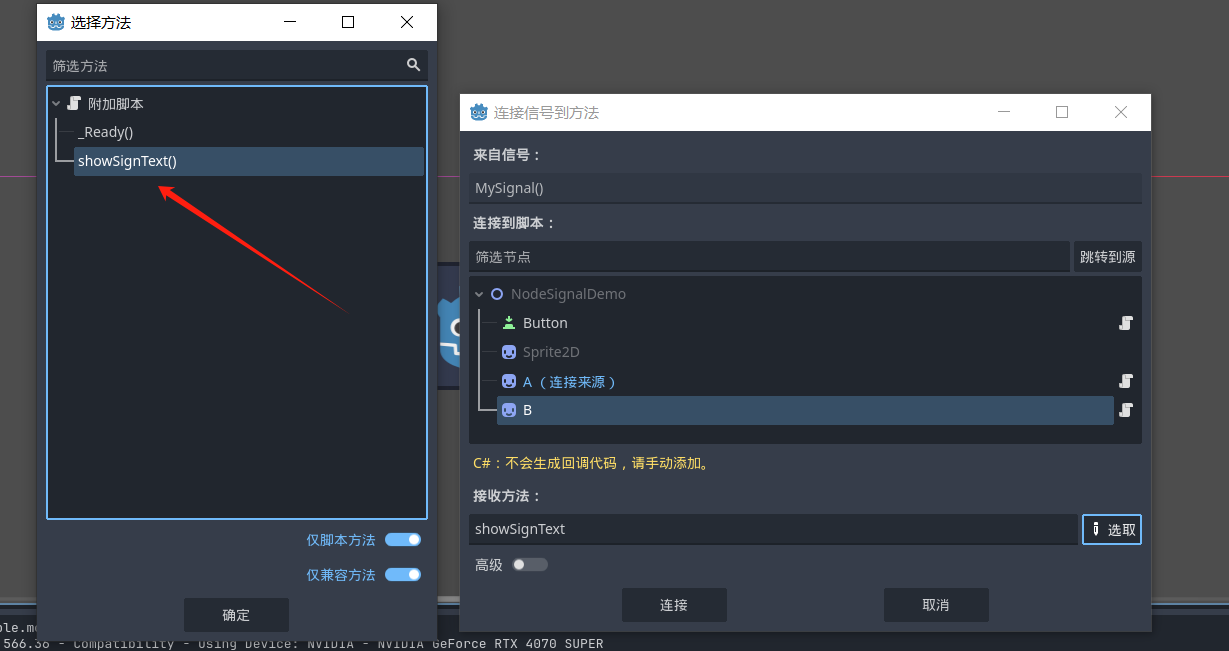
给节点 B 也创建一个脚本 编写一个方法 用于链接信号
using Godot;
using System;

public partial class B : Sprite2D
{
    // Called when the node enters the scene tree for the first time.
    public override void _Ready()
    {
    }

    // Called every frame. 'delta' is the elapsed time since the previous frame.
    public override void _Process(double delta)
    {
    }

    public void showSignText()
    {
        GD.Print("接受到信号了");
    }
}
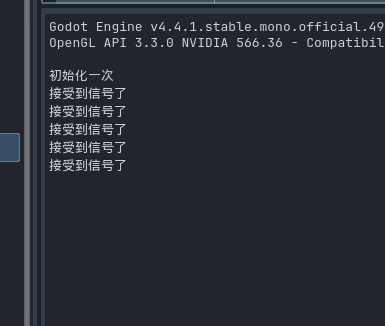
确定链接信号
启动该项目 就可以看到显示结果了
场景
从之前的示例可以知道设置好主场景, 游戏会从主场景开始运行, 现在我们要新创建一个场景,来学习一下场景之间的交互
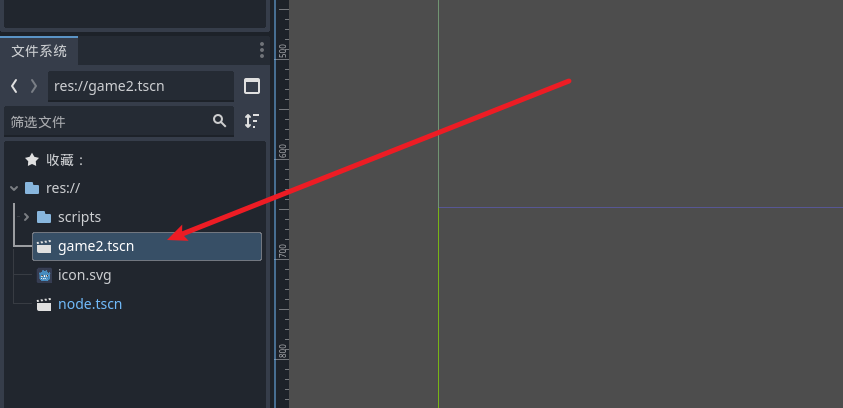
新建场景在根目录
跳转场景(路径跳转)
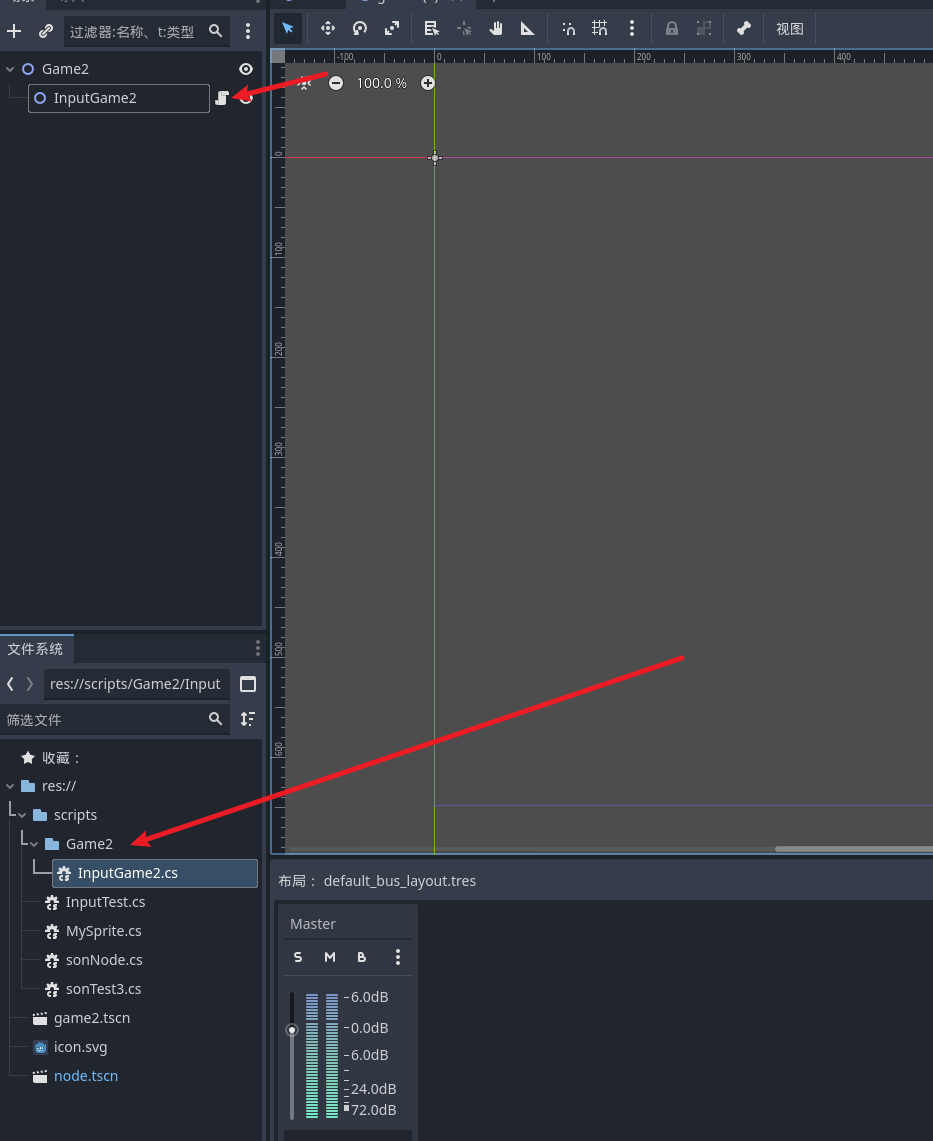
创建一个节点, 然后加入一个新的脚本 我们将在这个基点展示场景之间的跳转
- 我们将game2设置为主场景
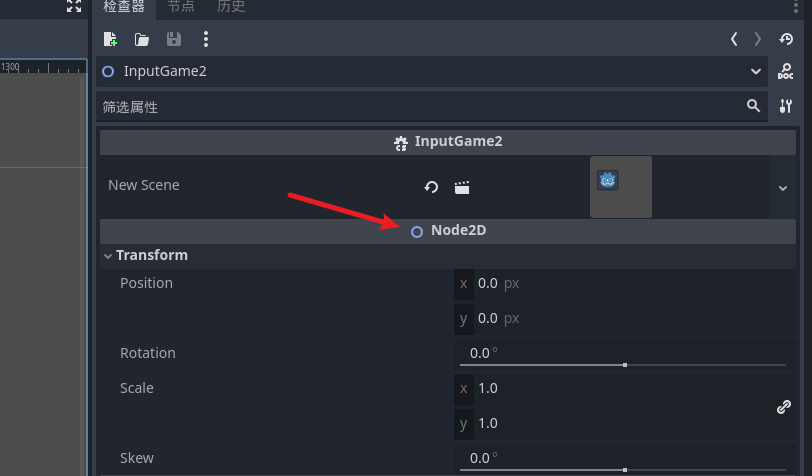
- 然后编写inputgame2脚本
using Godot;
using System;
public partial class InputGame2 : Node2D
{
// Called when the node enters the scene tree for the first time.
public override void _Ready()
{
}
// Called every frame. 'delta' is the elapsed time since the previous frame.
public override void _Process(double delta)
{
if (Input.IsActionJustPressed("left"))
{
// 拿到场景树
SceneTree st = GetTree();
//跳转场景
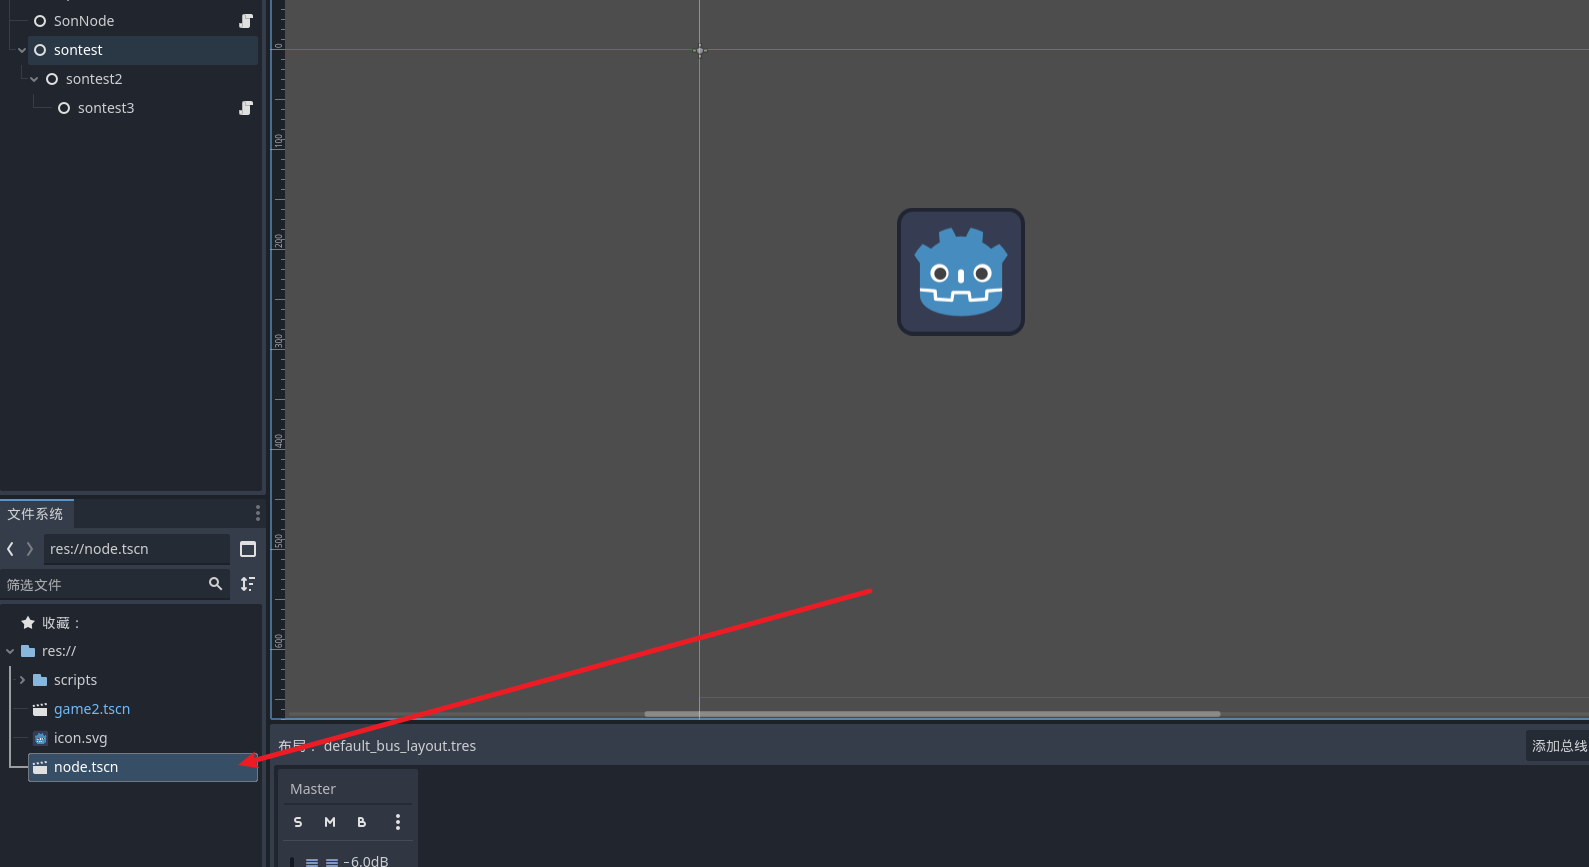
st.ChangeSceneToFile("res://node.tscn");
}
}
}
node场景 放入一个默认的图片
然后启动项目点击A 就可以查看跳转结果
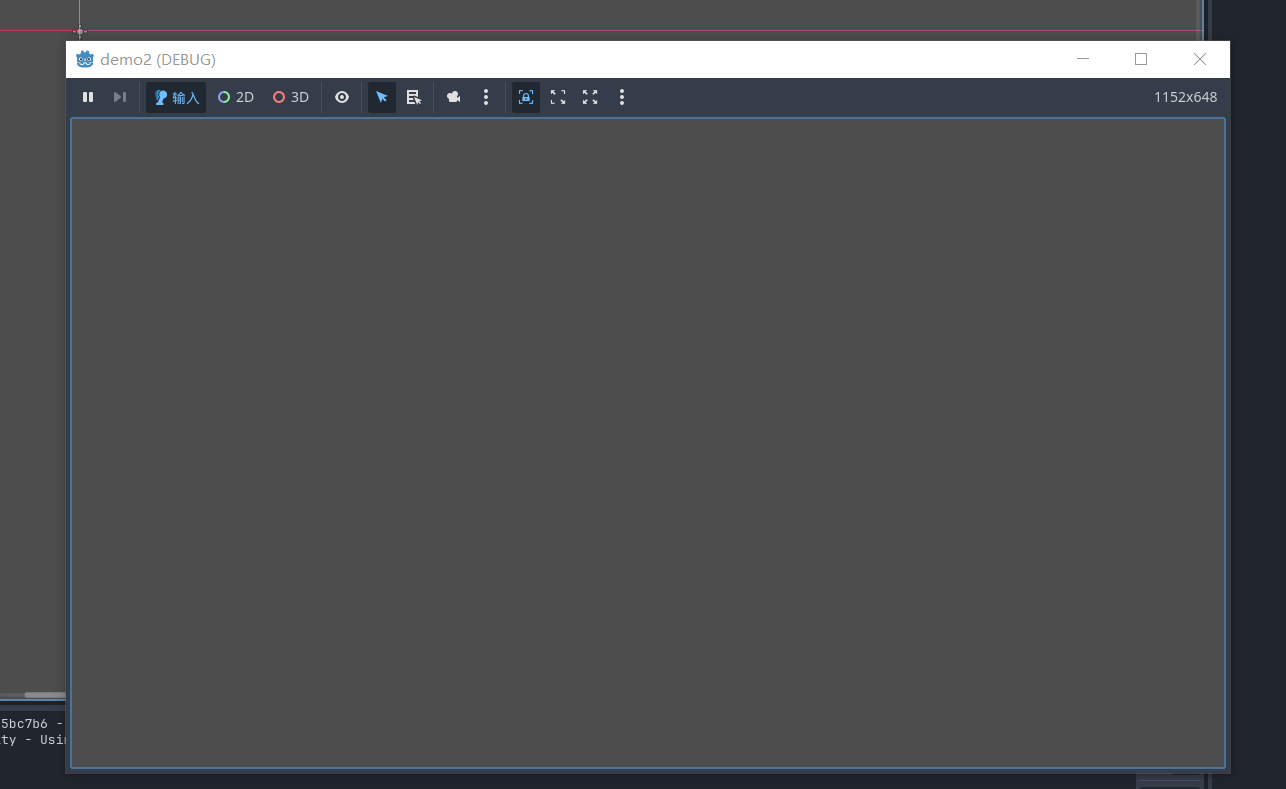
按下A
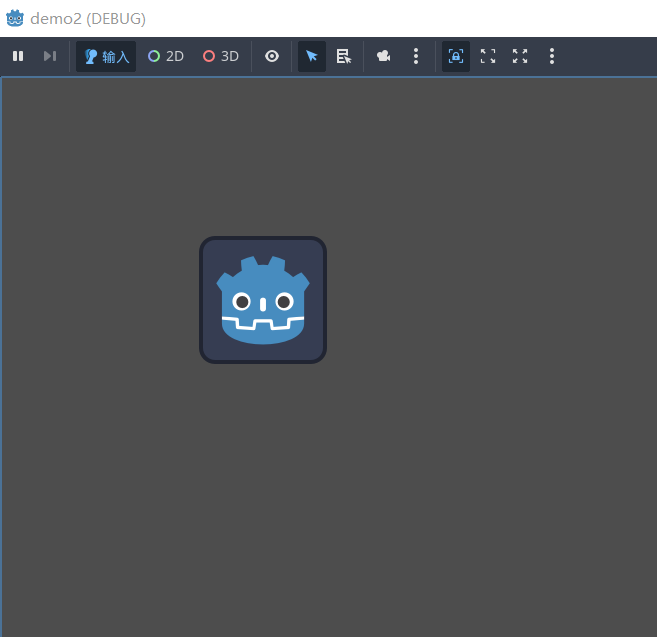
可以看到场景成功跳转了
场景跳转(属性跳转)
我们可以使用Attribute的方式将变量导出到godot里进行选择,只需要将节点拖进去就可以了
using Godot;
using System;

public partial class InputGame2 : Node2D
{
    [Export] public PackedScene newScene;

    // Called when the node enters the scene tree for the first time.
    public override void _Ready()
    {
    }

    // Called every frame. 'delta' is the elapsed time since the previous frame.
    public override void _Process(double delta)
    {
        if (Input.IsActionJustPressed("left"))
        {
            // 拿到场景树
            SceneTree st = GetTree();
            //跳转场景
            // st.ChangeSceneToFile("res://node.tscn");
            st.ChangeSceneToPacked(newScene);
        }
    }
}
操作
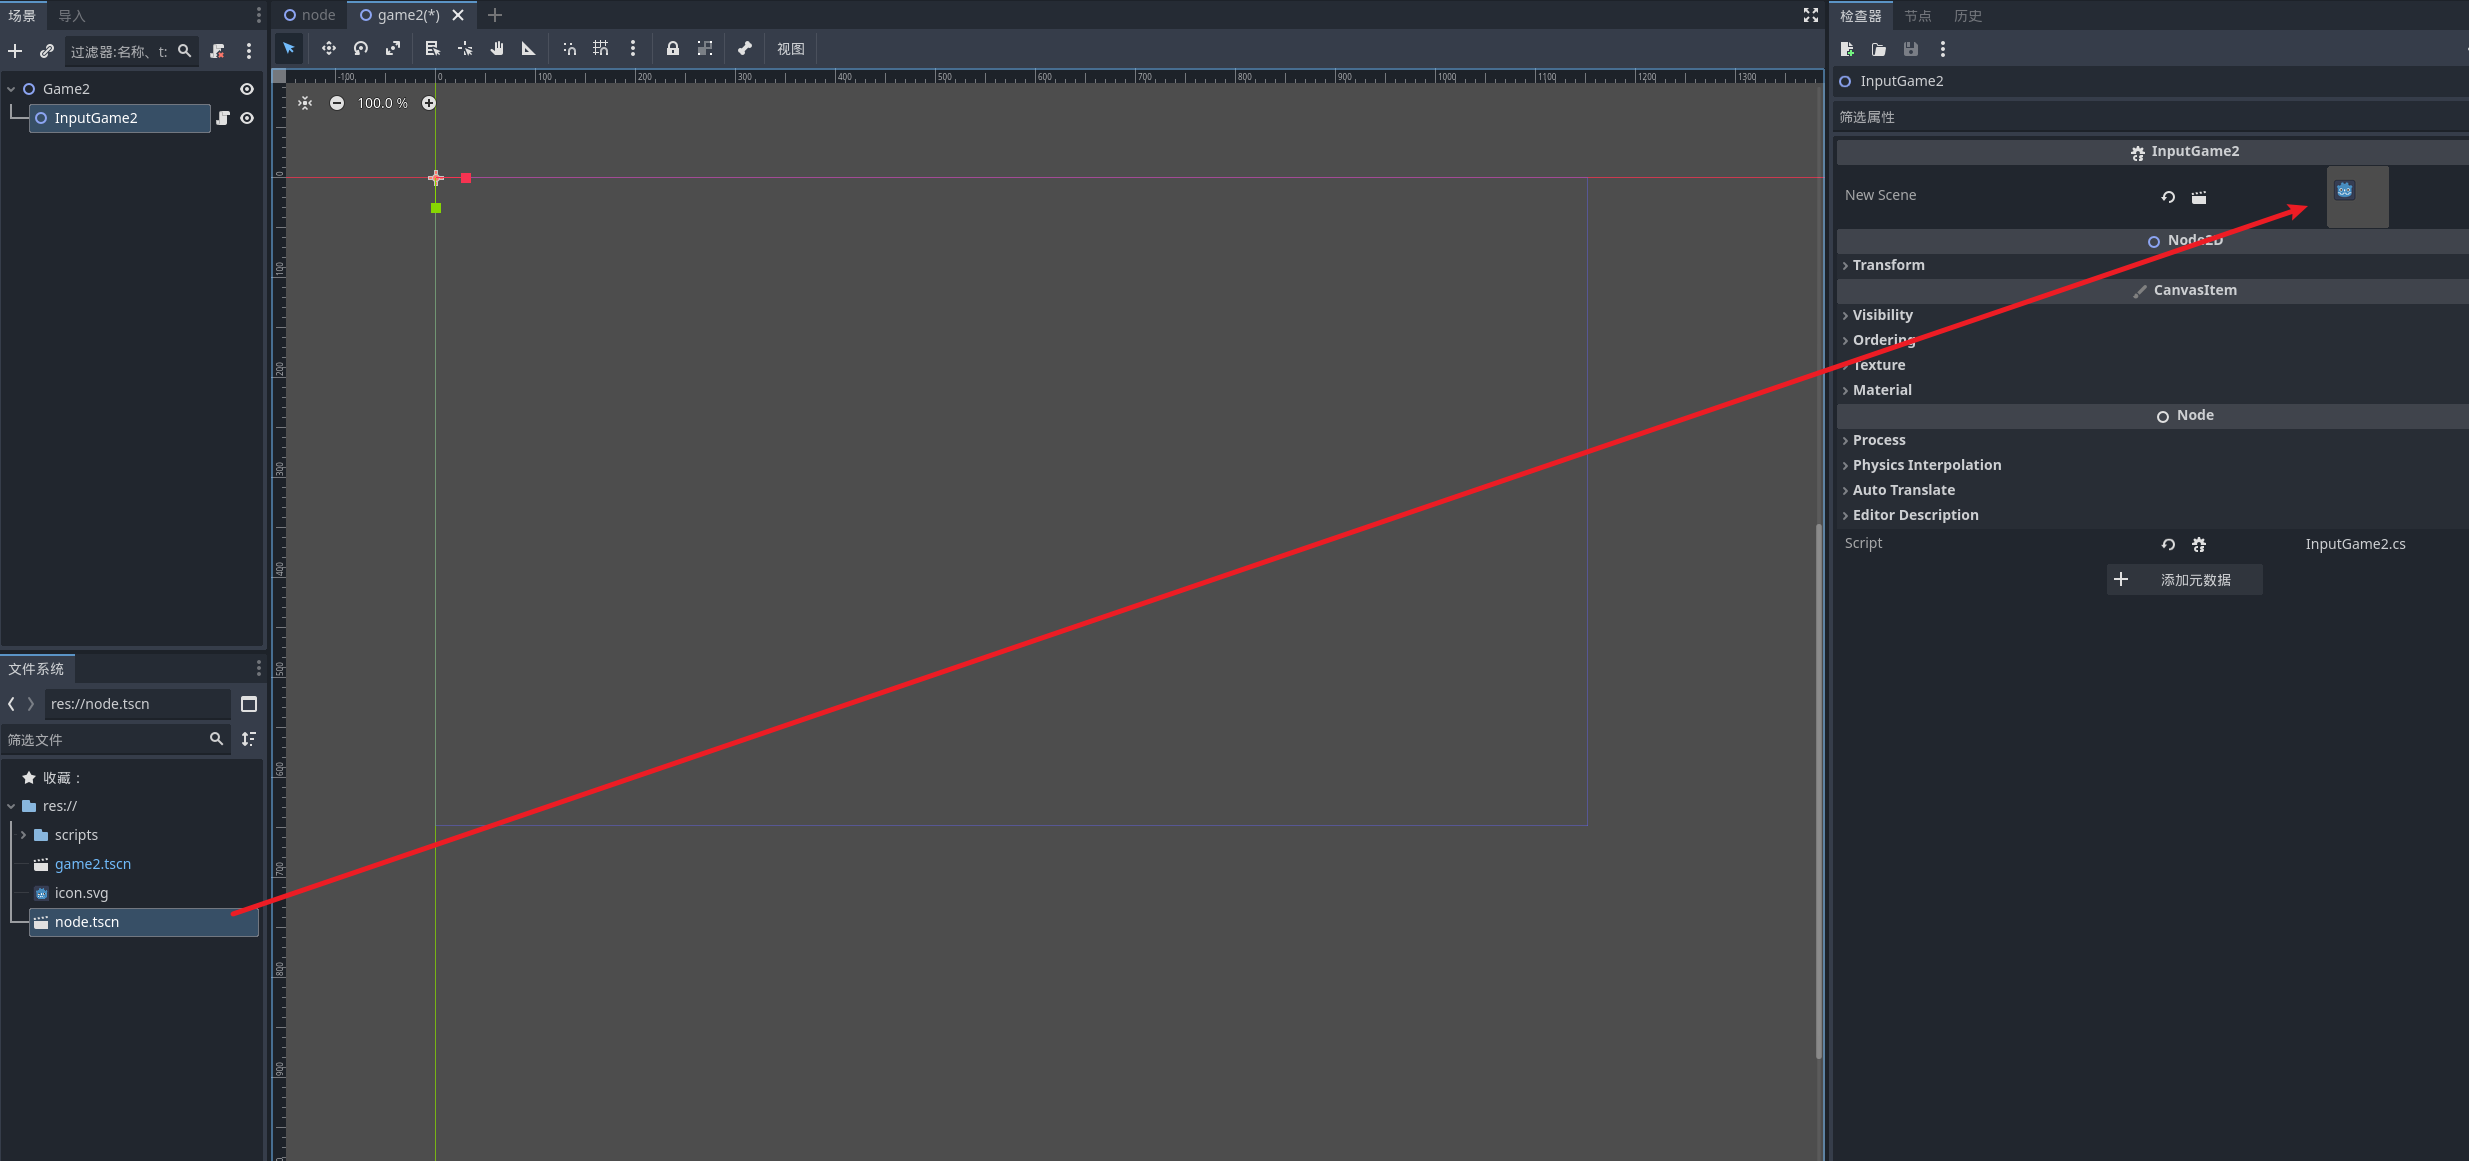
效果和之前的路径跳转一样, 好处是可以使用变量来进行跳转 对比纯路径更加灵活
实例化场景 (预设体)
例子
比如弹匣里的子弹 我们主场景需要子弹 我们可以加载出子弹的节点 然后根据需要的数量来实例化场景节点并且获取到所需数量的对象
比如node场景的精灵节点 我们需要按下right键位让game2(主场景)拿到这个节点
using Godot;
using System;

public partial class InputGame2 : Node2D
{
    [Export] public PackedScene newScene;

    // Called when the node enters the scene tree for the first time.
    public override void _Ready()
    {
    }

    // Called every frame. 'delta' is the elapsed time since the previous frame.
    public override void _Process(double delta)
    {
        if (Input.IsActionJustPressed("left"))
        {
            // 拿到场景树
            SceneTree st = GetTree();
            //跳转场景
            // st.ChangeSceneToFile("res://node.tscn");
            st.ChangeSceneToPacked(newScene);
        }

        if (Input.IsActionJustPressed("right"))
        {
            //实例化场景
            Node initNode = newScene.Instantiate();
            GetTree().CurrentScene.AddChild(initNode);
        }
    }
}
node
此刻查看我们的运行场景
按下右键 就能看到页面节点发生的变化, 就可以看到效果了 我们拿到了对应的节点

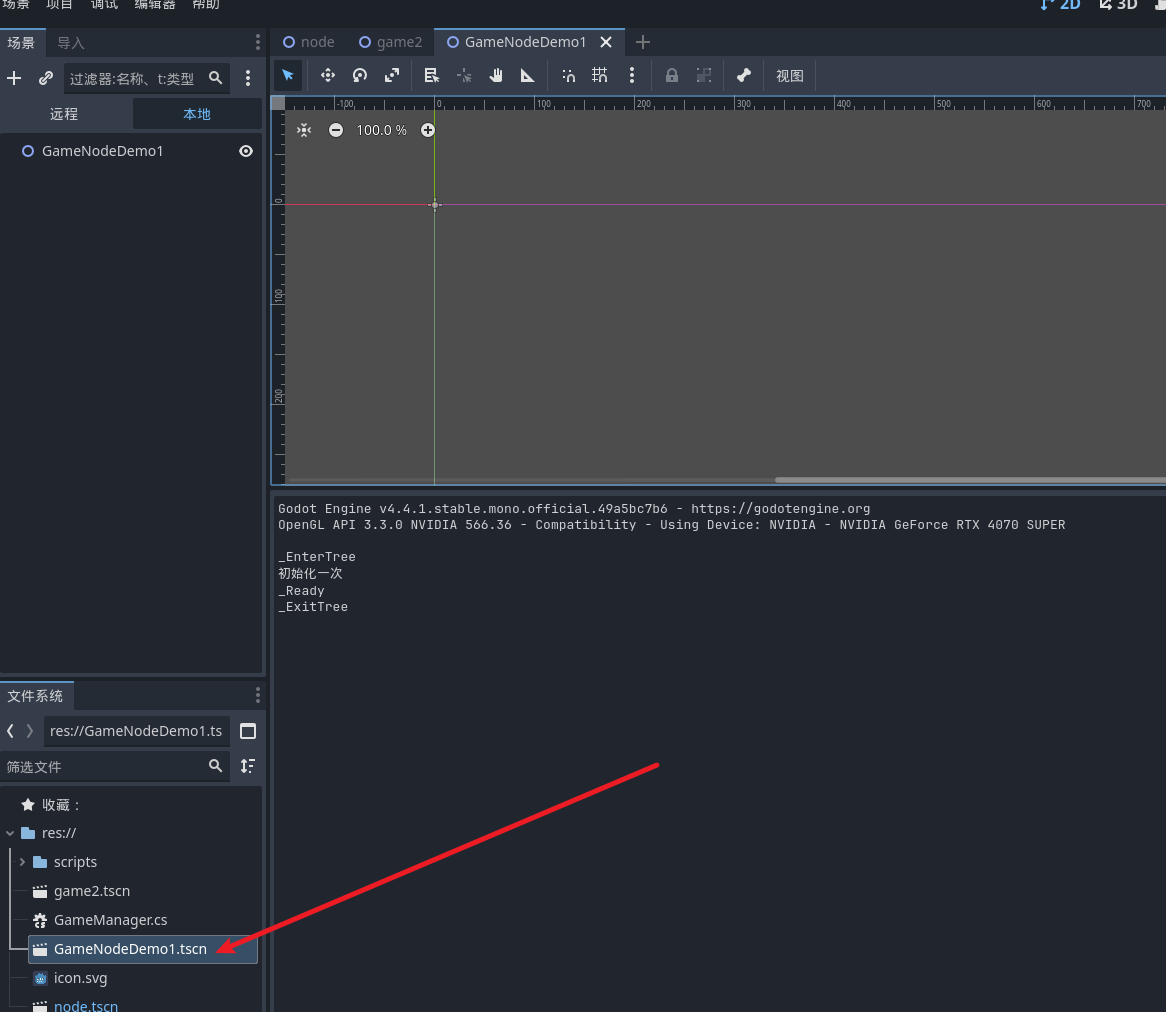
保证设定脚本任意场景都存活
创建一个管理新脚本,我们需要他一直存活在游戏的运行中,
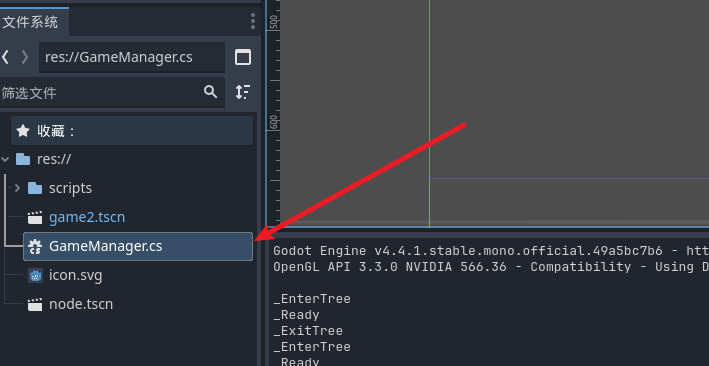
将我们的脚本挂在到项目设置的自动加载中, 这样我们就获得了一个随意切换场景并且保持存活的单利对象
using Godot;
using System;


//用于对游戏做一些设定的管理
public partial class GameManager : Node
{
    // Called when the node enters the scene tree for the first time.
    public override void _Ready()
    {
        GD.Print("初始化一次");
    }

    // Called every frame. 'delta' is the elapsed time since the previous frame.
    public override void _Process(double delta)
    {
    }
}
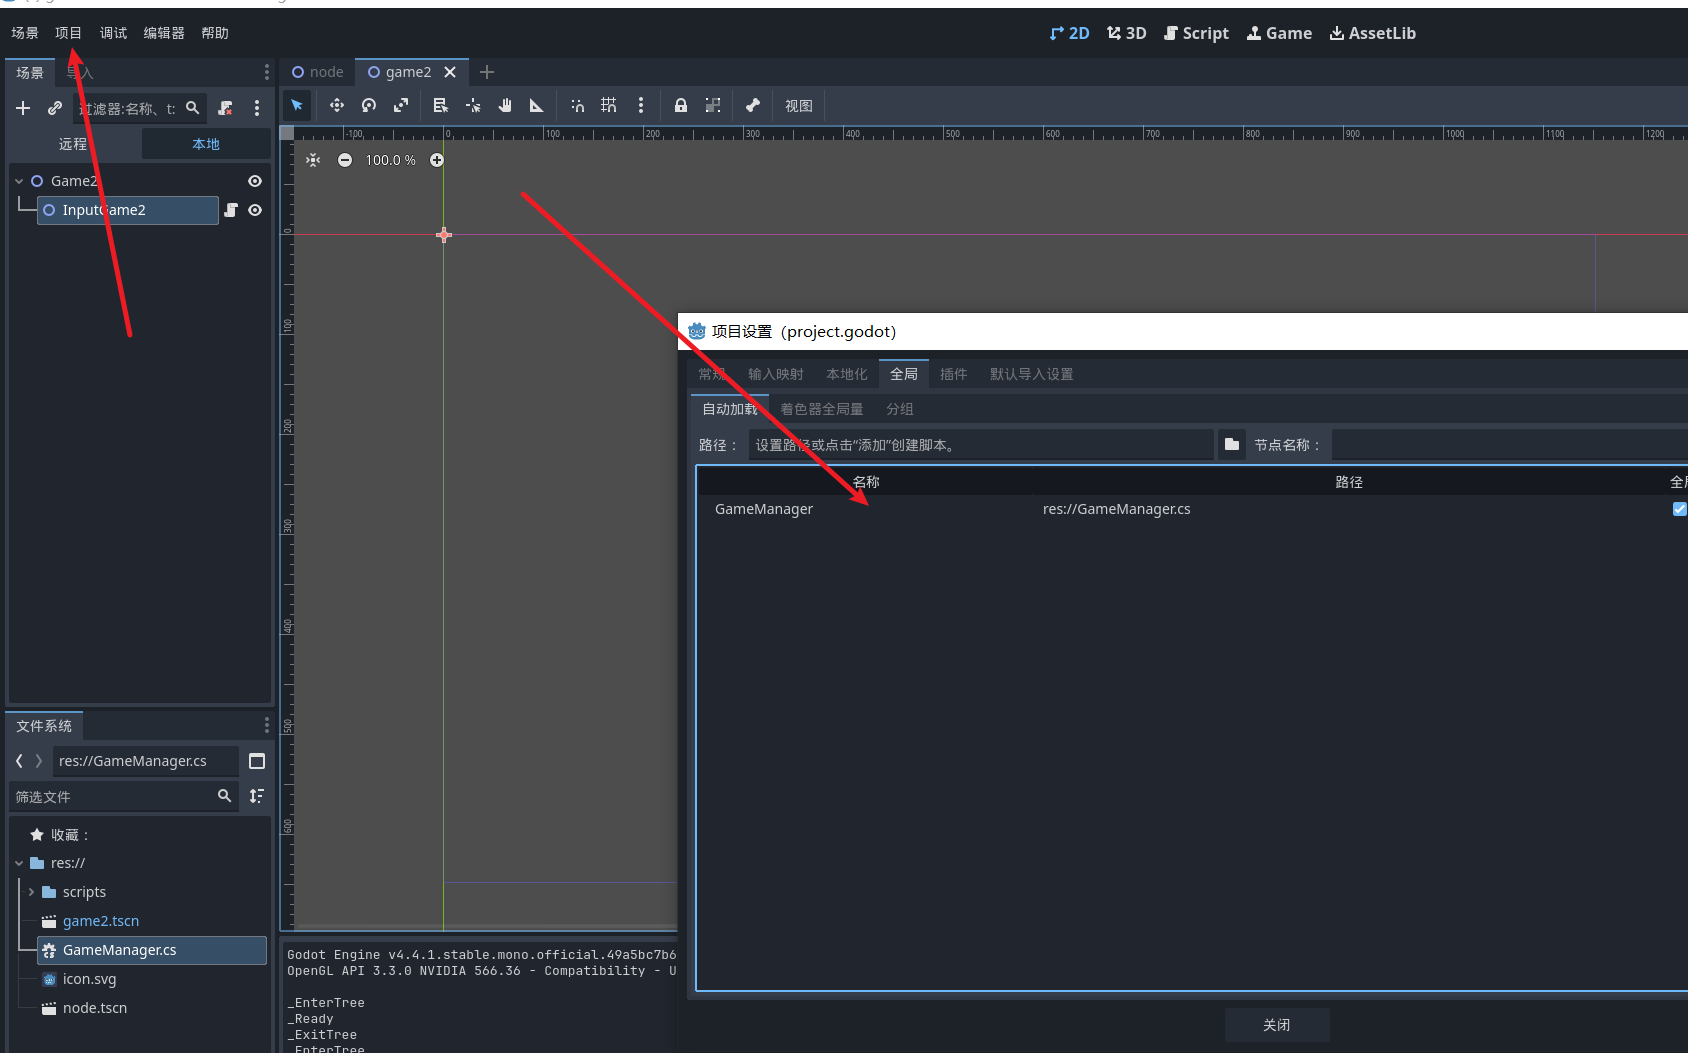
效果
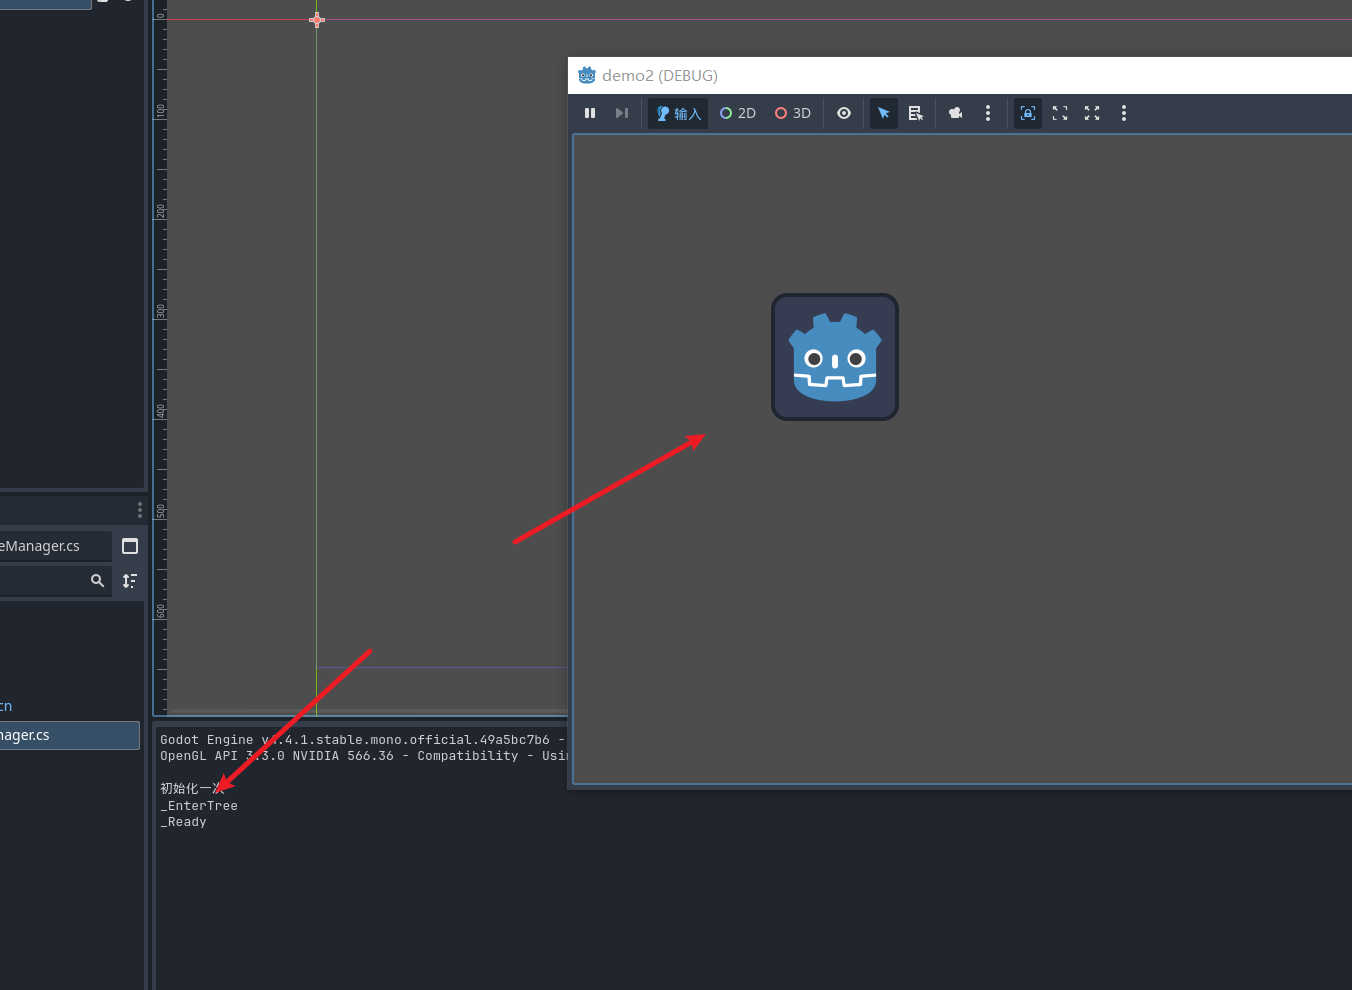
可以看到就算我切换场景 也不会多次触发ready方法 证明单例是没问题的 , 并且保证代码的存活
向量
向量在开发游戏的道路中尤为基础和关键 我们的未来游戏的方向 瞄准 视线 等等都和向量的使用息息相关
大多数的游戏引擎都封装有对应的函数 这里主要简单复习一下
- 标量 表示大小的量 如 88 99 100
- 向量 包含大小 也有方向 比如 前方 100m
- 向量的模: 只要大小 舍去方向
- 单位向量: 大小为1的向量
- 单位化: 把向量转换为单位向量的过程
向量的表示
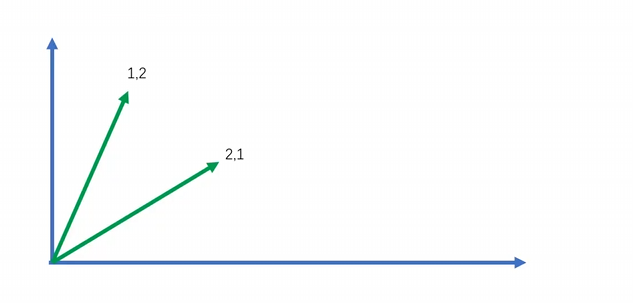
向量的计算
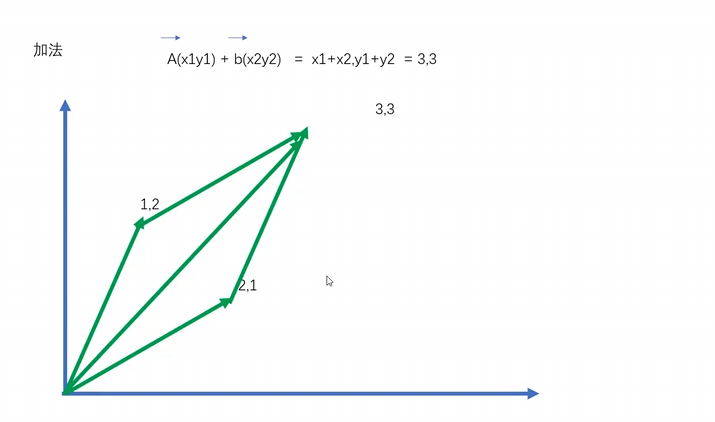
向量的加法
向量的加法计算思路很简单, 两个向量的起点链接 遵循起点做一个对角线就是结果 形状类似平行四边形
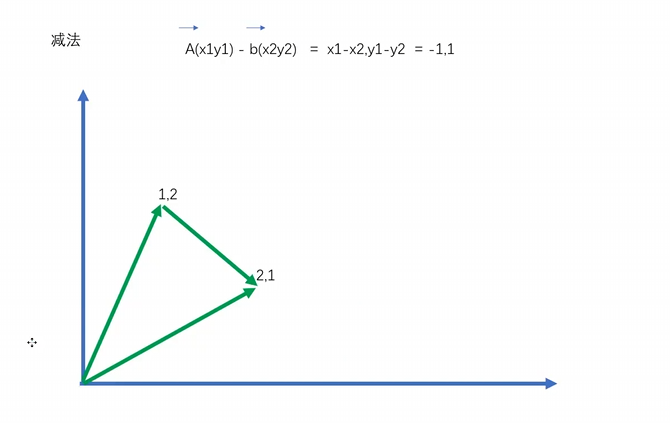
向量的减法
两个向量相减, 比如 a -b 获得的其实就是 从b指向a的向量 反之亦然
向量的点乘
得到两个向量的夹角
计算思路大致就是 $$ \vec{A} \cdot \vec{B} = x_1x_2 + y_1y_2 = n = |\vec{A}||\vec{B}|\cos\theta = \cos\theta $$
总结
到这里godot官方文档的渐进式内容就结束了 这里视频观看的是 bilibili Gamer飞羽的视频配合 c# 菜鸟文档+godot官方文档 接下来是其他内容的笔记
节点动画
使用的是 gamer飞羽公众号提供的2d资源包 地址: https://pan.quark.cn/s/c4723f7548b0
认识动画与选项卡配置动画
新建项目 GameDemo1 并且将资源包加入其中 , 创建一个基础场景 并且创建一个精灵节点

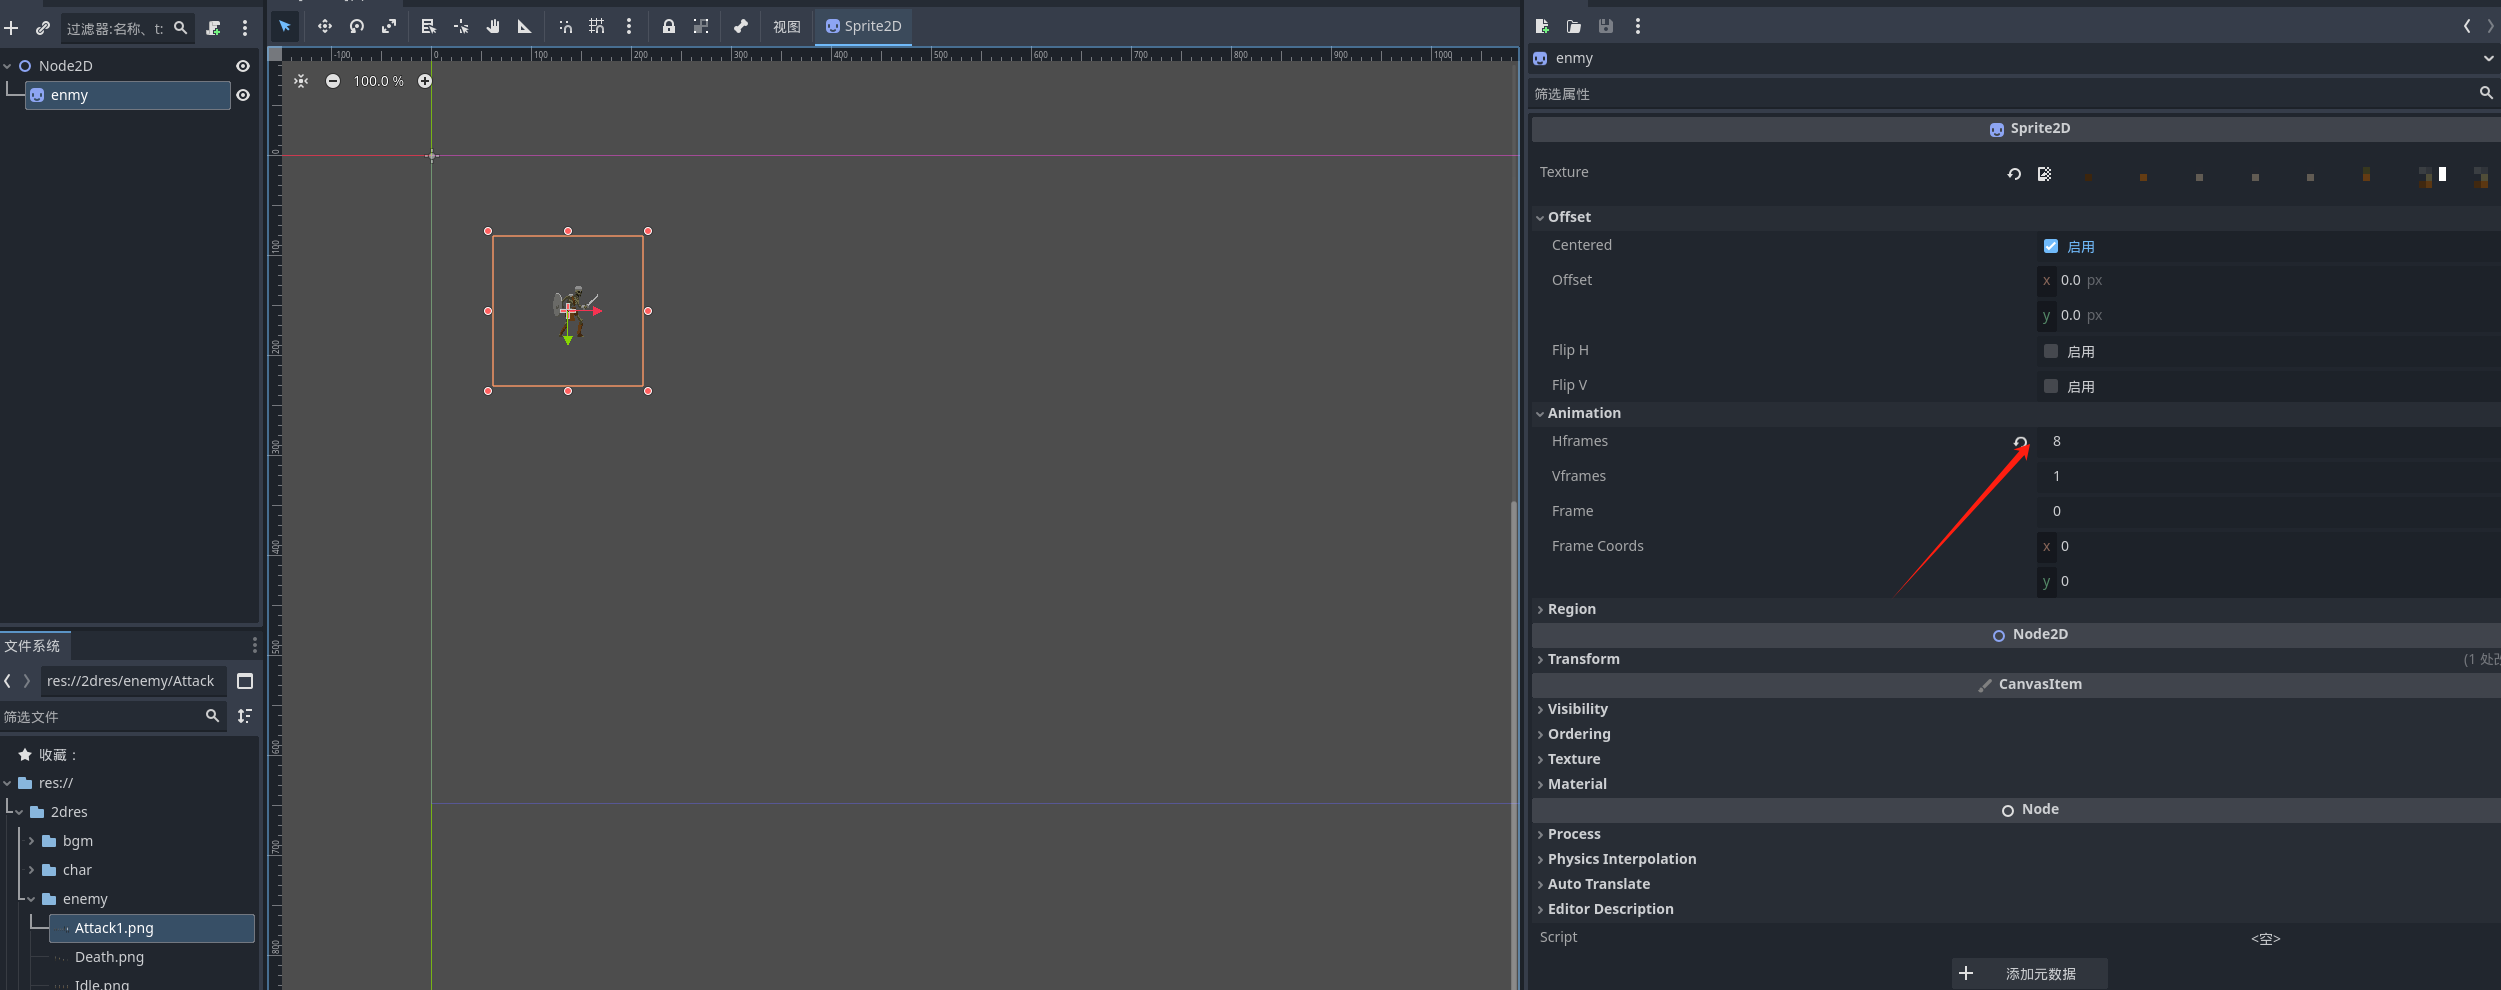
我们将frame设置为8 因为这个攻击的素材有八帧
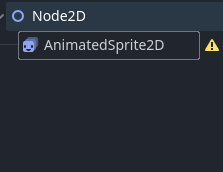
我们之前的教程有说过 并不会直接的在精灵节点中做动画相关的操作 这里我们选择 动画精灵节点
在选项卡里单击就可以创建动画了
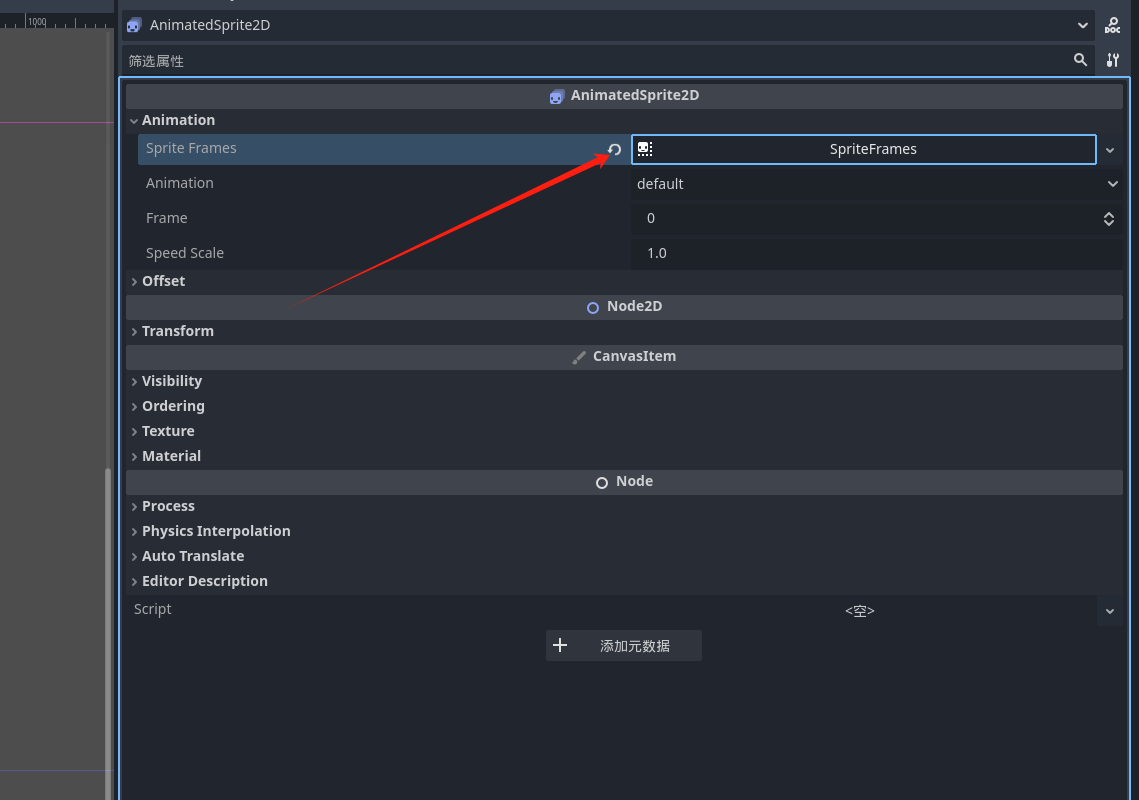
我们可以自行的修改状态 比如动画的名称 帧数 倍速等

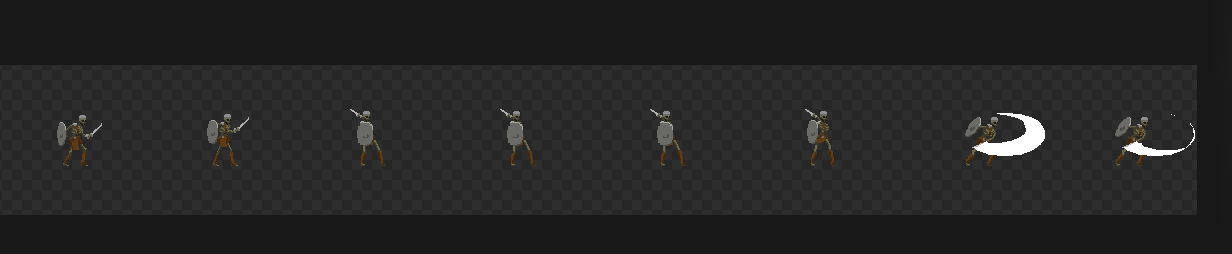
控制台的按钮都有悬浮的介绍 不过多的介绍,当我们资源有很多帧的时候 我们可以选择从精灵表中加入动画资源
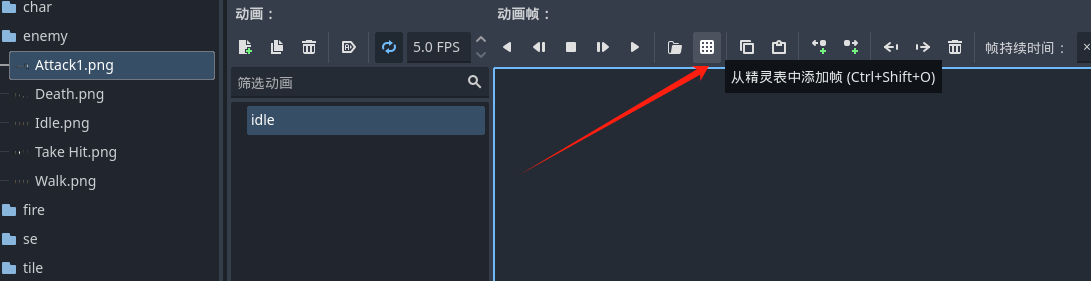
可以很明显的看到 我们的这个资源是水平 8 帧 垂直 1帧 设置后之后 可以通过选择帧数来创造动画
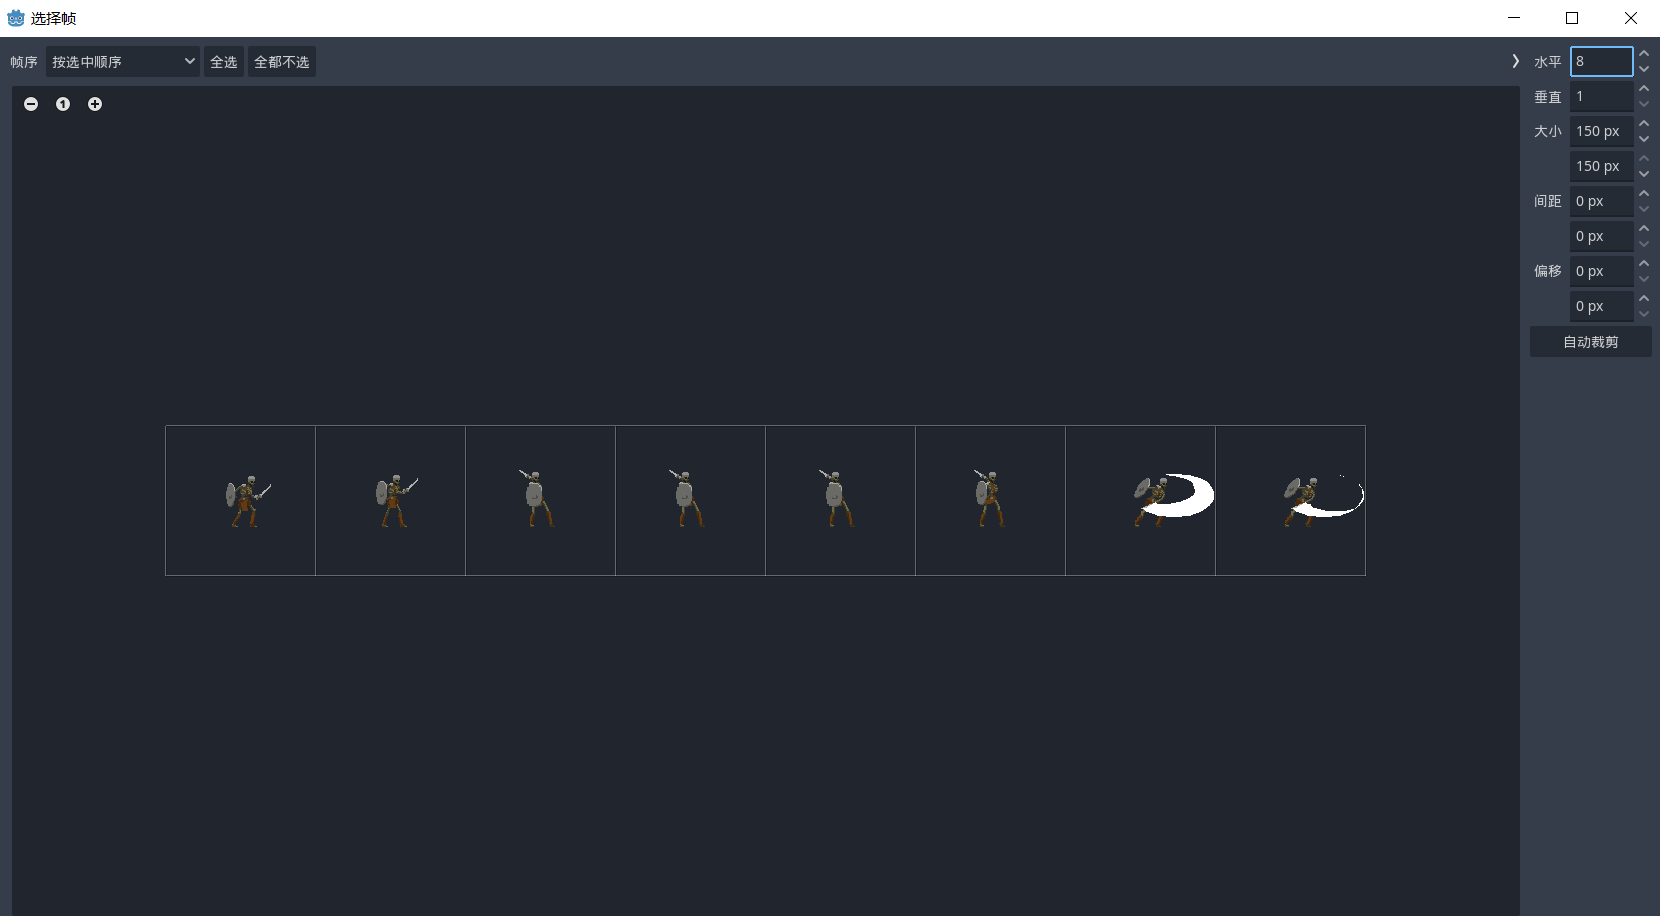
这里选择资源中的dle动画 设置好帧数之后 作为站立 循环5帧播放 设置好点击播放 就可以看到我们的小骷髅人动了
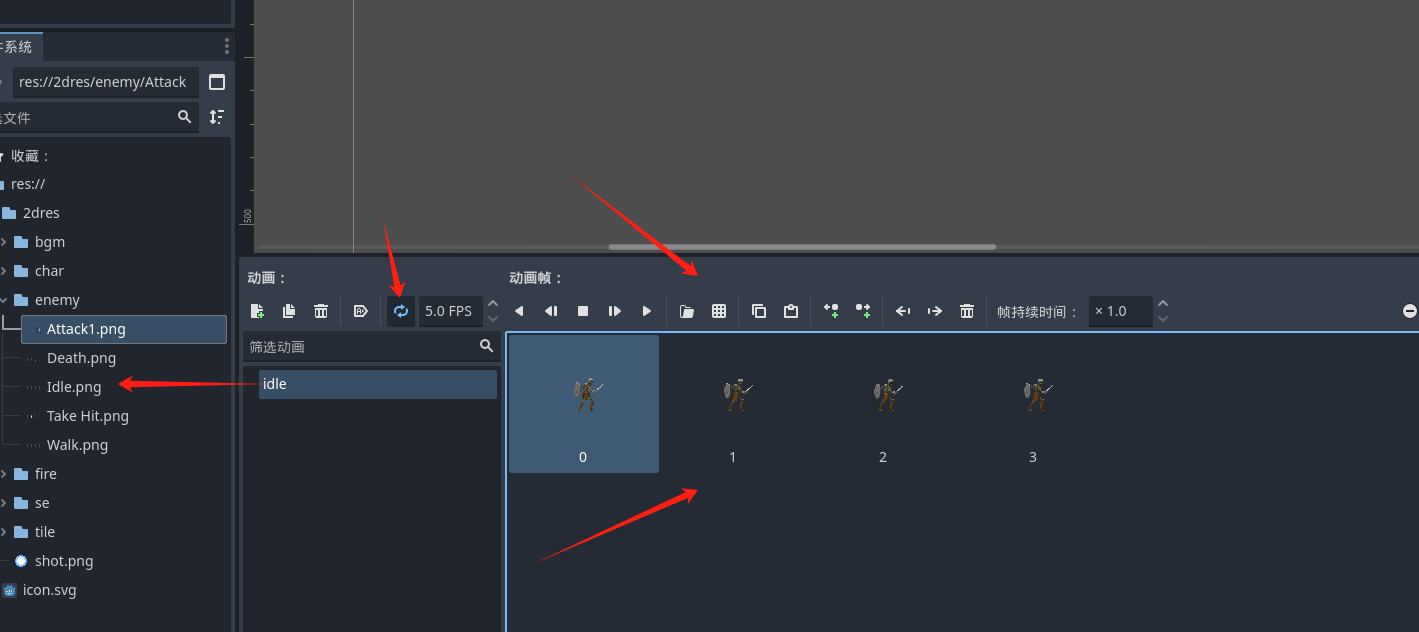
其他的动画也按照 idle的思路创建
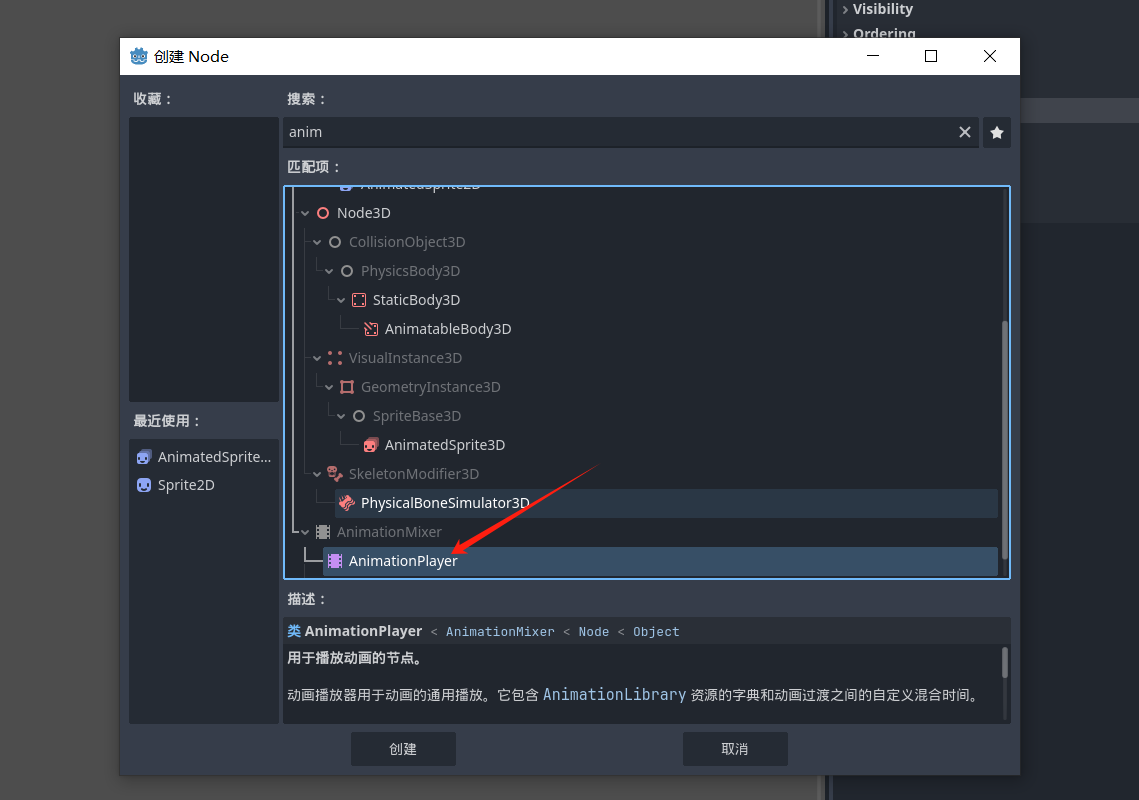
使用AnimationPlayer 来使用动画 这个动画节点支持我们使用动画轨道
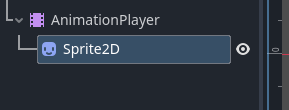
给精灵节点添加一个纹理
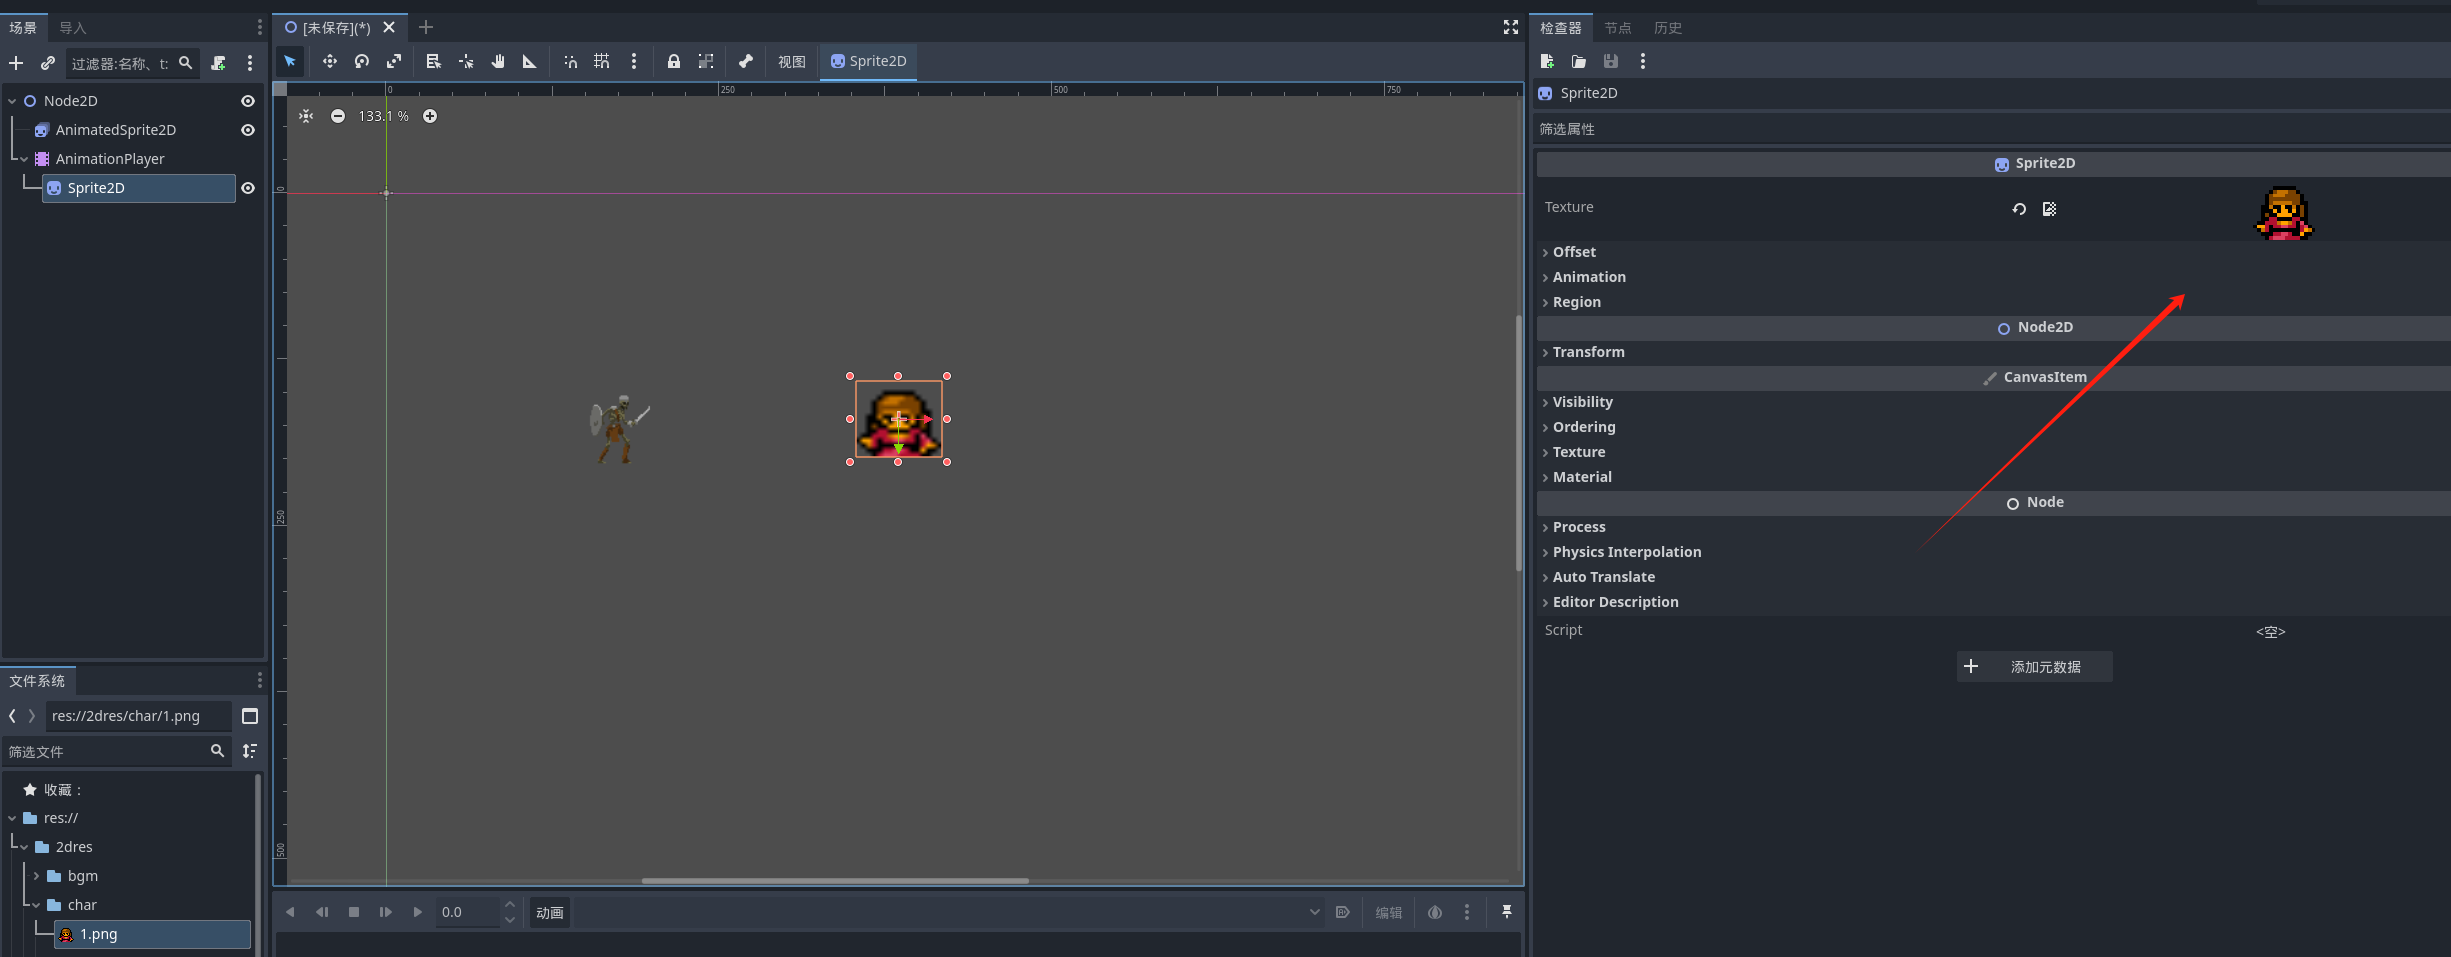
然后创建动画轨道 我们可以通过轨道来播放
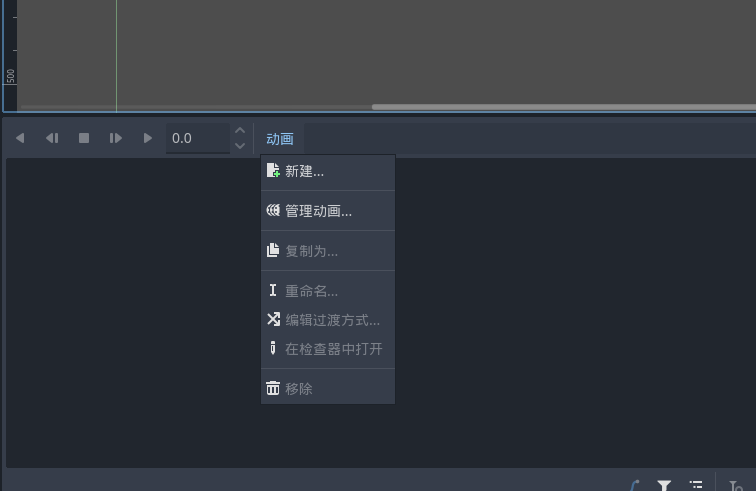
选择节点之后 我们会发现和之前的动画节点是不一样的 这里给我们提供了轨道的选项
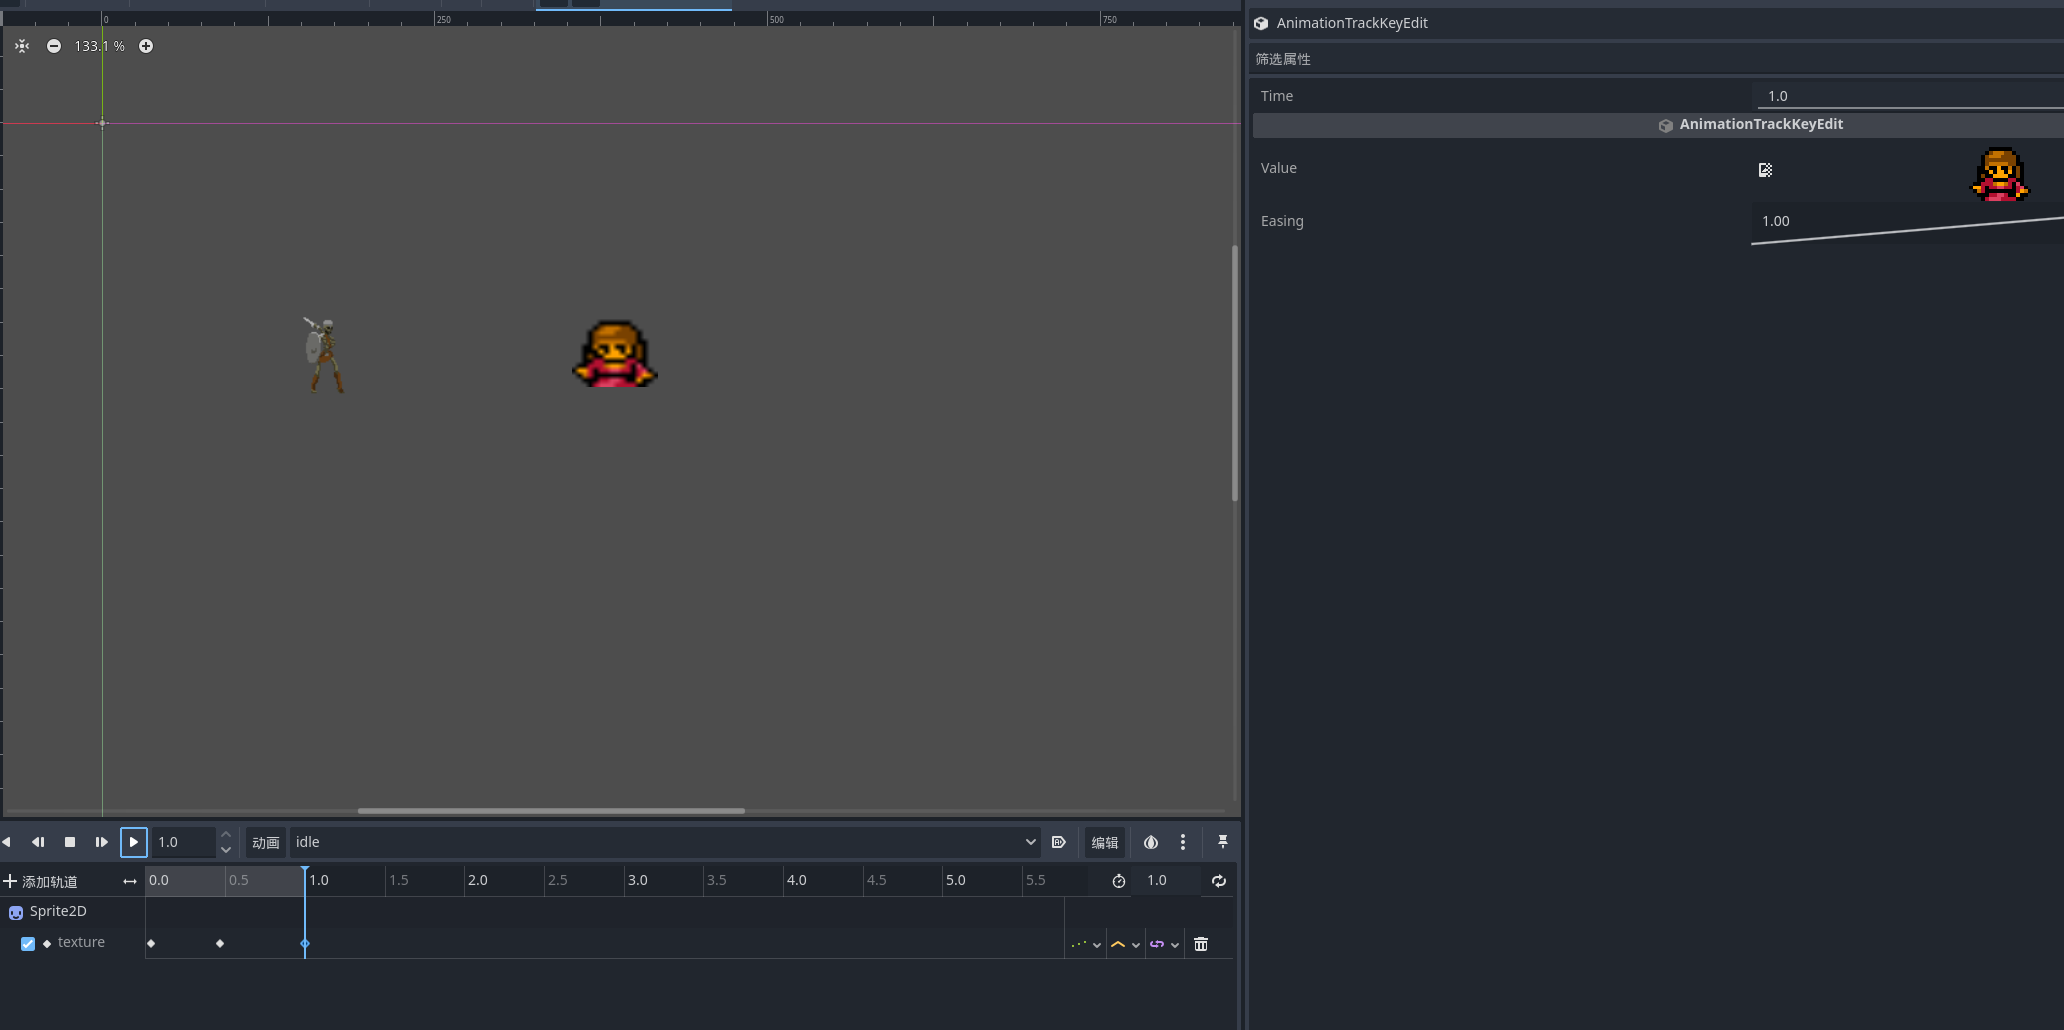
新建一个 idle动画
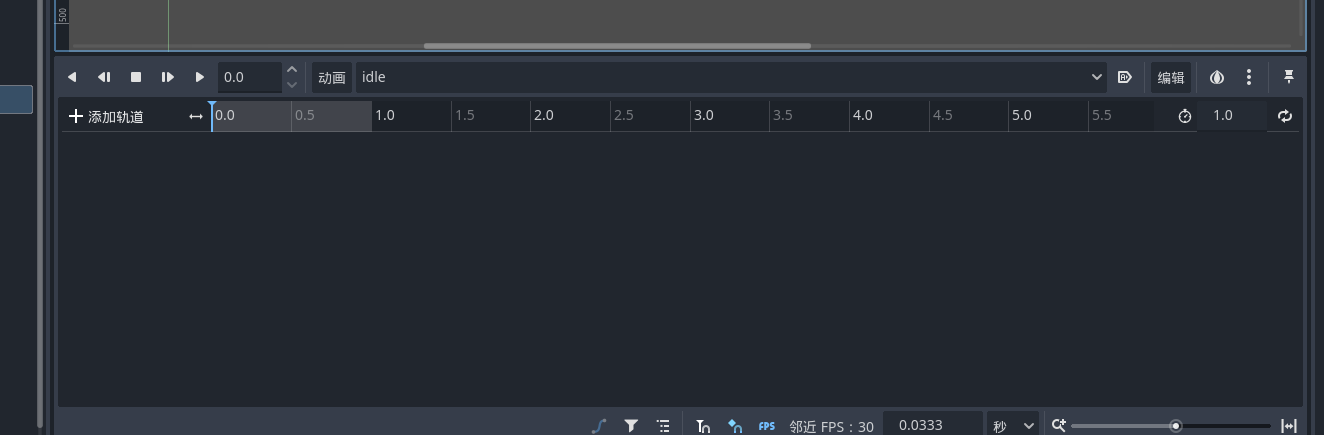
我们可以通过添加轨道来选择节点并且设置关键帧 添加属性轨道
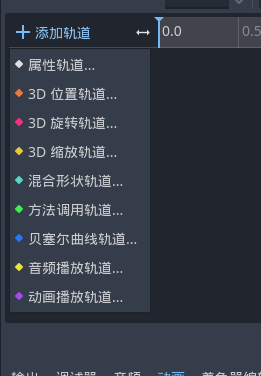
我们可以通过右键 打下关键帧 并且在不同关键帧使用不同的纹理 就可以看到变化 我们可以设置选中节点的所有属性加入到这个轨道中 很有意思
2D光照
全局光照
godot给我们2d也提供了具备光照的节点 这是全局性的光照

效果
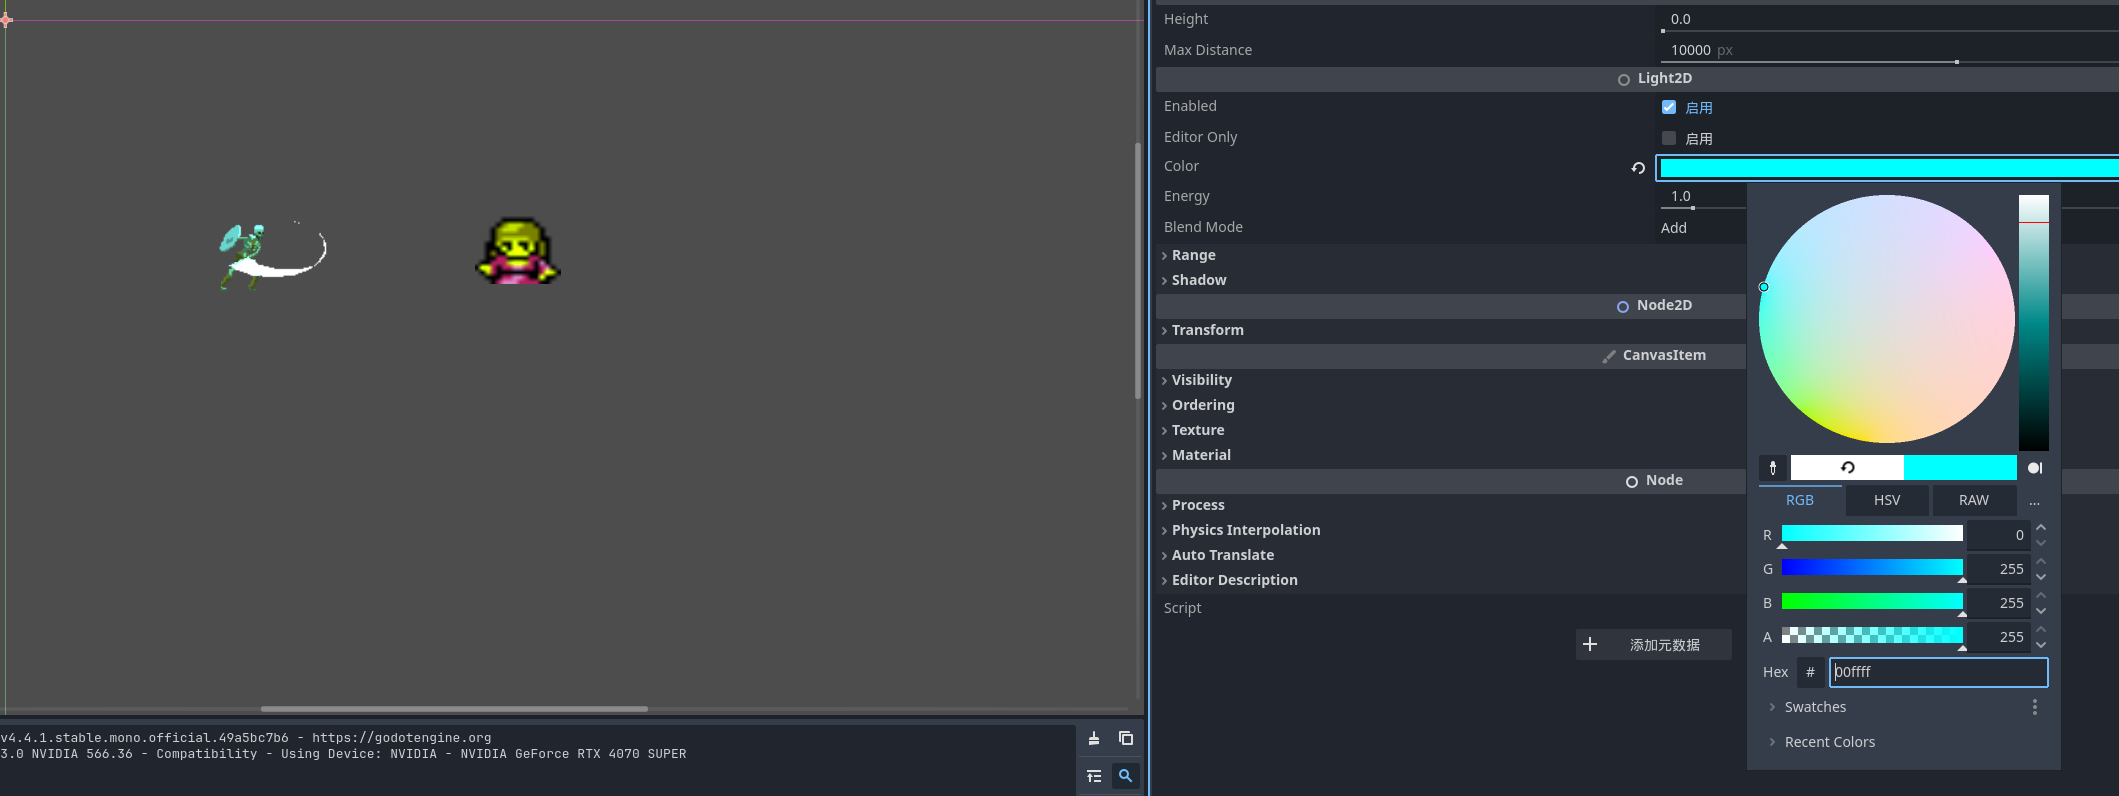
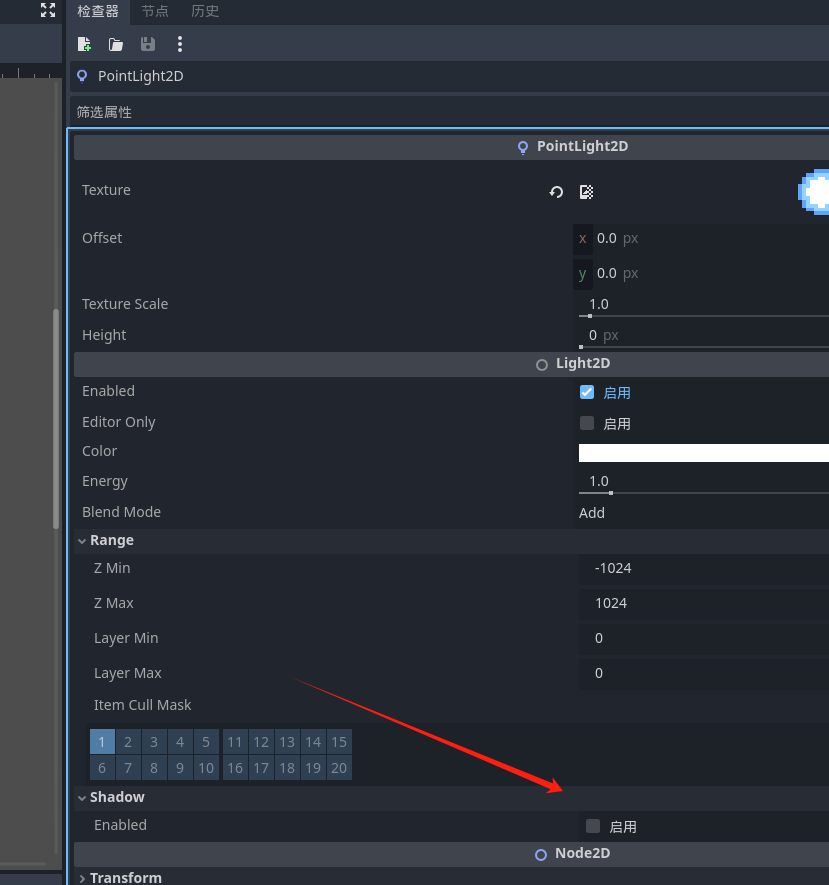
点光源
PointLight2D 是点光源 我们给他加入一个纹理让他有体积 方便查看效果 可以看到在点光源的范围中的小骷髅会有被光照的感觉
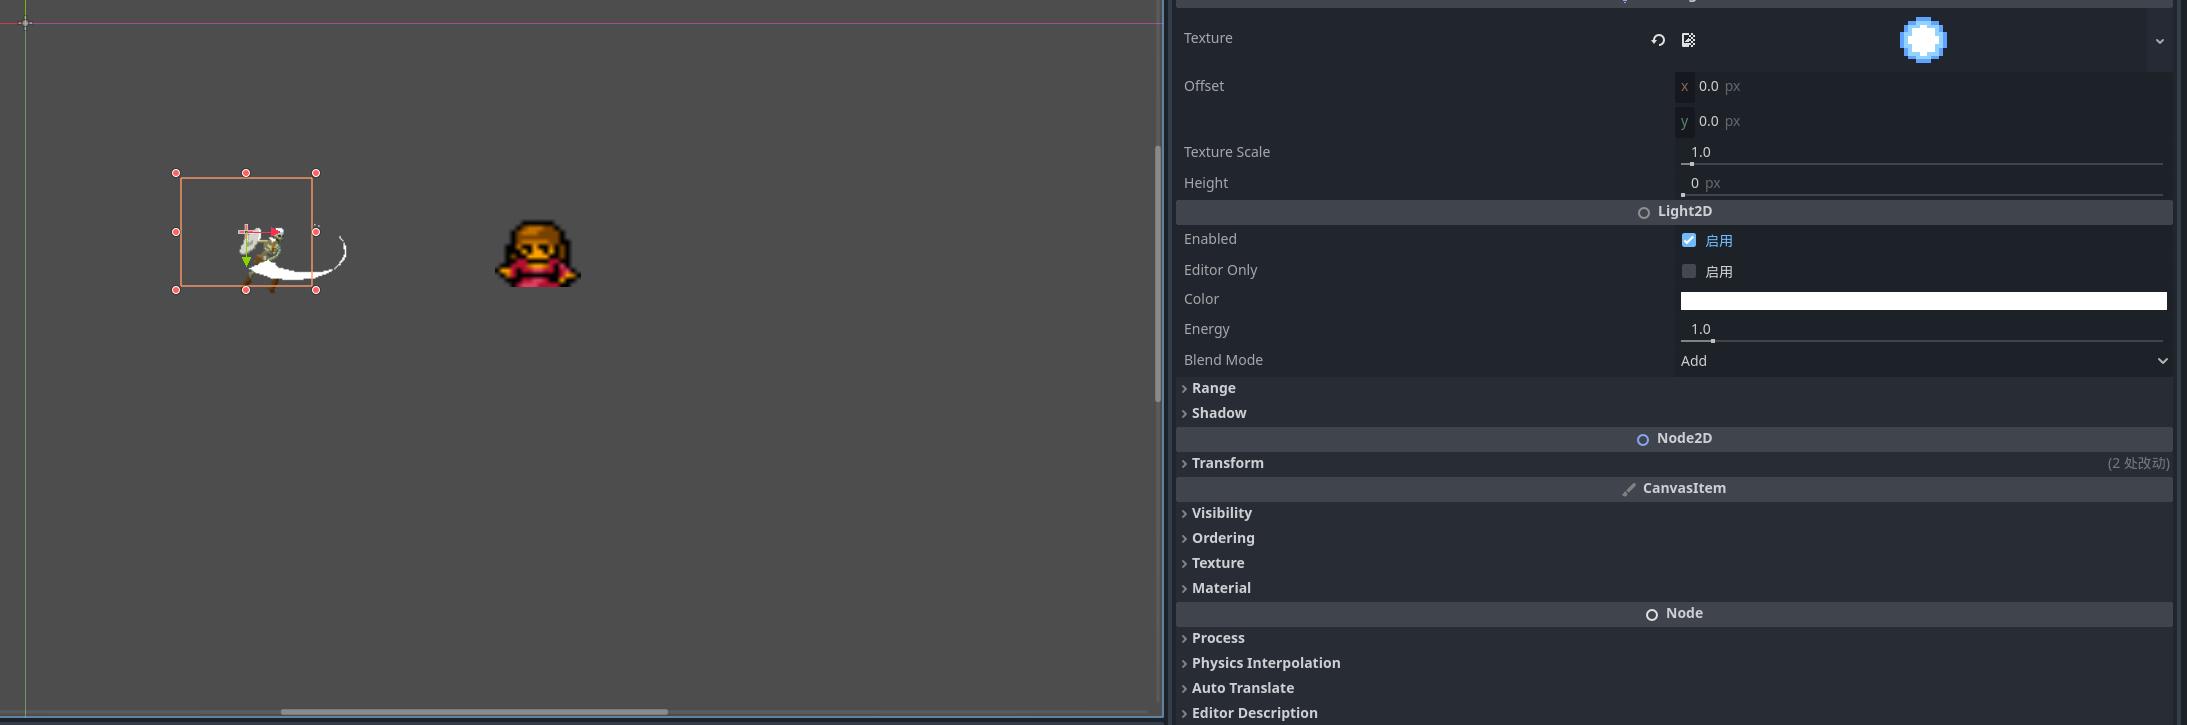
我们可以通过设置精灵的灯光遮罩层数 来选择哪个节点可以被光照
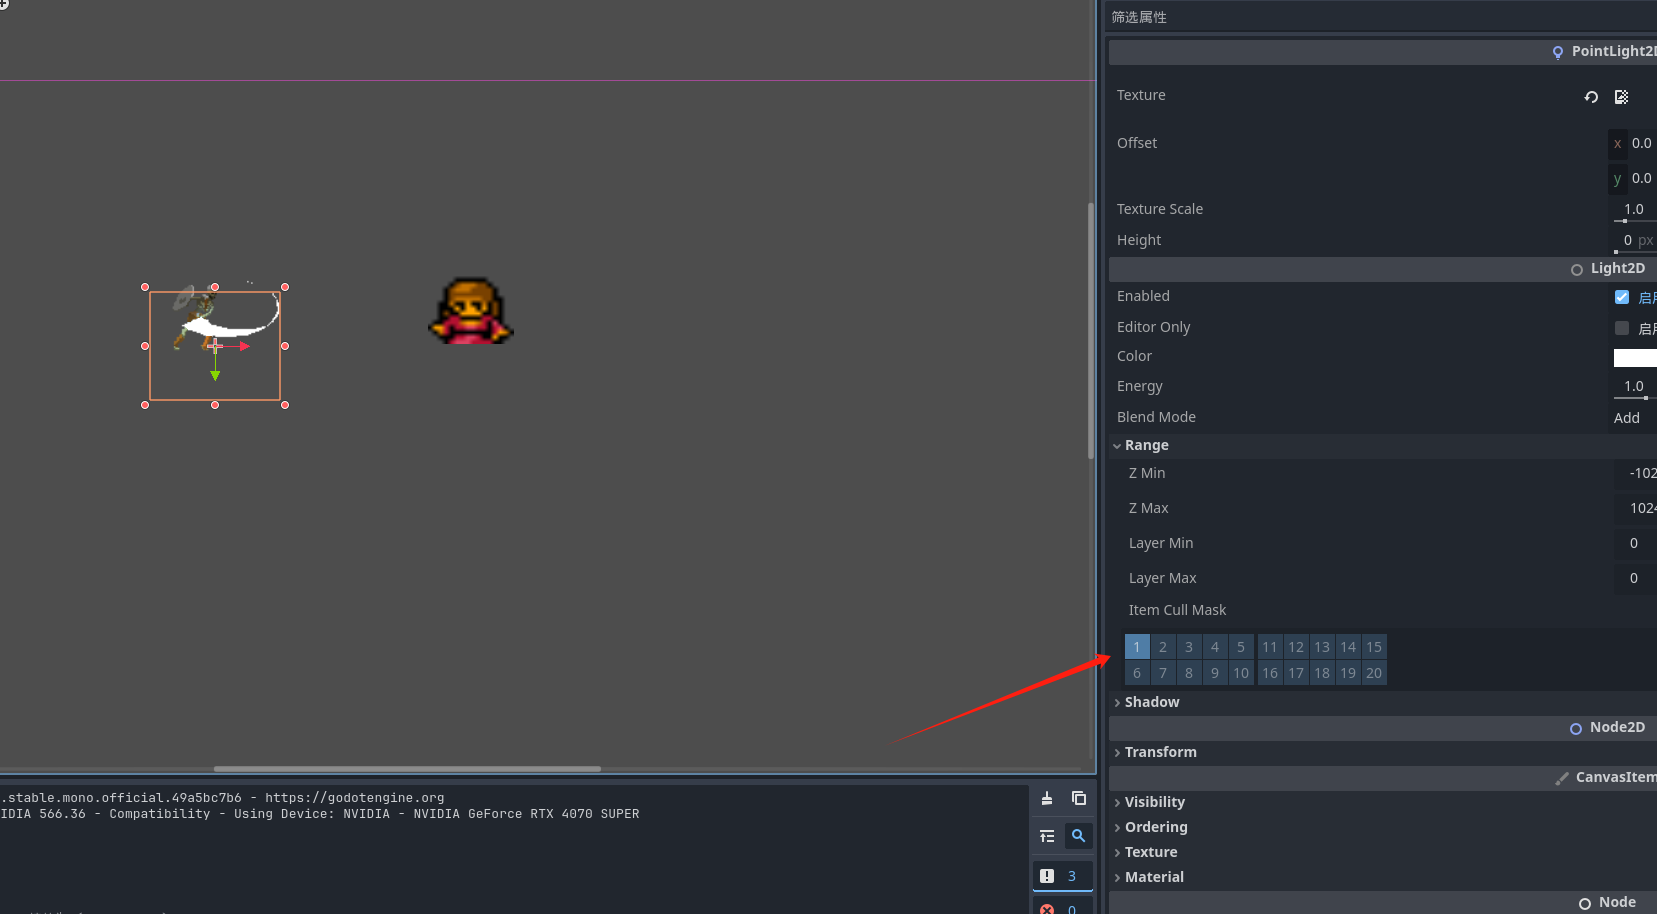
需要被光照的通道必须匹配才会被这个光源照到
阴影效果
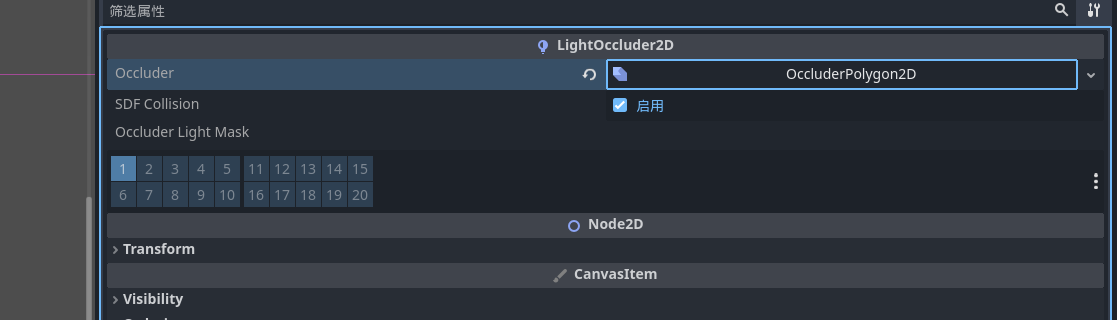
首先我们要能被光照到才能有阴影 这里我们创建一个遮罩节点
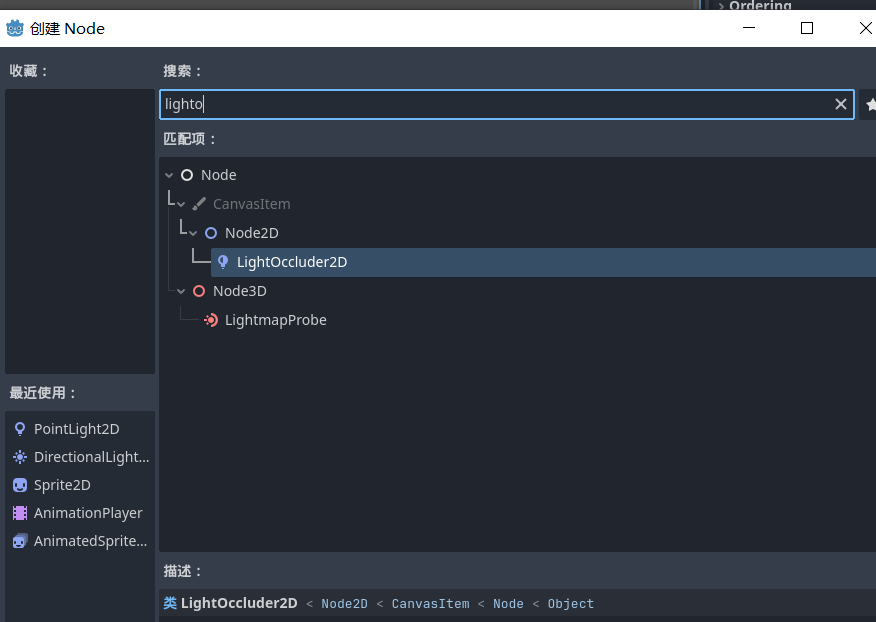
创建遮罩体积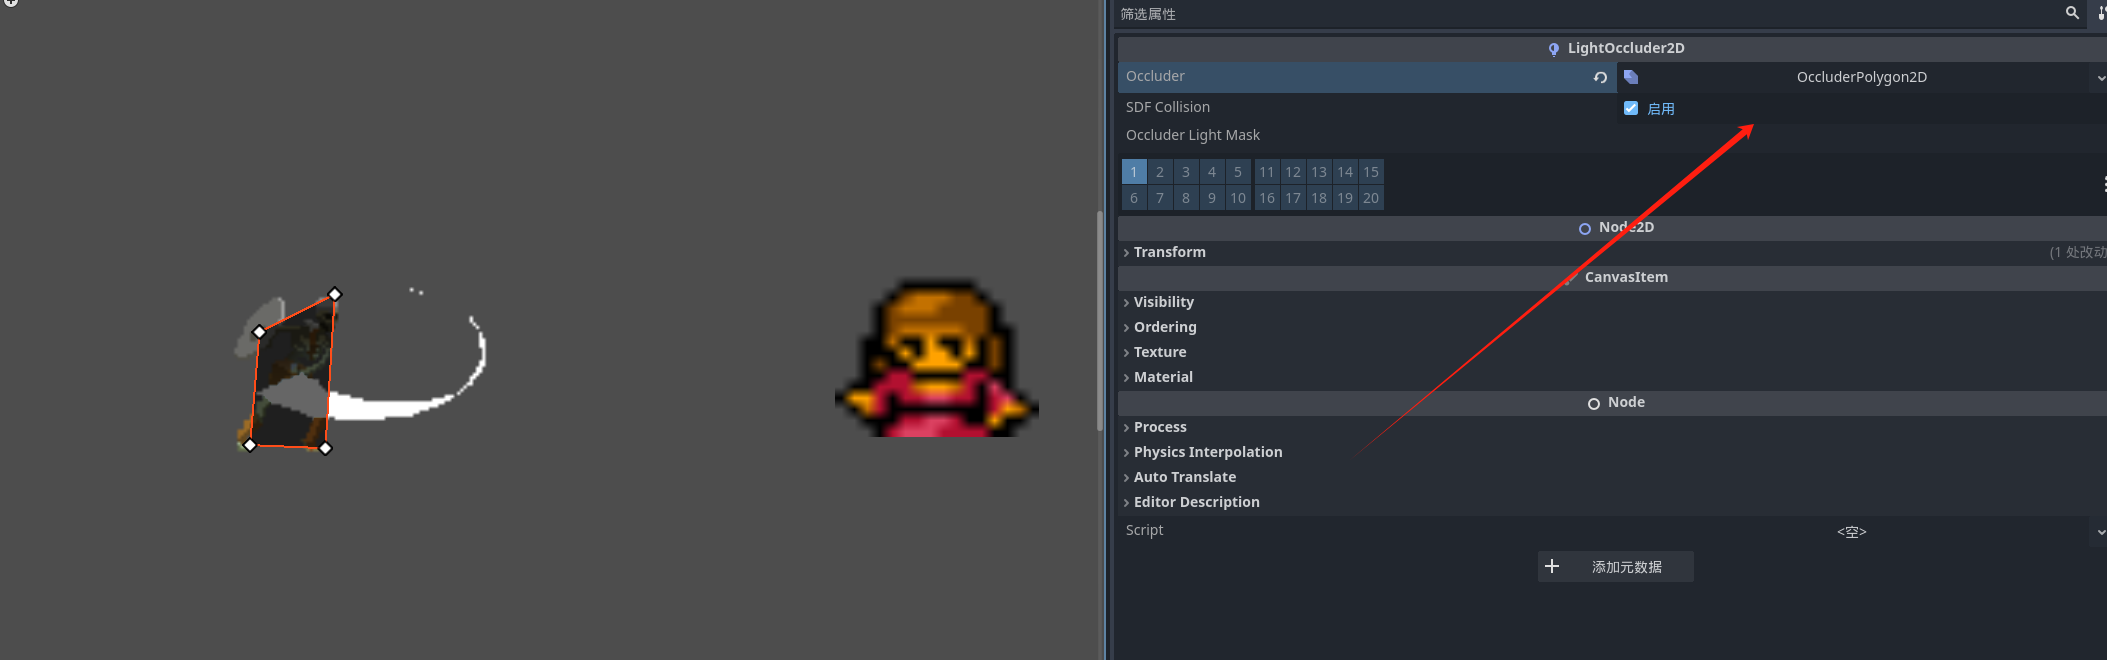
在光源这里开启支持阴影,之后就可以看出来我们的阴影效果了
同样的我们障碍物和阴影的层数也要相同才可以展示

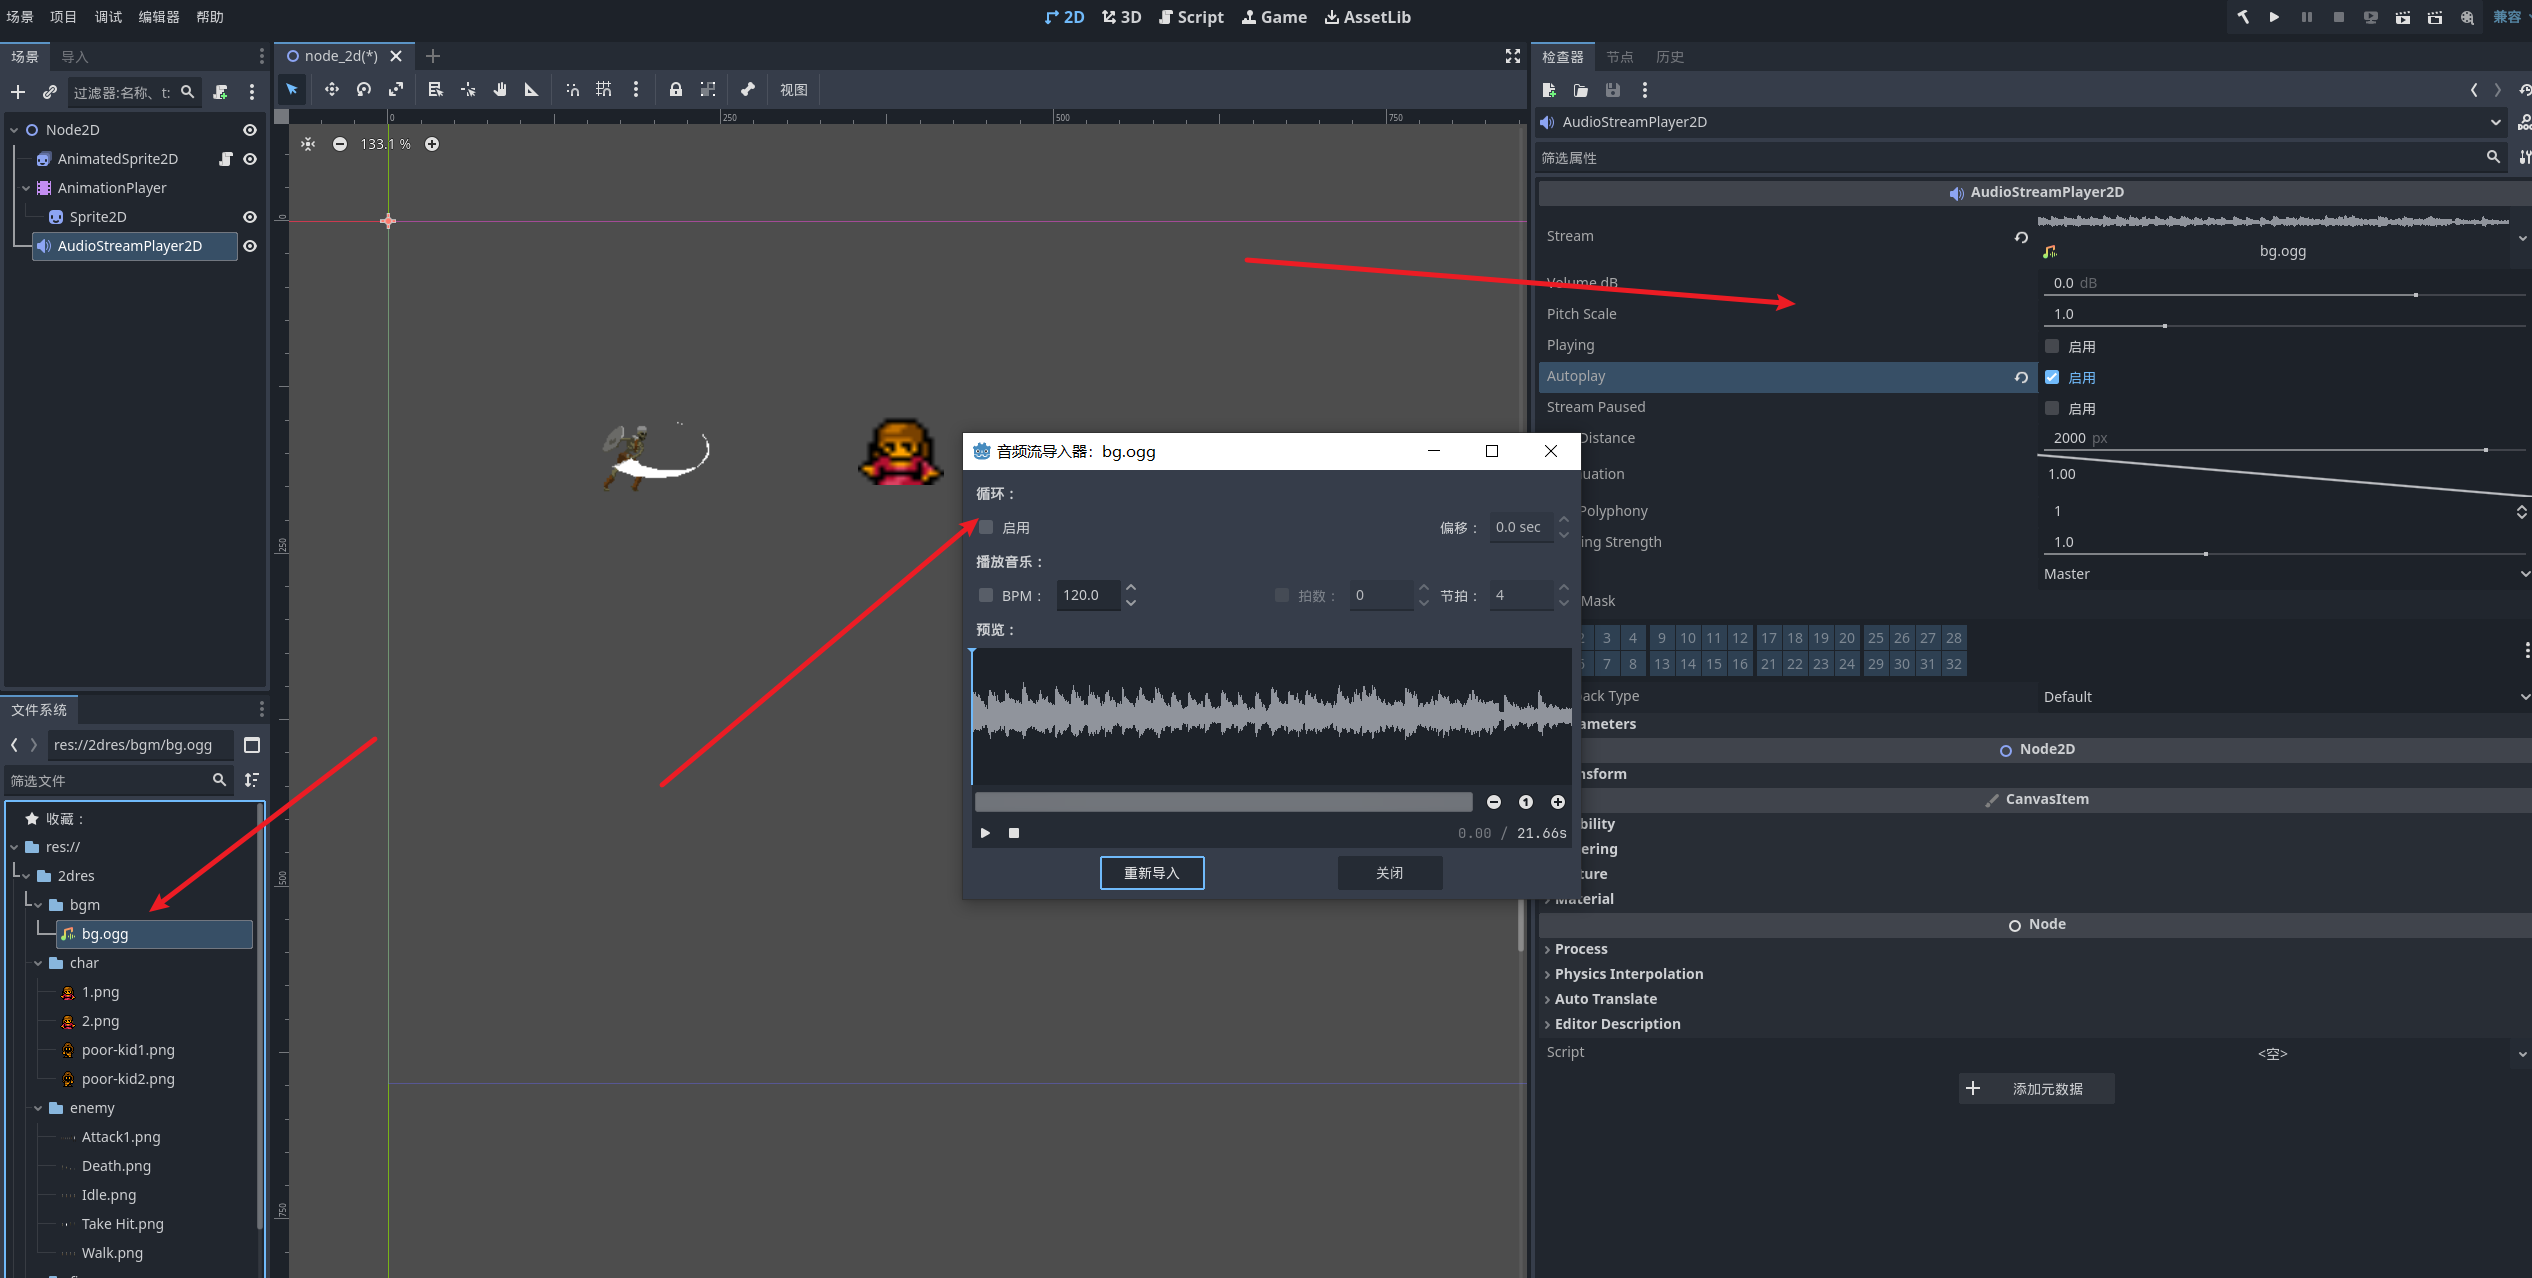
音频
我们可以通过audioStreamPlayer2D节点来播放音频
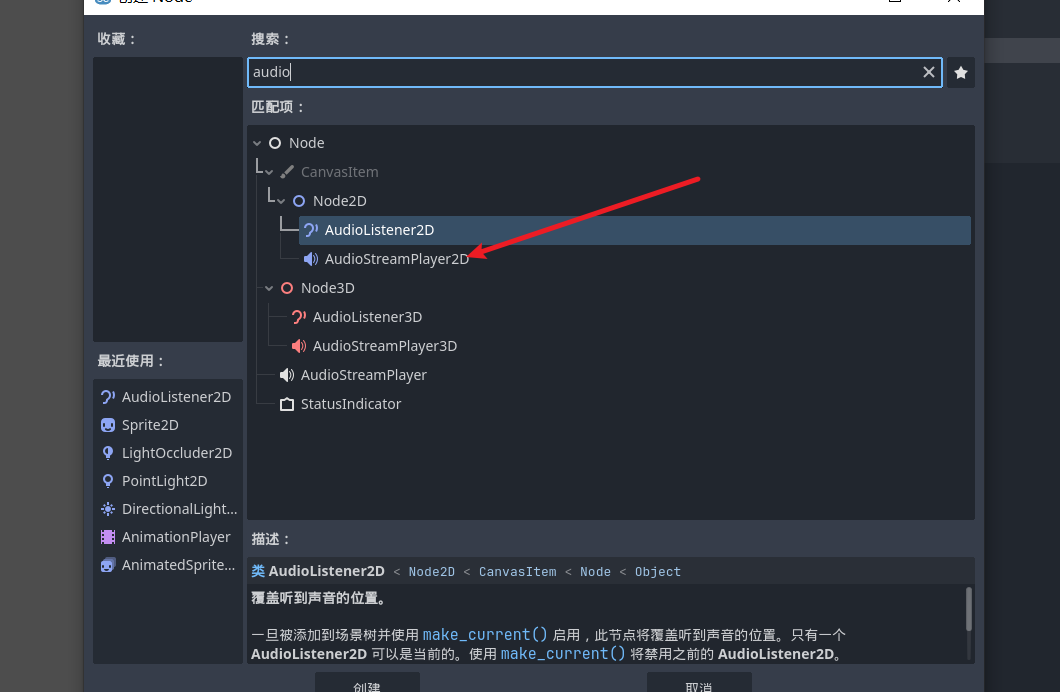
我们可以在配置面板对音频进行一些设置 也可以在资源栏右键音频对音频进行一些设置
用代码来配置音频
创建一个精灵节点 加上一个脚本 然后我们希望在创建的时候播放音频
public partial class audioNode : Sprite2D
{
	private AudioStreamPlayer audioPlayer;
	//我们希望初始化这个节点的时候 就播放音乐
	public override void _Ready()
	{
		audioPlayer = new AudioStreamPlayer();
		this.AddChild(audioPlayer);
		//加载音频
		AudioStream audioStream = GD.Load<AudioStream>("res://2dres/bgm/bg.ogg");
		audioPlayer.Stream = audioStream;
		audioPlayer.Play();
	}
}
当然我们也可以通过 [EXPORT]的方式直接在godot配置版加入音频
碰撞
在游戏中我们经常的会需要去处理碰撞 这里我们来学习godot 开发游戏中最基础的碰撞
基础碰撞
我们先创建两个节点用于演示
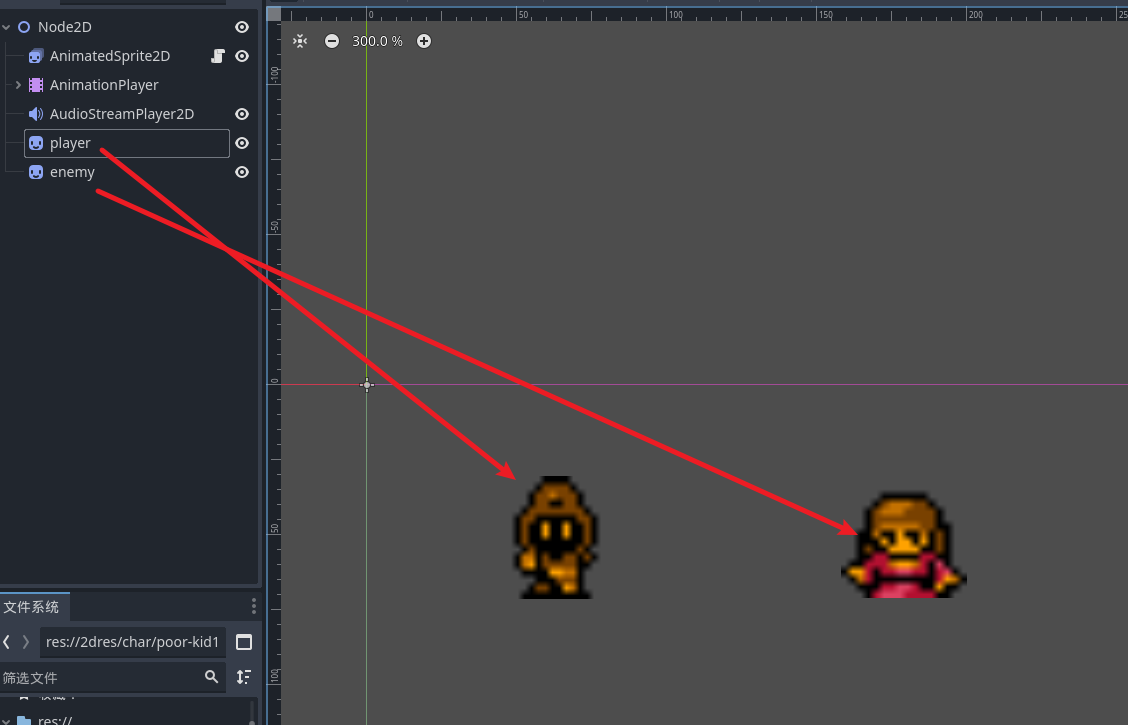
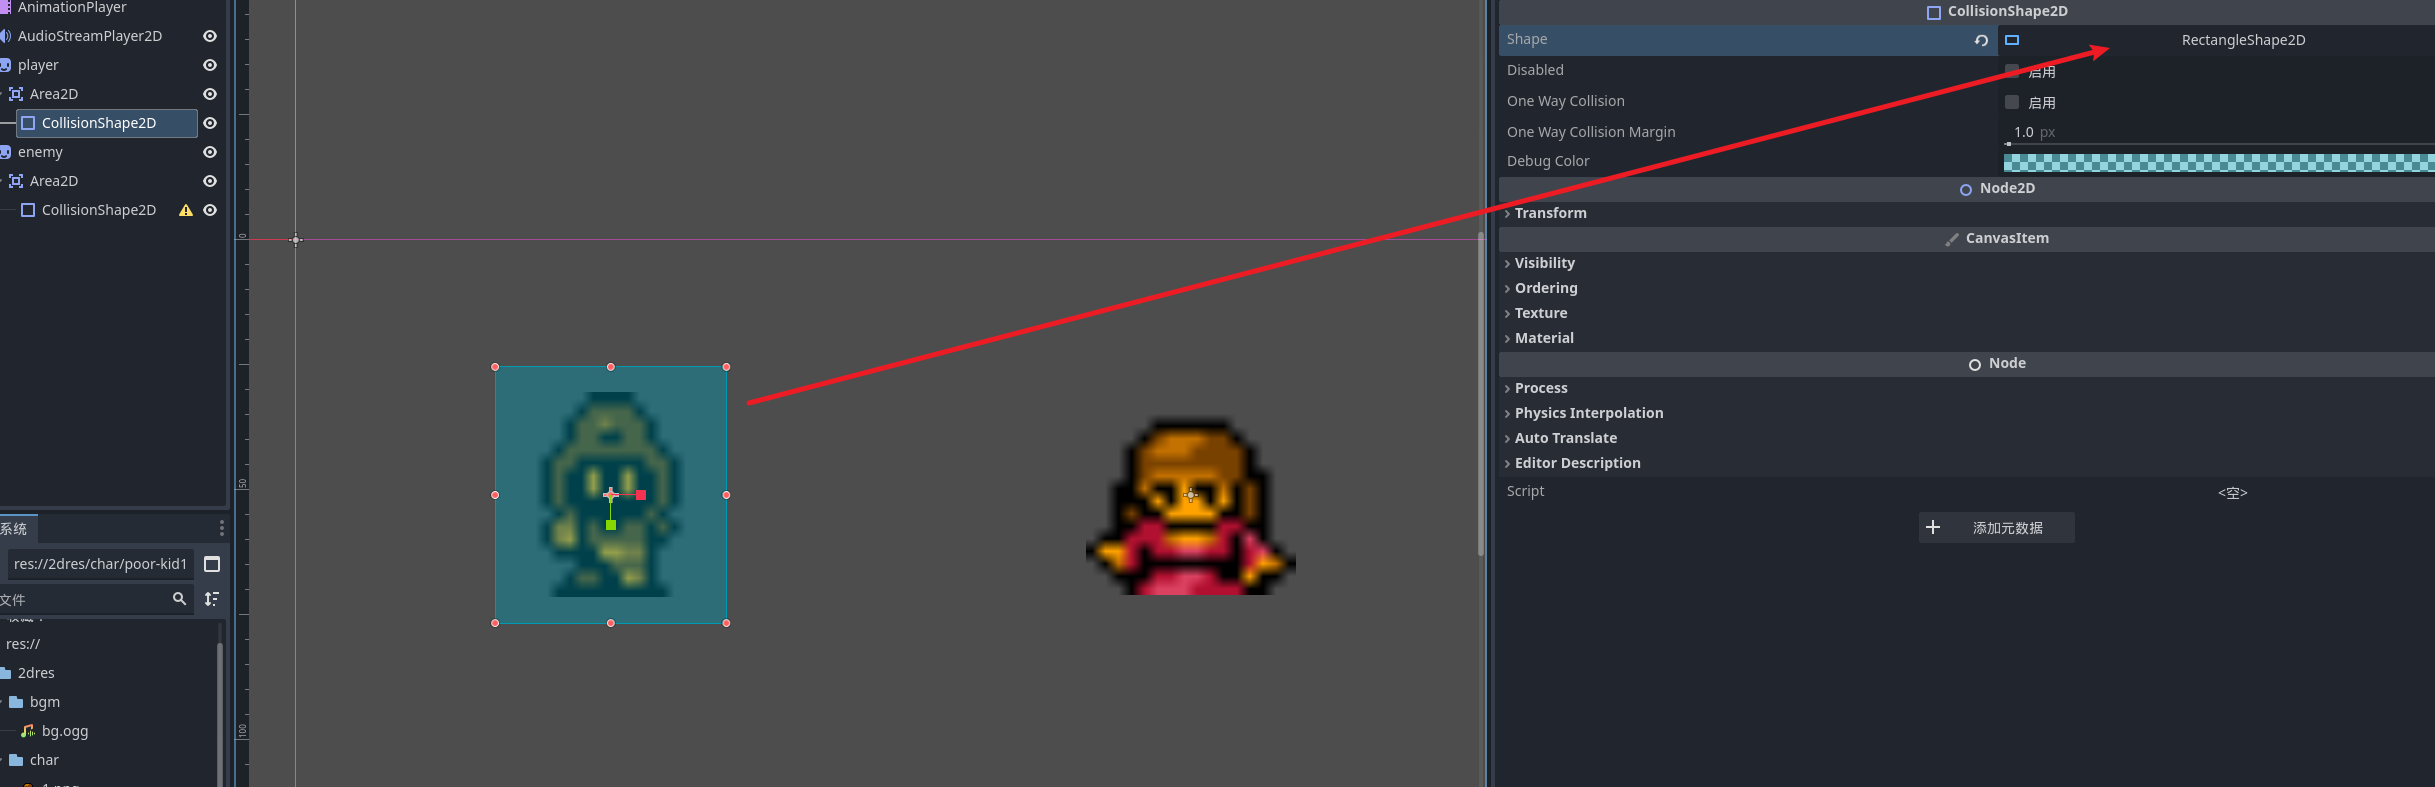
我们通过使用 area2d节点来为精灵节点设置碰撞区域, 接着去创建描述碰撞区域的子节点 collisionShape2d
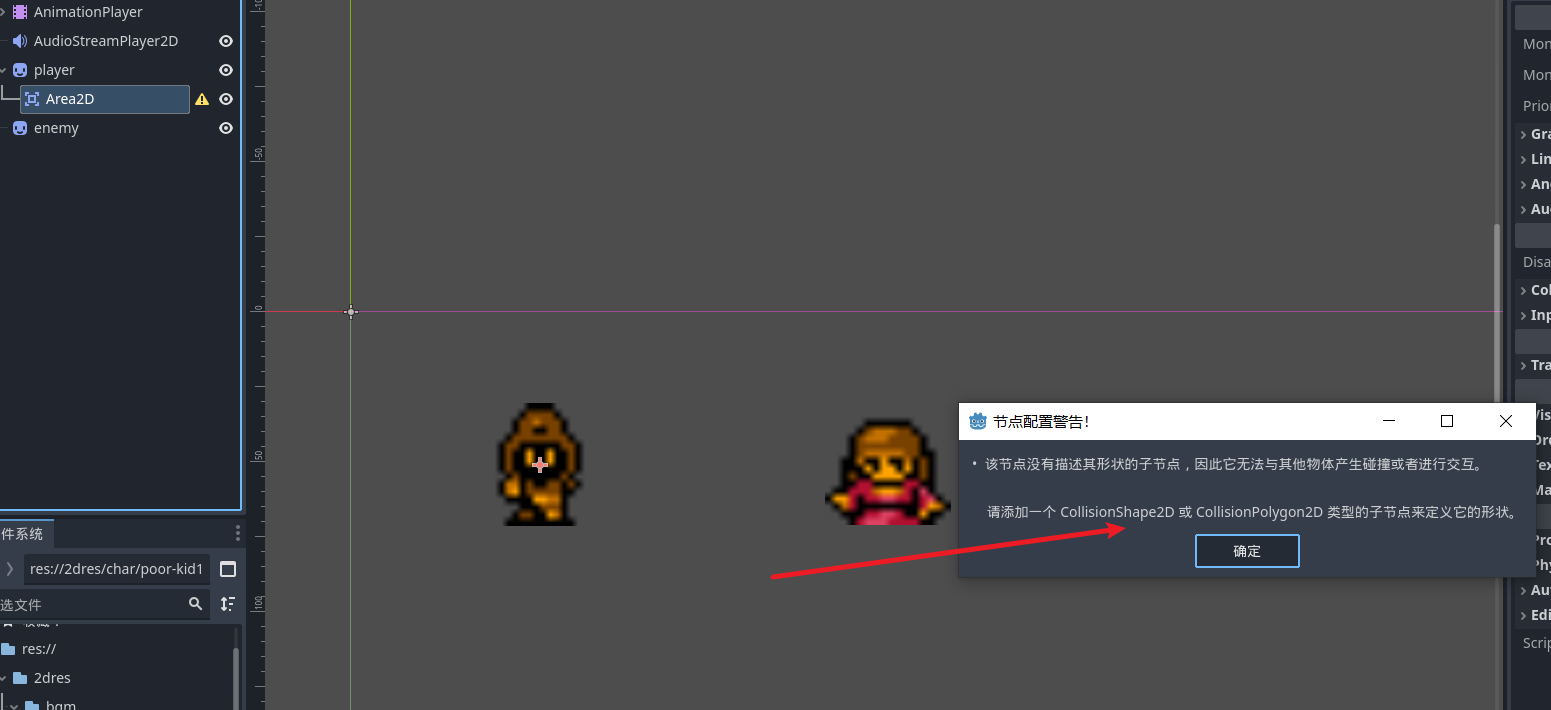
之后再配置卡中选择创建碰撞区域类型就完成碰撞区域的建立了
之后给敌人节点也配置好碰撞区域 打开area2d的配置卡信号区域 我们可以看到两个最常用的信号 用于显示碰撞和离开
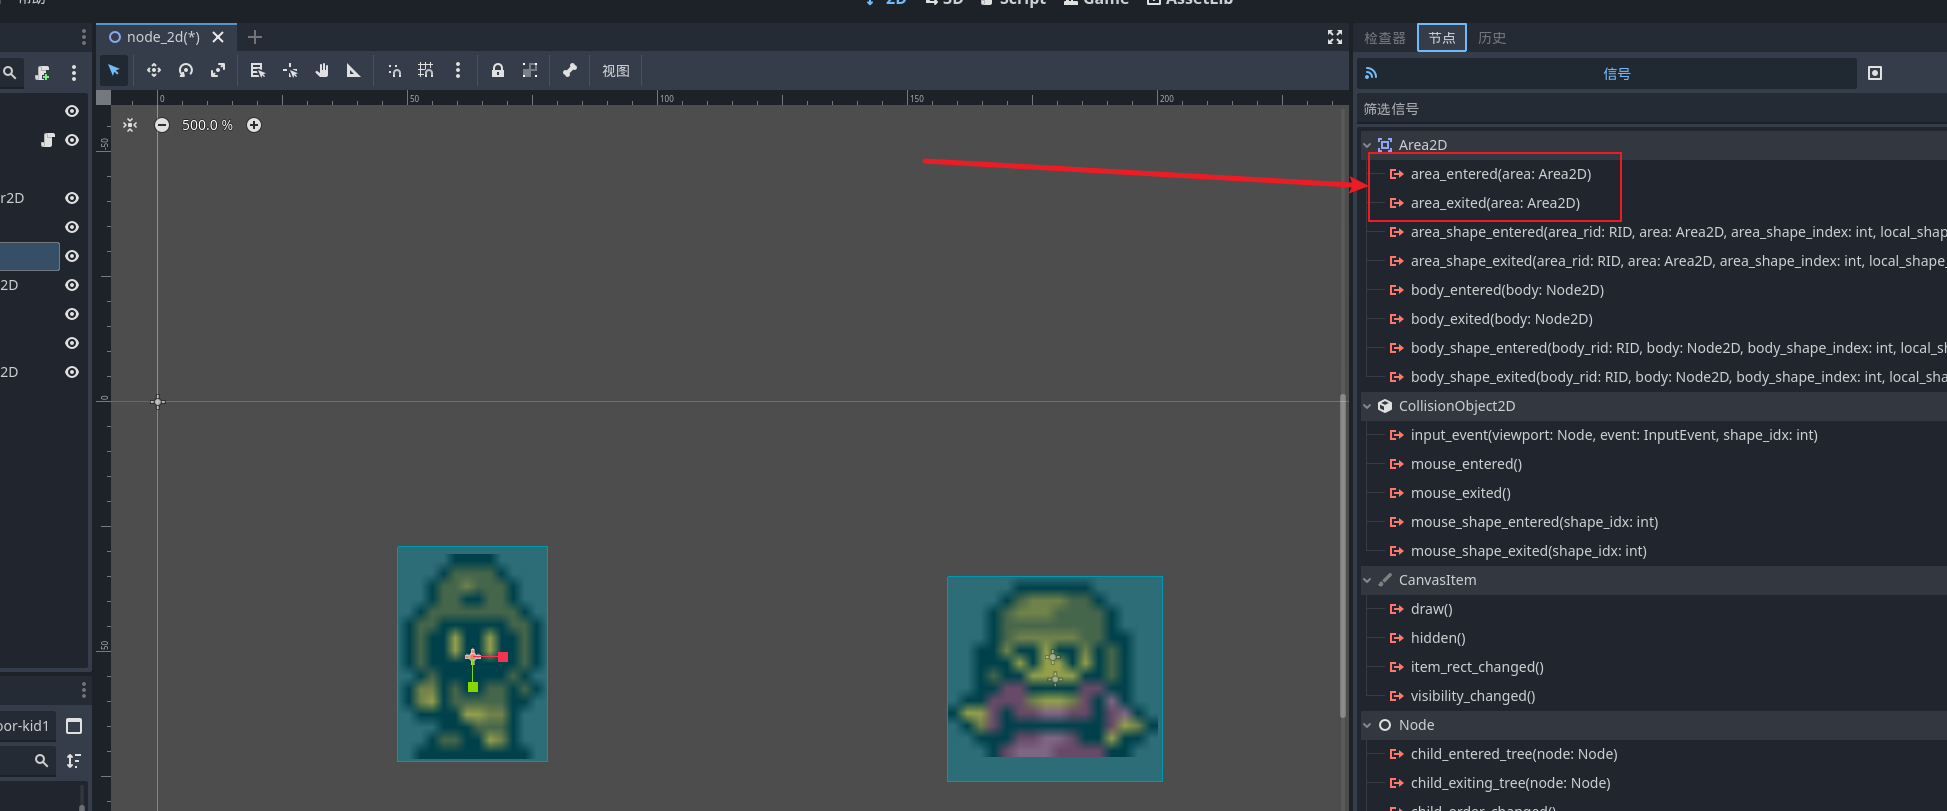
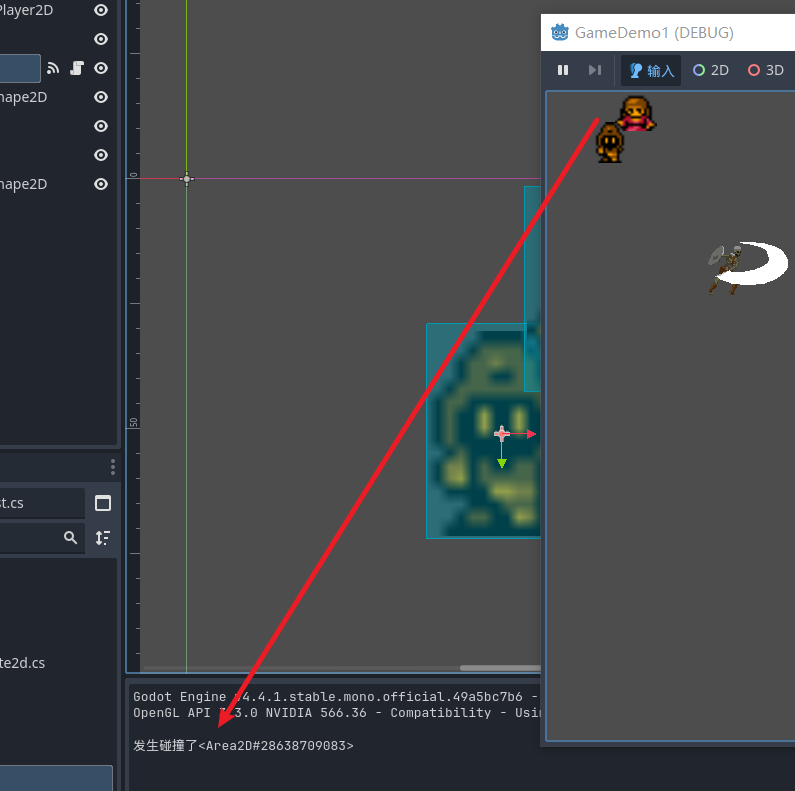
我们为player添加一个脚本并且将脚本的关联方法加入到信号绑定, 这个信号会传给我们一个参数 表示在什么区域发生了碰撞
	public void onAreaEnter(Area2D area2D)
	{
		GD.Print("发生碰撞了"+area2D);
	}
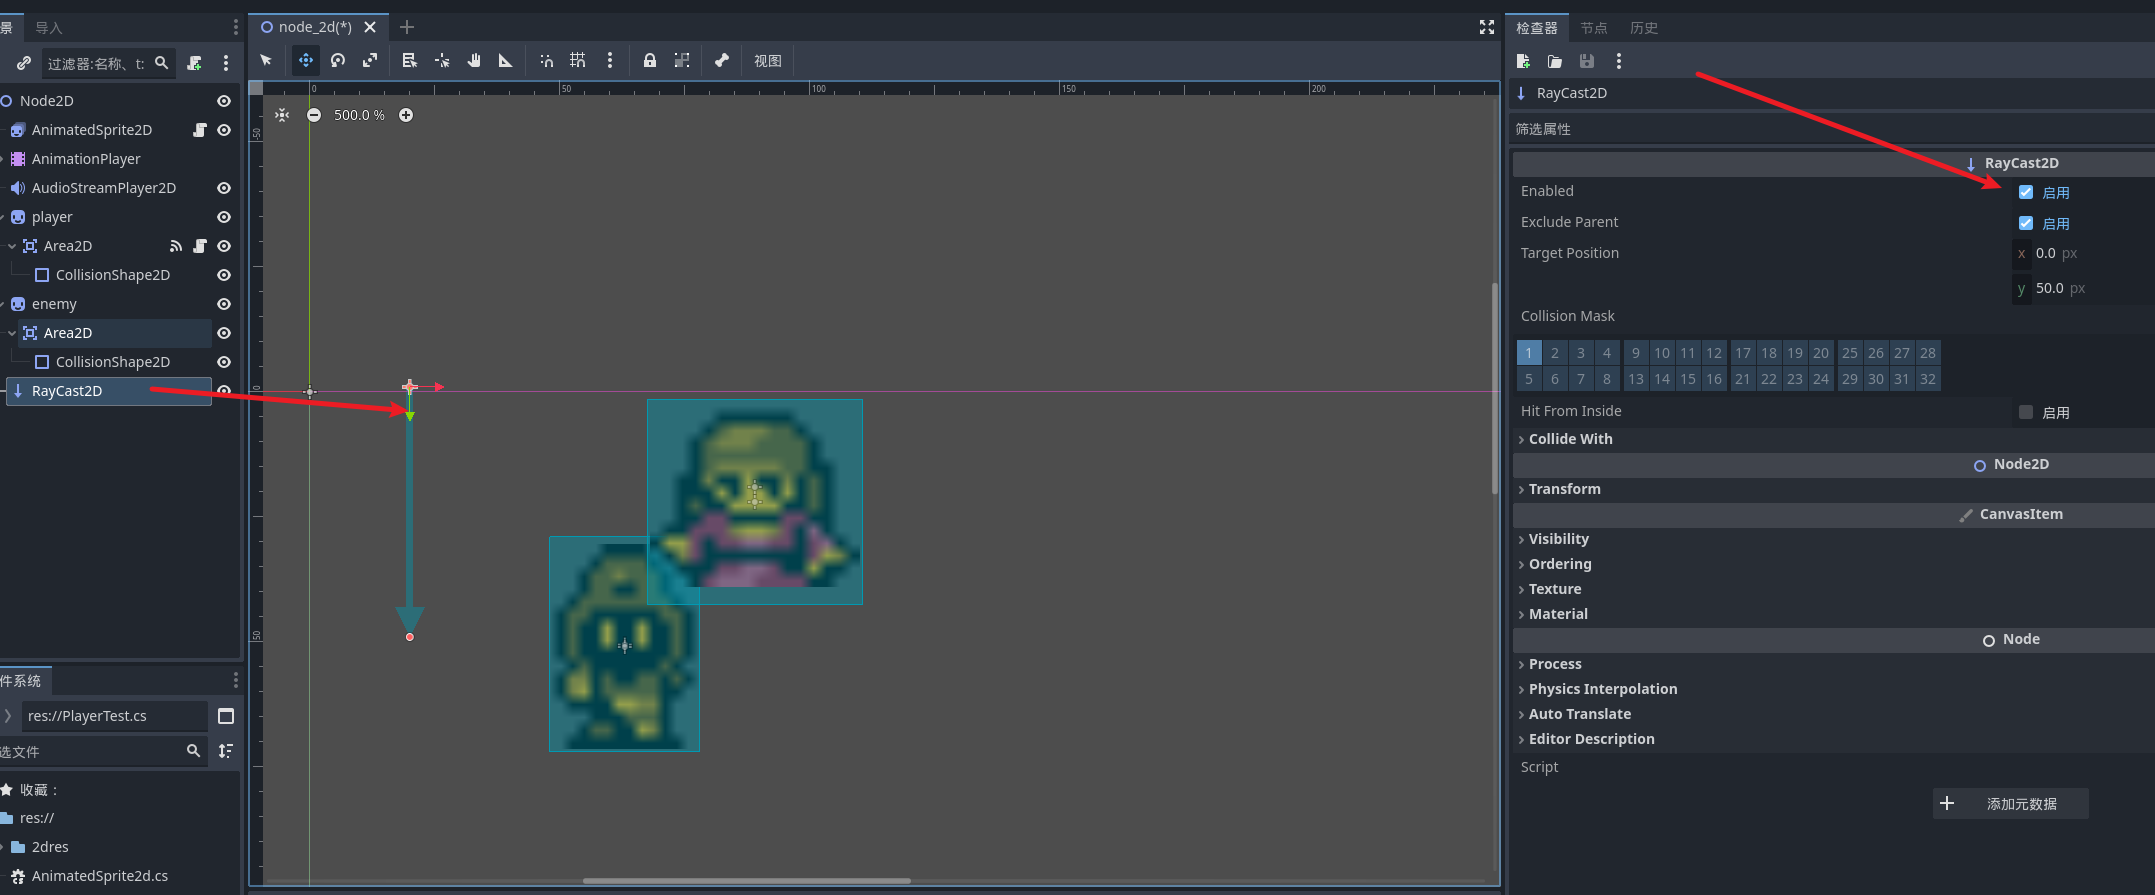
射线碰撞
射线碰撞需要添加一个叫 rayCast2d的节点来实现 还是沿用我们的两个节点, 可以看到这个线就是射线碰撞的范围了
这两个配置项就是是否开启碰撞和是否开启和父节点的碰撞
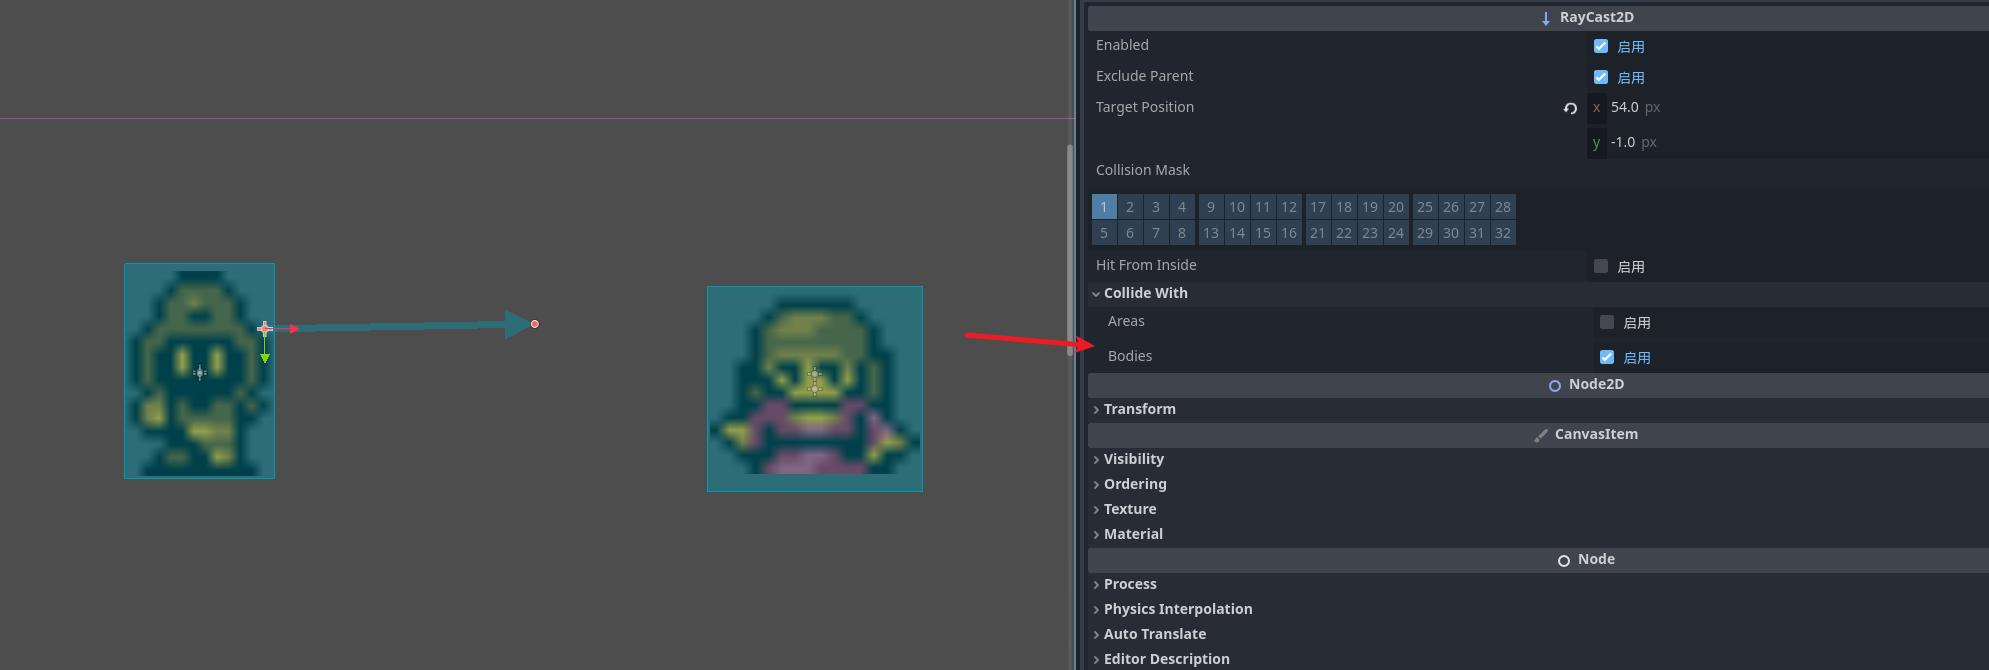
碰撞类型
,默认情况下只检测物理碰撞 勾选 areas开启2d区域的检测
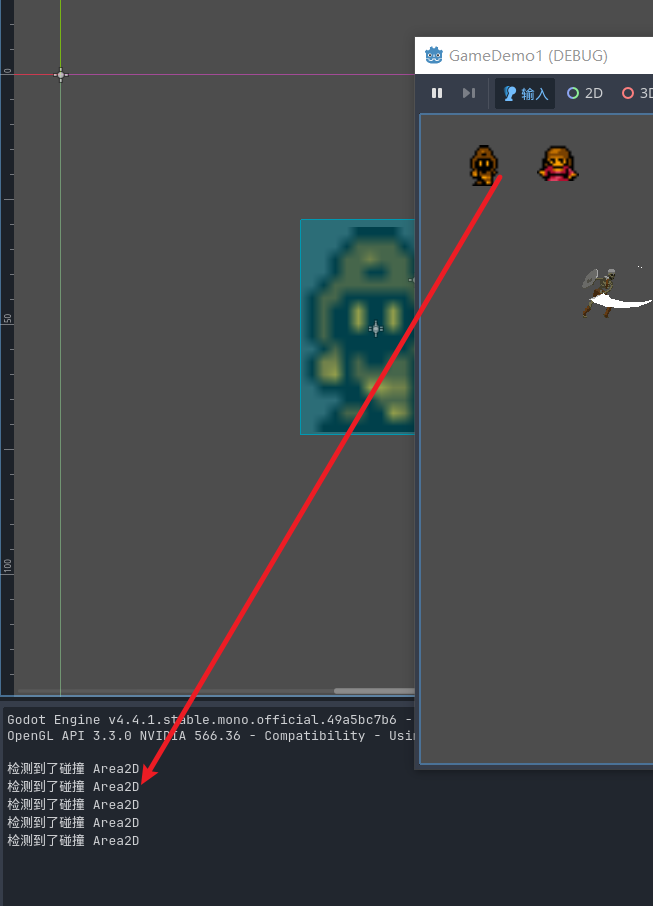
检测碰撞
我们需要添加脚本 来为射线检测提供支持, 这里我们采用触发物理会调用的狗子方法 _PhysicsProcess方法来检测射线 物理帧每一次都执行的区间是固定的 我们的需求是按下键位 拿到当前这一次的检查结果
PS: 这里我预先绑定好了 两个虚拟按键 left和right 对应 A D 你也可以绑定自己需要的键位
using Godot;
using System;

public partial class RayCast2dTest : RayCast2D
{
	// Called when the node enters the scene tree for the first time.
	public override void _Ready()
	{
	}

	// Called every frame. 'delta' is the elapsed time since the previous frame.
	public override void _Process(double delta)
	{
	}

	public override void _PhysicsProcess(double delta)
	{
		base._PhysicsProcess(delta);
		//按下左键 判断射线检测
		if (Input.IsActionJustPressed("left"))
		{
			if (IsColliding())
			{
				//拿到碰撞的区域
				Area2D collider = GetCollider() as Area2D;
				GD.Print("检测到了碰撞 "+collider.Name);
			}
			else
			{
				GD.Print("没检测到");
			}
		}
	}
}
启动当前的场景去按下左键获取
这里还有一个拓展的节点 ShapeCast2D这个节点可以选择射线的形状 使用的方式和射线节点非常相似
射线也有检测的层级
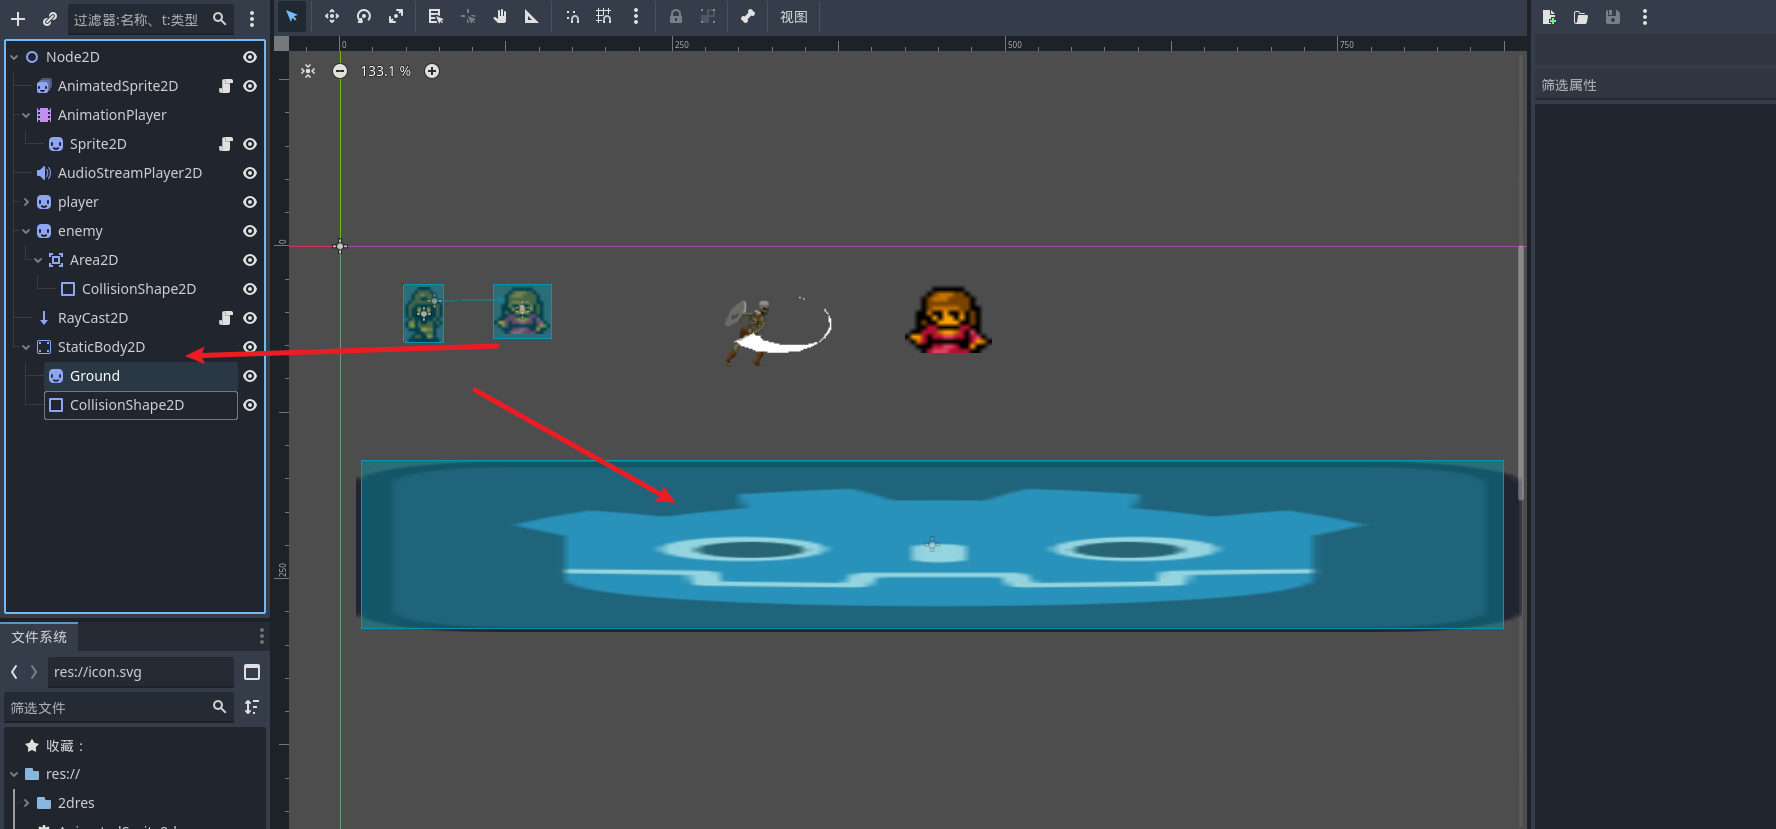
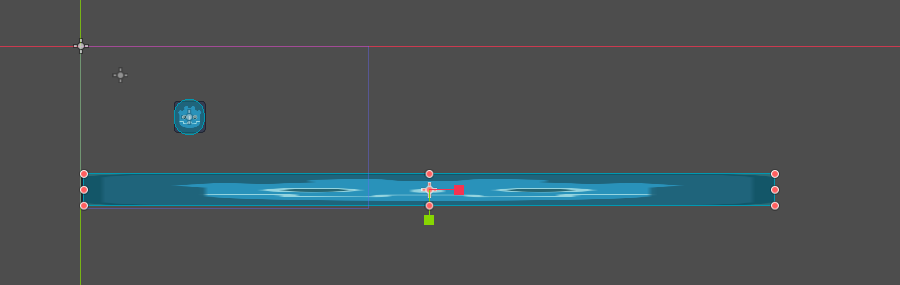
物理碰撞
这里我们使用 staticBody2D 节点作为地板 来学习物理碰撞 创建节点并且为他添加一个碰撞形状
我们可以为staticBody2D 加入材质 并且可以设置摩擦力
之后我们用RigidBody2d节点 来让精灵节点拥有动态碰撞

这个时候 你启动项目就可以看到 演示节点掉到地板上哈哈
小实现 物理的任务控制
我们之前添加了 虚拟按键 a d 接下来我们来实现一个基于水平轴体的人物移动 给我们的人物刚体添加一个脚本
using Godot;
using System;

public partial class RigidBody2dPlayerControl : RigidBody2D
{
	// Called when the node enters the scene tree for the first time.
	public override void _Ready()
	{
	}

	// Called every frame. 'delta' is the elapsed time since the previous frame.
	public override void _Process(double delta)
	{
	}

	public override void _PhysicsProcess(double delta)
	{
		base._PhysicsProcess(delta);
		//获取水平轴 用于左右移动
		float h = Input.GetAxis("left", "right");
		//设置速度
		LinearVelocity = new Vector2(h * 100, LinearVelocity.Y);
	}
}
此刻启动你的游戏 就可以发现你的人物可以移动了 但是是翻滚着移动的
我们需要锁定旋转
using Godot;
using System;

public partial class RigidBody2dPlayerControl : RigidBody2D
{
	// Called when the node enters the scene tree for the first time.
	public override void _Ready()
	{        //锁定旋转
		LockRotation = true;
	}

	// Called every frame. 'delta' is the elapsed time since the previous frame.
	public override void _Process(double delta)
	{

	}

	public override void _PhysicsProcess(double delta)
	{
		base._PhysicsProcess(delta);
		//获取水平轴 用于左右移动
		float h = Input.GetAxis("left", "right");
		//设置速度
		LinearVelocity = new Vector2(h * 100, LinearVelocity.Y);
	}
}
如果我们想实现跳跃 只需要绑定 space 然后修改Y轴就可以了 新增 up绑定空格 ,并且我们需要通过刚体的信号来建立碰撞检测的通知
鼠标悬浮就可以看到介绍 自行了解
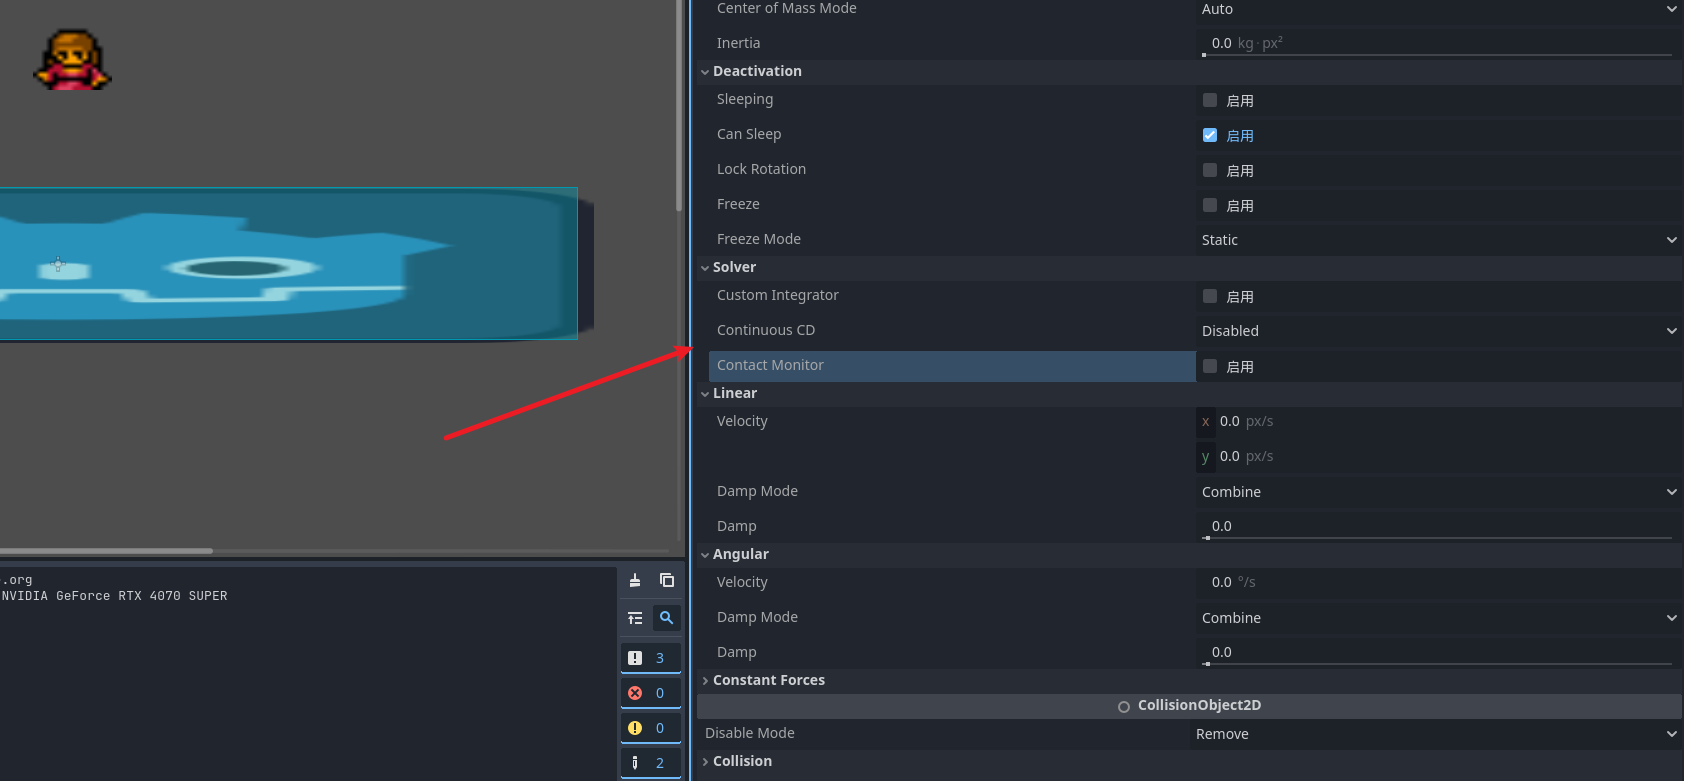
代码
using Godot;
using System;
public partial class RigidBody2dPlayerControl : RigidBody2D
{
private bool isGround ;
// Called when the node enters the scene tree for the first time.
public override void _Ready()
{
LockRotation = true;
//如果刚体需要碰撞检测需要设置这个选项
ContactMonitor = true;
//记录的次数 默认为0 不修改这个就算绑定了信号也不检测
MaxContactsReported = 1;
}
// Called every frame. 'delta' is the elapsed time since the previous frame.
public override void _Process(double delta)
{
}
public override void _PhysicsProcess(double delta)
{
base._PhysicsProcess(delta);
//获取水平轴 用于左右移动
float h = Input.GetAxis("left", "right");
//设置速度
LinearVelocity = new Vector2(h * 100, LinearVelocity.Y);
if (Input.IsActionJustPressed("up") && isGround ==true)
{
//跳跃
LinearVelocity = new Vector2(LinearVelocity.X,-200);
}
}
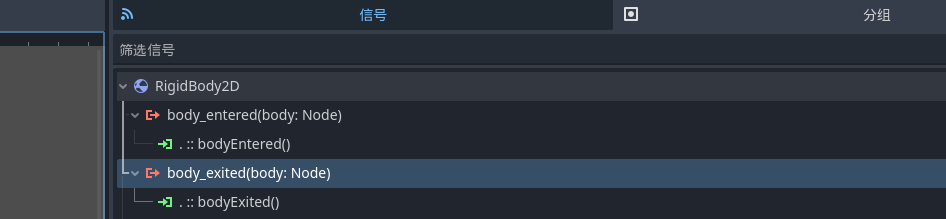
public void bodyEntered(Node body)
{
GD.Print("人物落地了");
isGround = true;
}
public void bodyExited(Node body)
{
GD.Print("人物起跳了");
isGround = false;
}
}
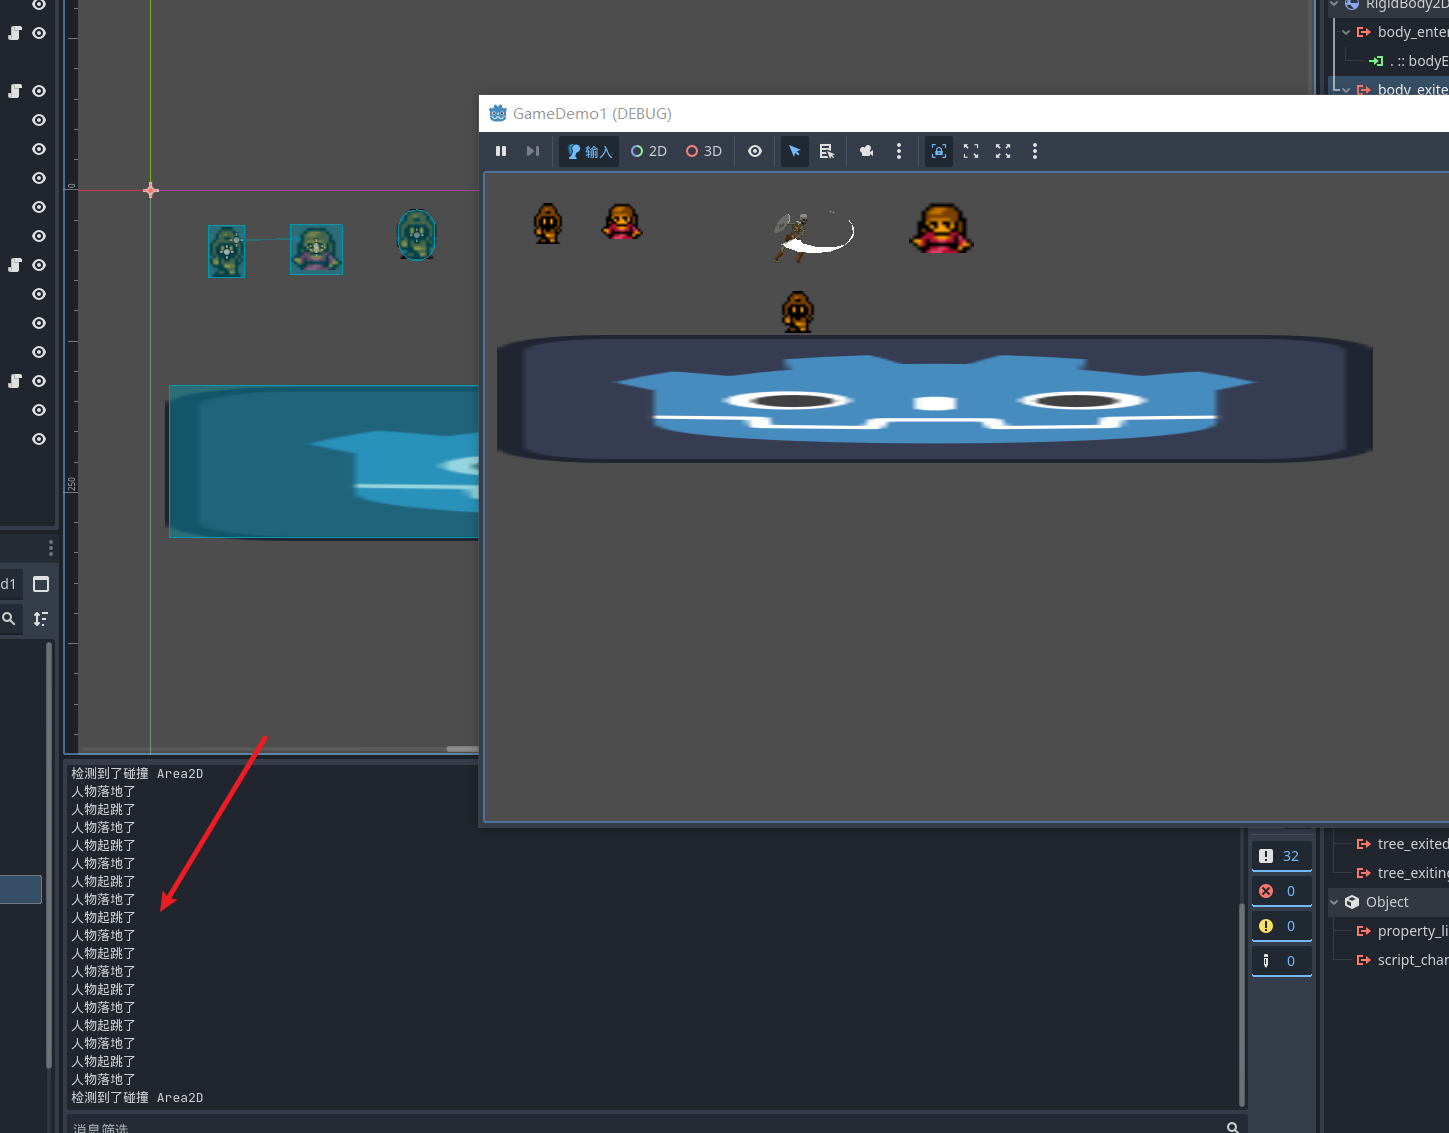
然后我们将碰撞和离开两个方法绑定到信号
启动游戏 就可以获得一个简单的任务控制器了
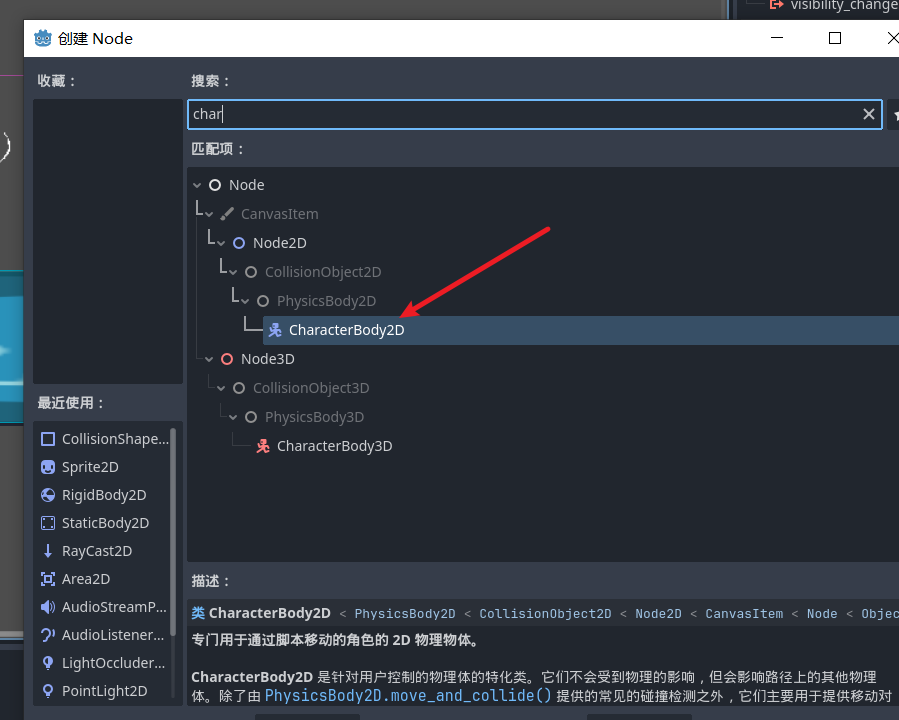
人物控制器
学了一大圈 godot其实给我们提供了专门用于角色的任务控制器 他也是刚体下的一个节点 这个节点的一切下落 移动等 需要我们来控制操作 比如你创建好碰撞和物理 但是你启动界面后 人物还是会在空中
绑定好脚本之后 会发现内置的模版有很多的代码 这其实和我们上一小节实现的代码非常的相似
using Godot;
using System;

public partial class CharacterBody2dPlayer : CharacterBody2D
{
	public const float Speed = 300.0f;
	public const float JumpVelocity = -400.0f;

	public override void _PhysicsProcess(double delta)
	{
		Vector2 velocity = Velocity;

		// Add the gravity.
		if (!IsOnFloor())
		{
			velocity += GetGravity() * (float)delta;
		}

		// Handle Jump.
		if (Input.IsActionJustPressed("ui_accept") && IsOnFloor())
		{
			velocity.Y = JumpVelocity;
		}

		// Get the input direction and handle the movement/deceleration.
		// As good practice, you should replace UI actions with custom gameplay actions.
		Vector2 direction = Input.GetVector("ui_left", "ui_right", "ui_up", "ui_down");
		if (direction != Vector2.Zero)
		{
			velocity.X = direction.X * Speed;
		}
		else
		{
			velocity.X = Mathf.MoveToward(Velocity.X, 0, Speed);
		}

		Velocity = velocity;
		MoveAndSlide();
	}
}
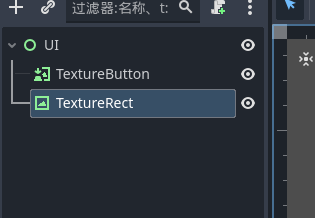
UI
godot的ui都基于control节点 我们可以来创建一个ui场景
小案例
比如我们想要将一个ui相对的放到屏幕的某个位置
我们创建一个新的场景 ui 选择用户界面 比如当前这个节点是我想要的小地图 我希望他不论多大的窗口都在右上角显示 就可以这样设置 其他的设置godot的显示的非常完全可以按需去选择
这个相对的锚点其实就是对于宽度和边缘的计算

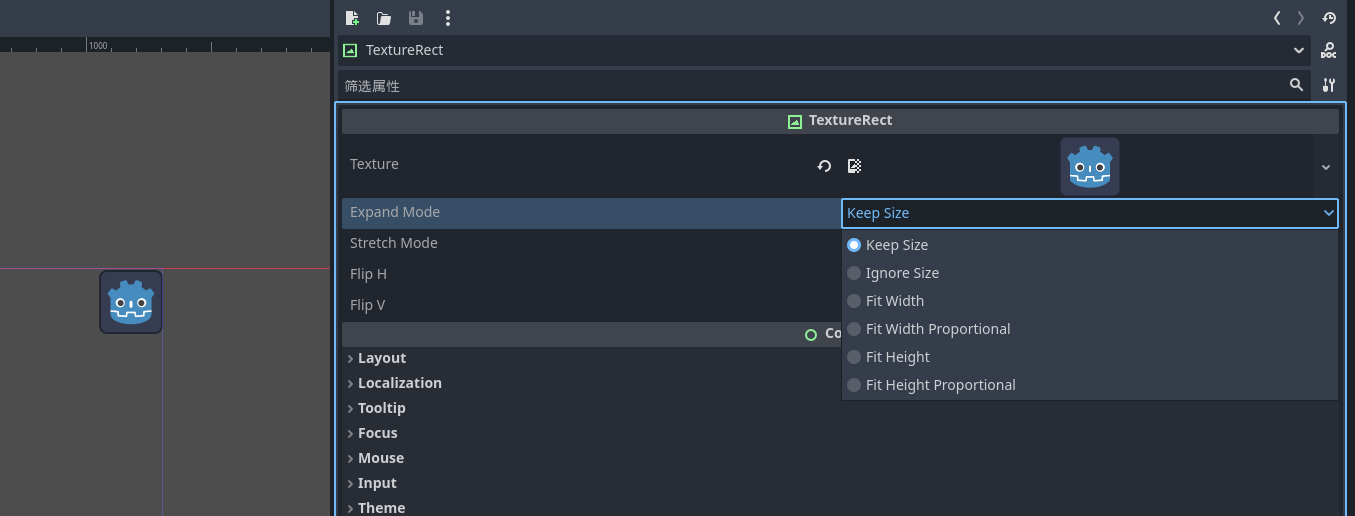
带纹理的方块
选项卡 提供了非常丰富的选项
显示模式
第一个配置项为忽略模式
第二个配置项是纹理的展示程度
godot为我们提供很详细的中文描述所以不过多的赘述
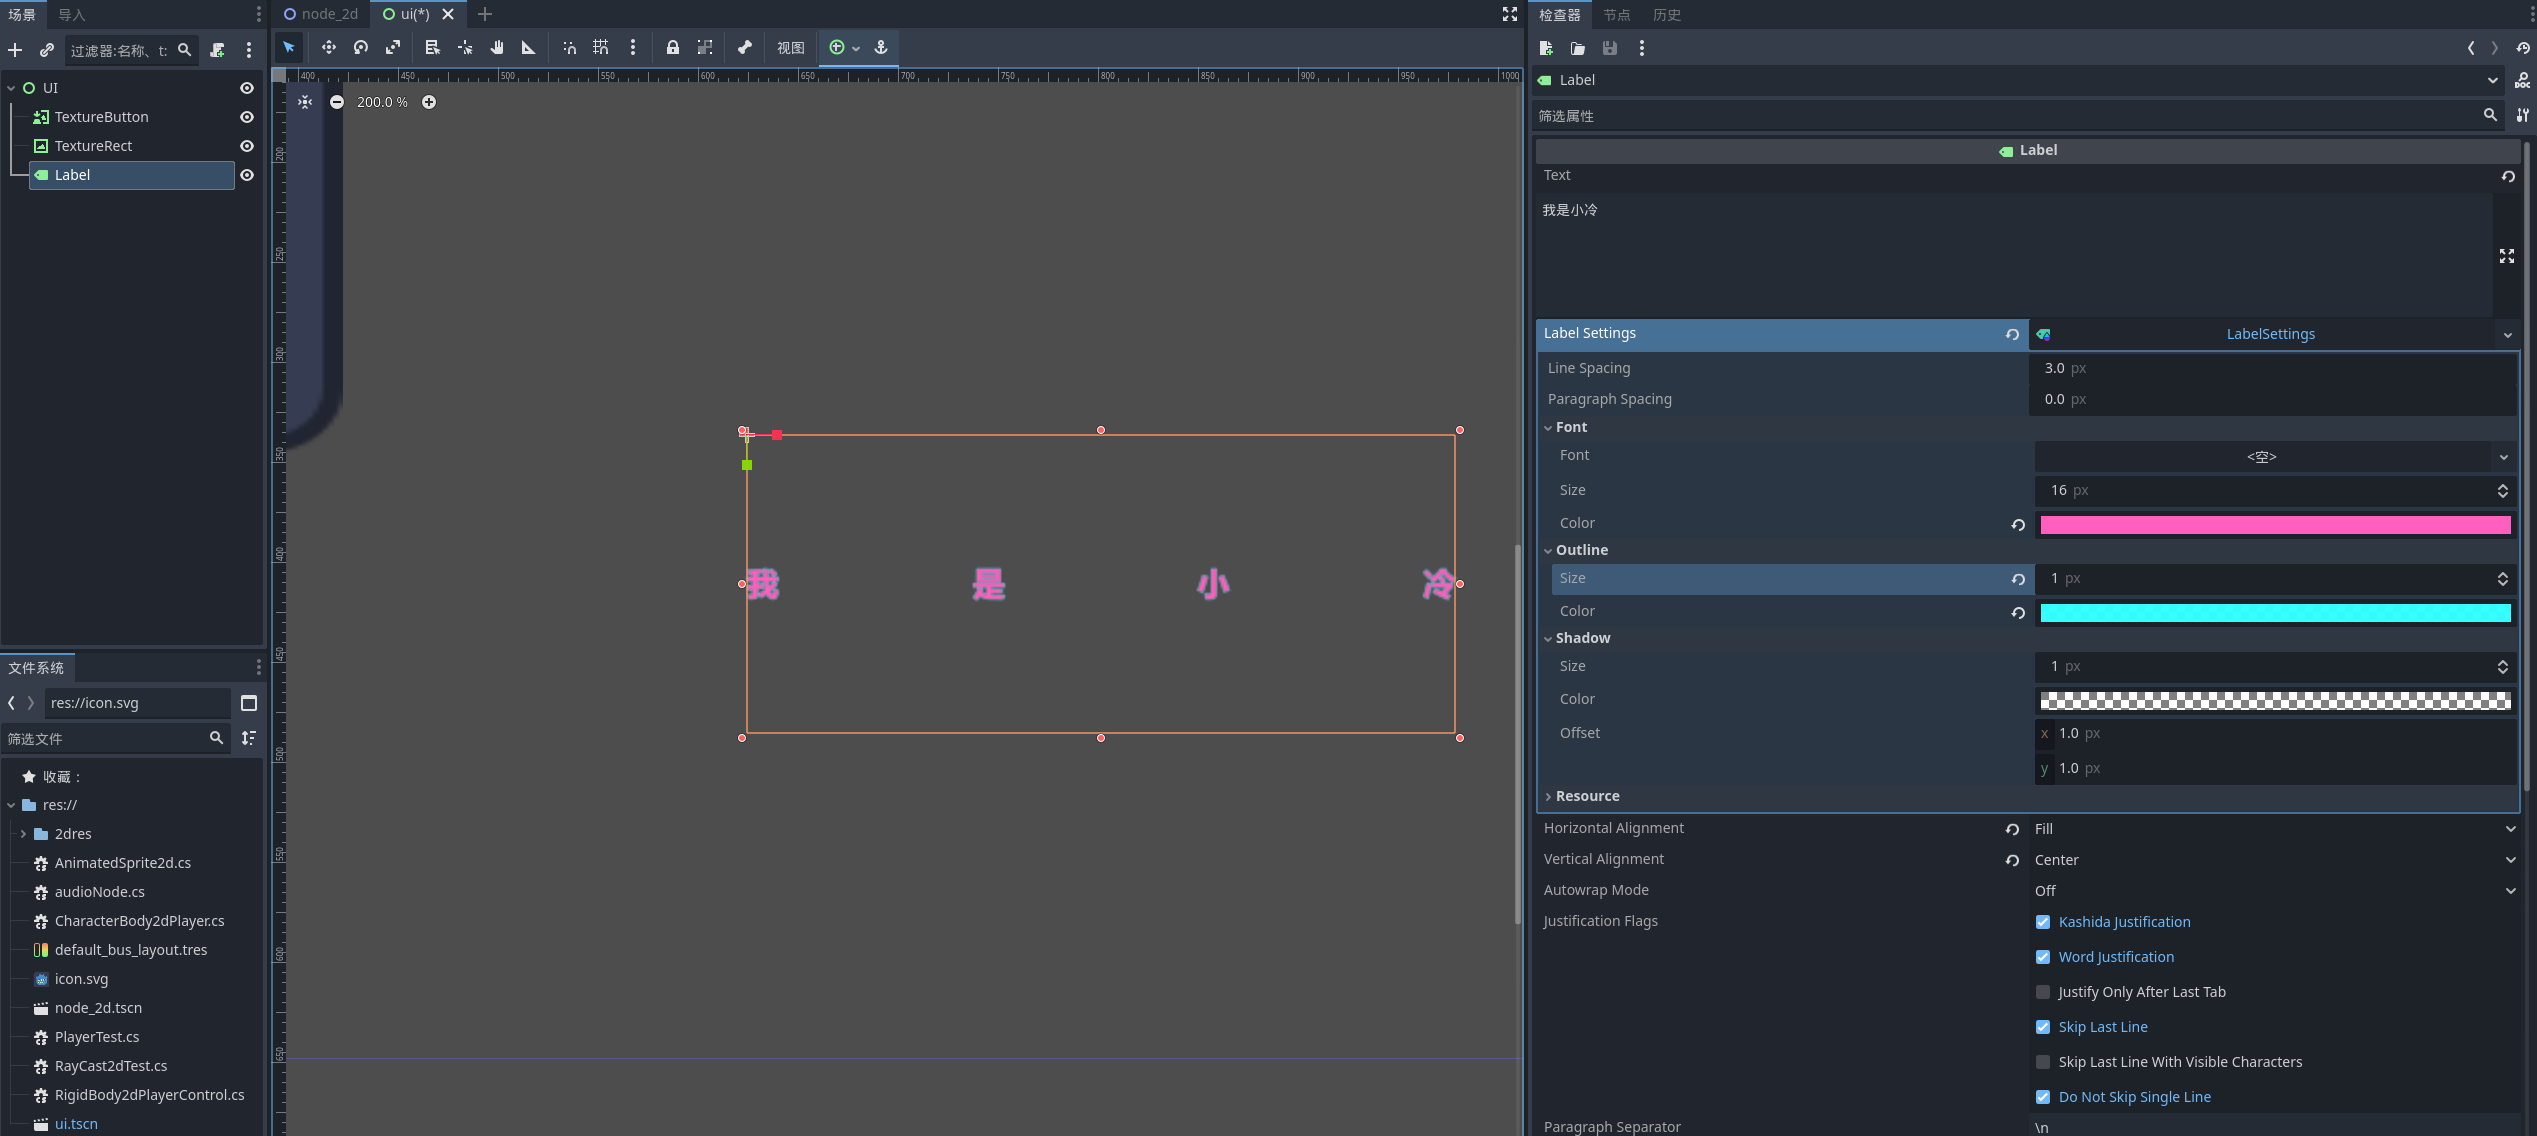
文字控件
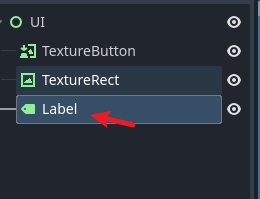
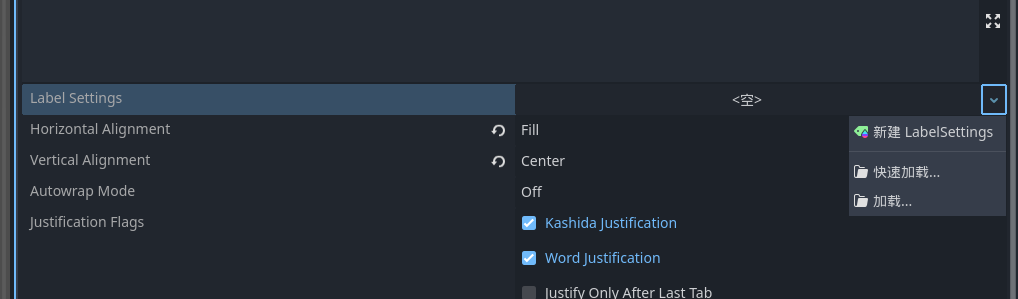
顾名思义 就是可以展示我们的文本了
我们所有对label的设置都支持导入导出 不需要重复设置
效果
按钮节点
我们在之前的节点说过了 带文档的按钮 其实按钮是常用也简单的控件
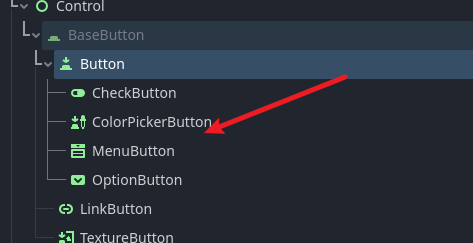
常用的四个按钮 之后我们使用的时候会展示使用细节
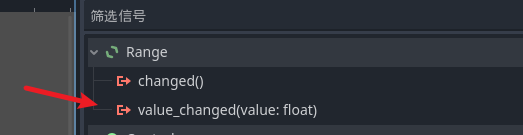
进度条
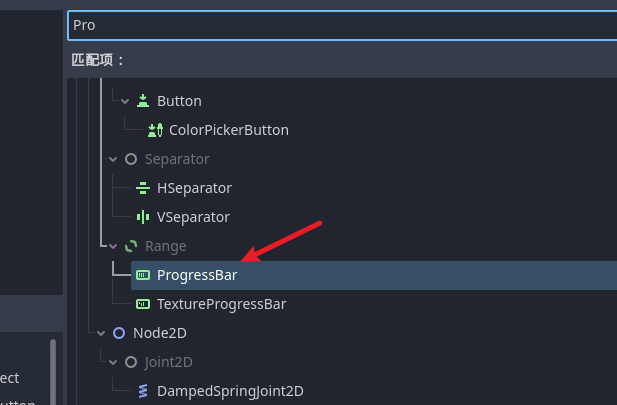

我们可以用来做加载动画 或者血条
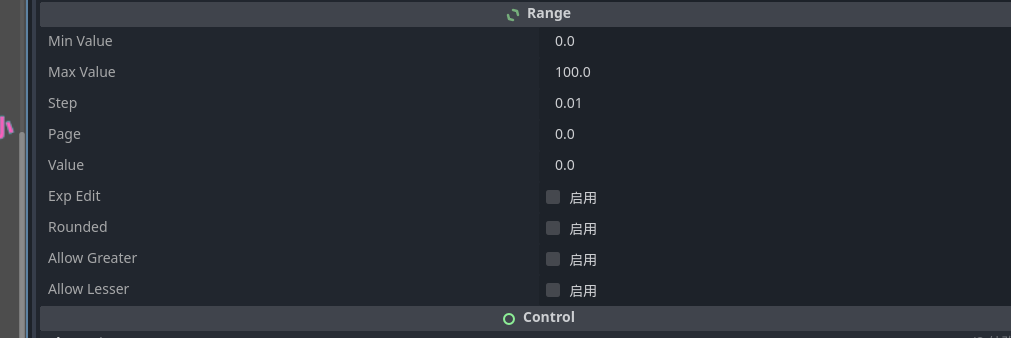
选项卡非常的清晰
- 最大值
- 最小值
- 每次变化多少
- 当前多少
- 等等
小实验 制作血条
我们为这个进度条节点 加入一个脚本 , 然后创建一个方法 用于绑定信号, 然后我们的小实验基于按键左右来操作进度条的值
代码
using Godot;
using System;

public partial class ProgressBarTest : ProgressBar
{

	public override void _Ready()
	{
	}

	public override void _Process(double delta)
	{
		var h = Input.GetAxis("left","right");
		Value += h*50*delta;
	}

	public void onValueChanged(float value)
	{
		GD.Print(value);
	}
}
记得将onValueChanged绑定到信号中
效果
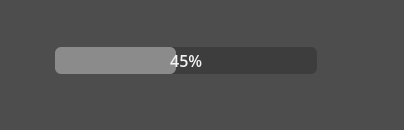
之后启动项目 你就可以获得一个由 a d键位控制的进度条了 这里我使用的是虚拟键位 你可以直接使用 key.*的输入来完成
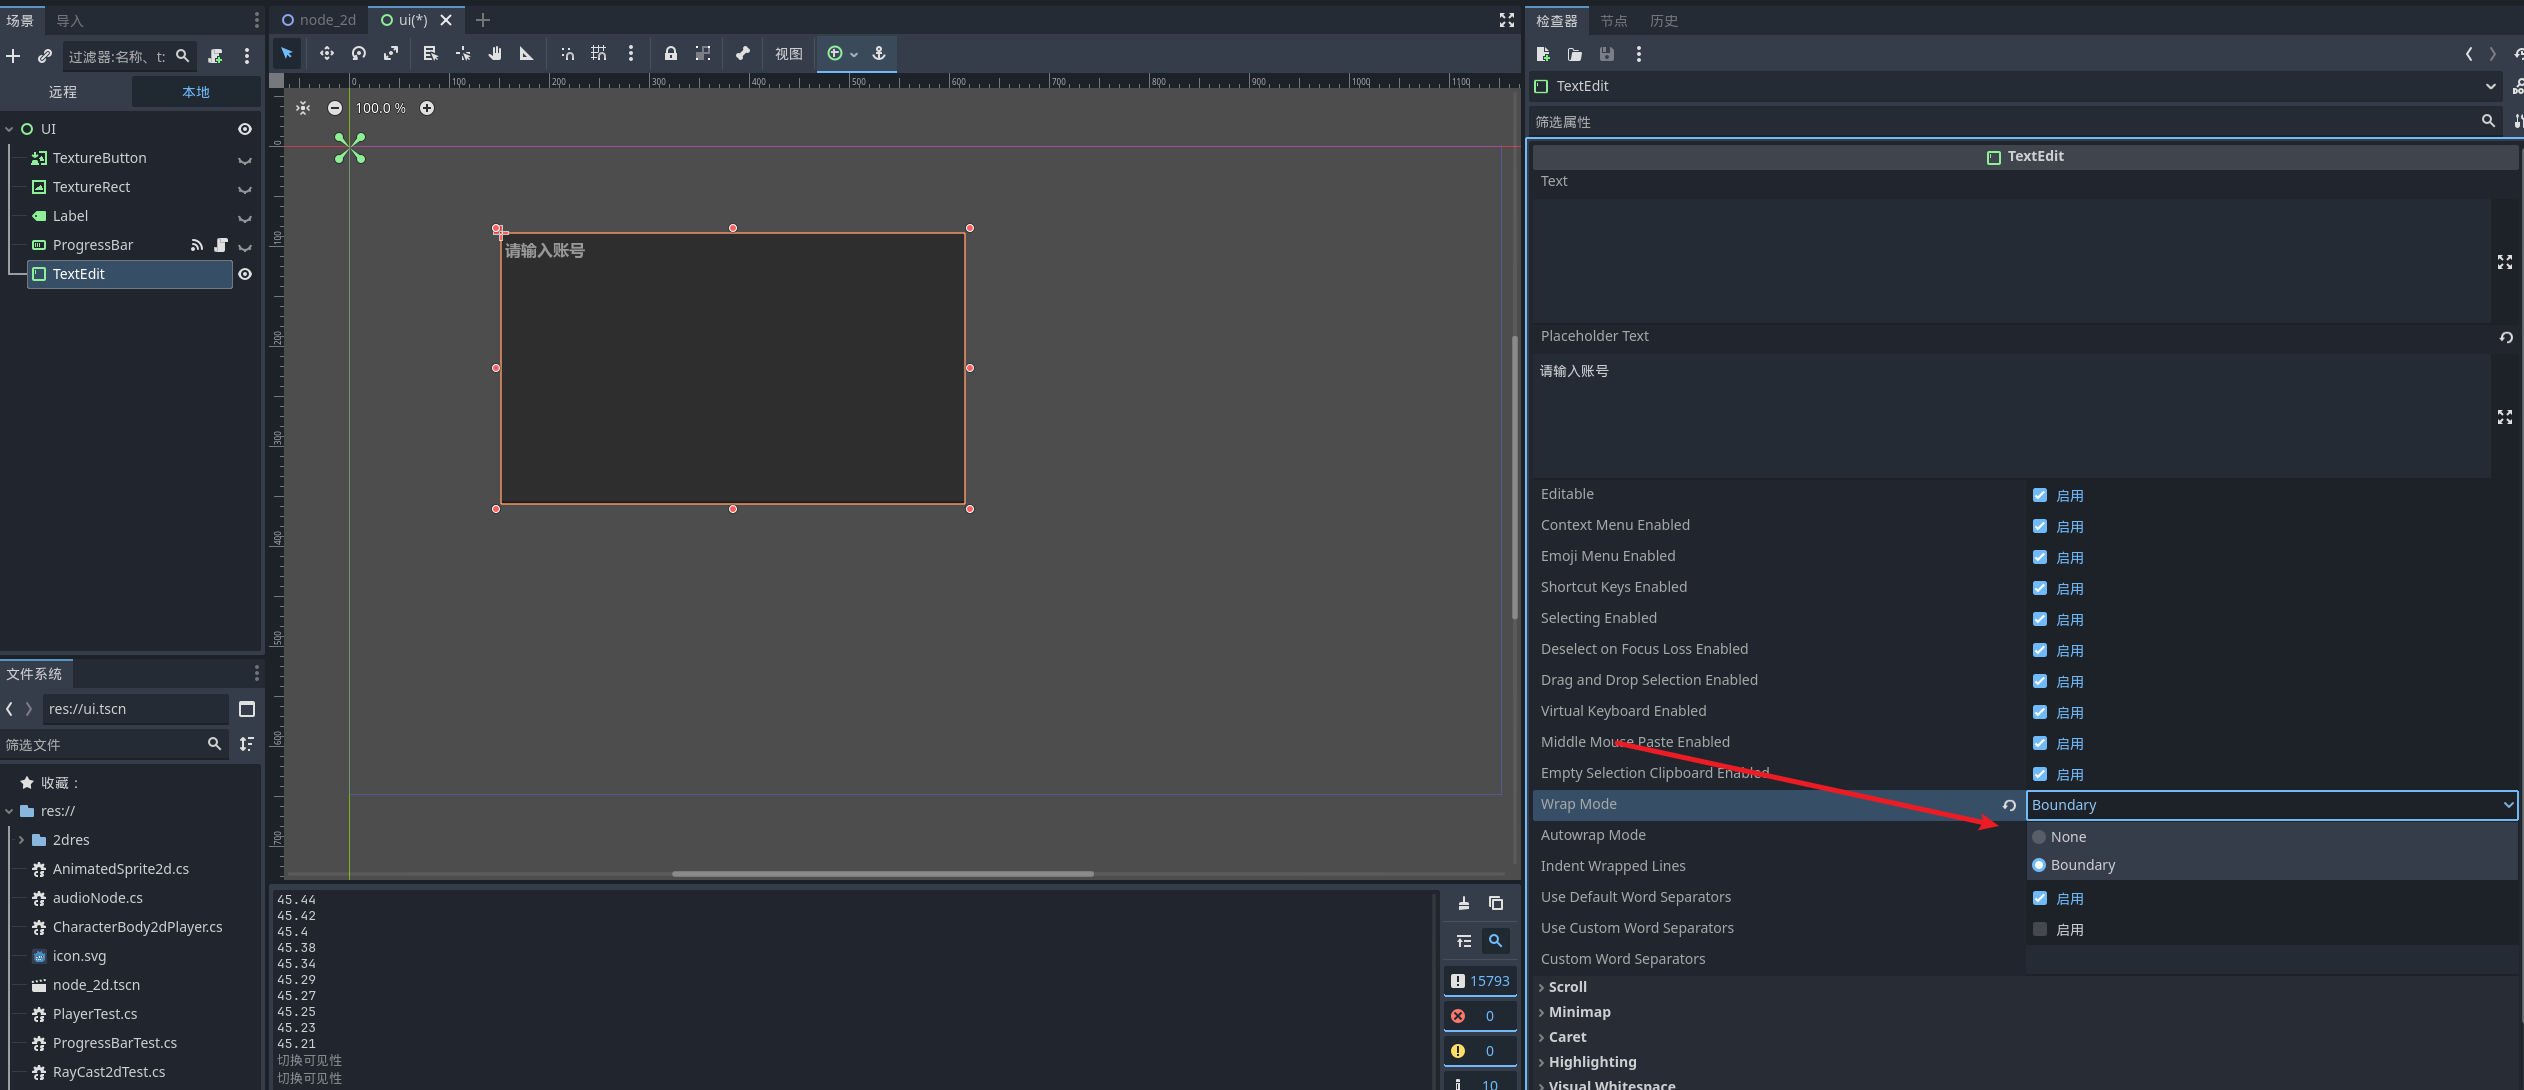
输入框
很多属性可以自己悬浮查看 这里我们主要看一下这个模式 这个是关于内容溢出的模式 none是单行滚动条 另一个选项是自动换行
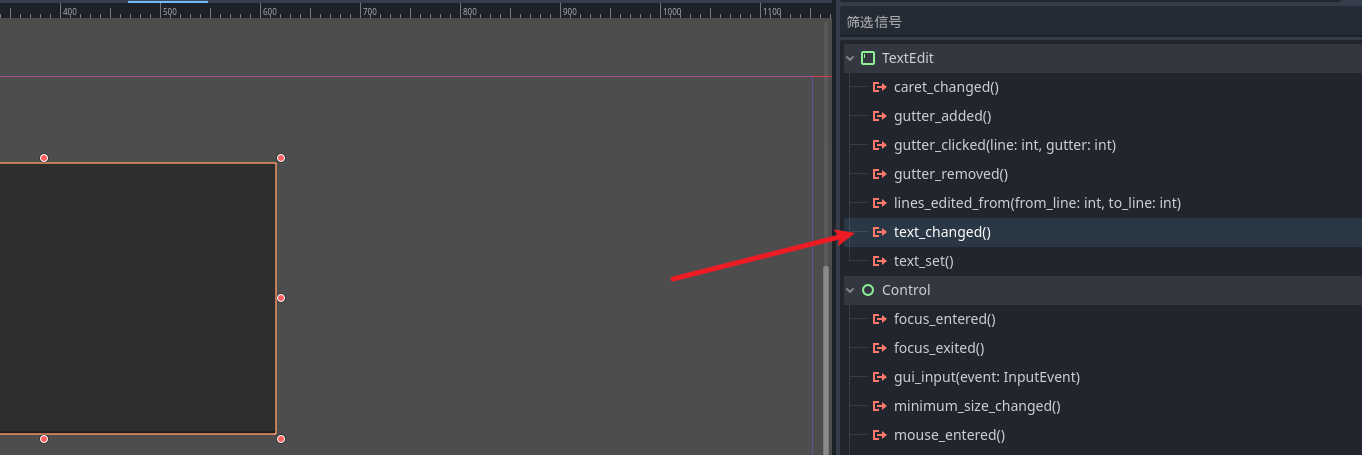
常用的信号
容器
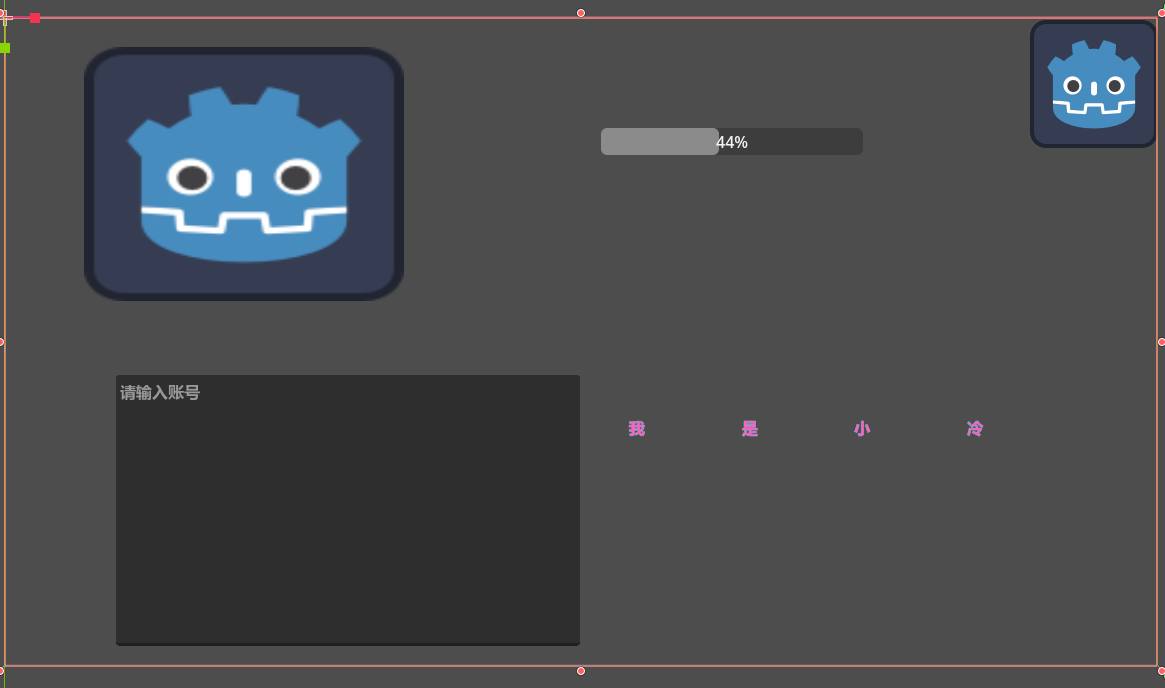
我现在由好几个空间 我自己手动的去布局 会很麻烦 这个时候我们可以引入一个容器节点 来为我们自动的管理容器的位置模式
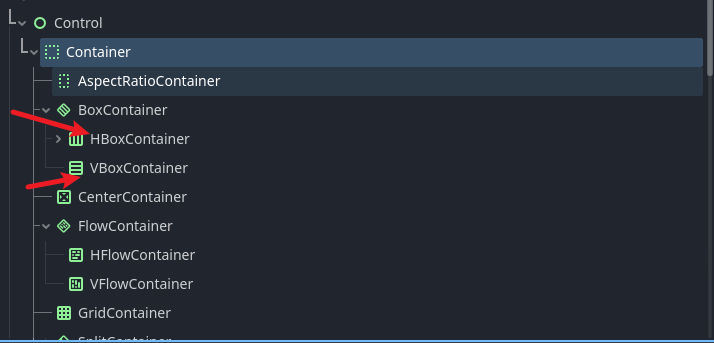
我们创造一个水平容器
然后将节点加入到容器中
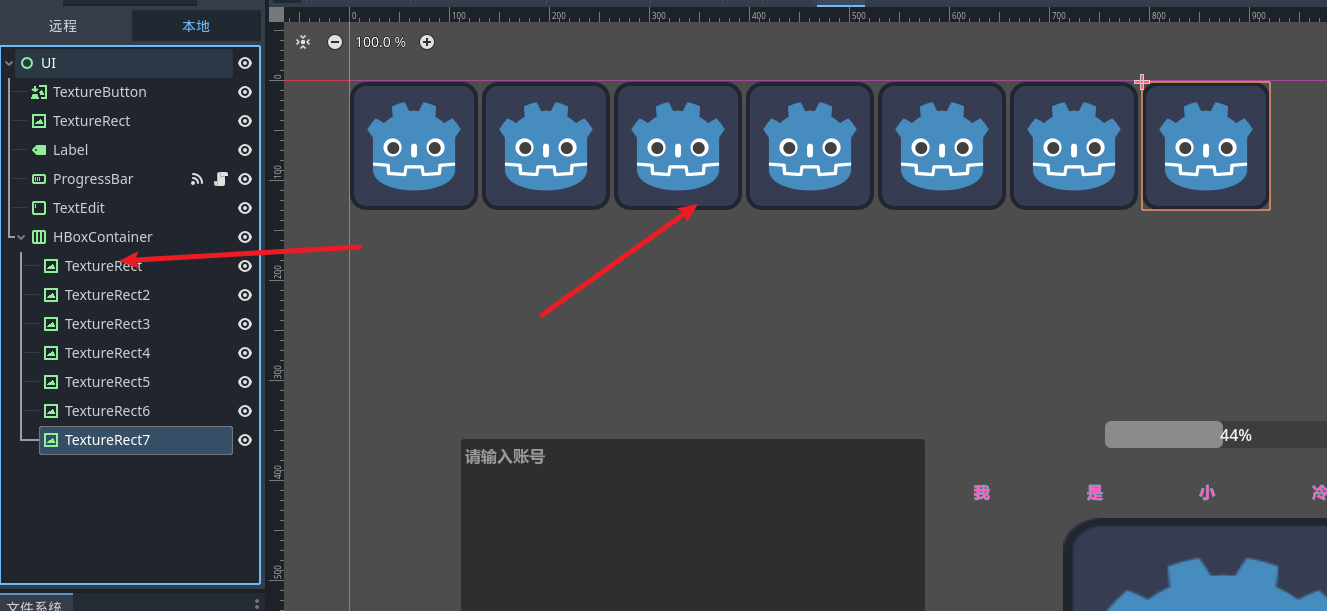
我们会发现加入的新节点 都按照加入的顺序 水平的排序好位置了 这就是容器为我们做的事情
加入我们想要实现背包 我们该如何选择呢 ? godot给我们提供了格子容器
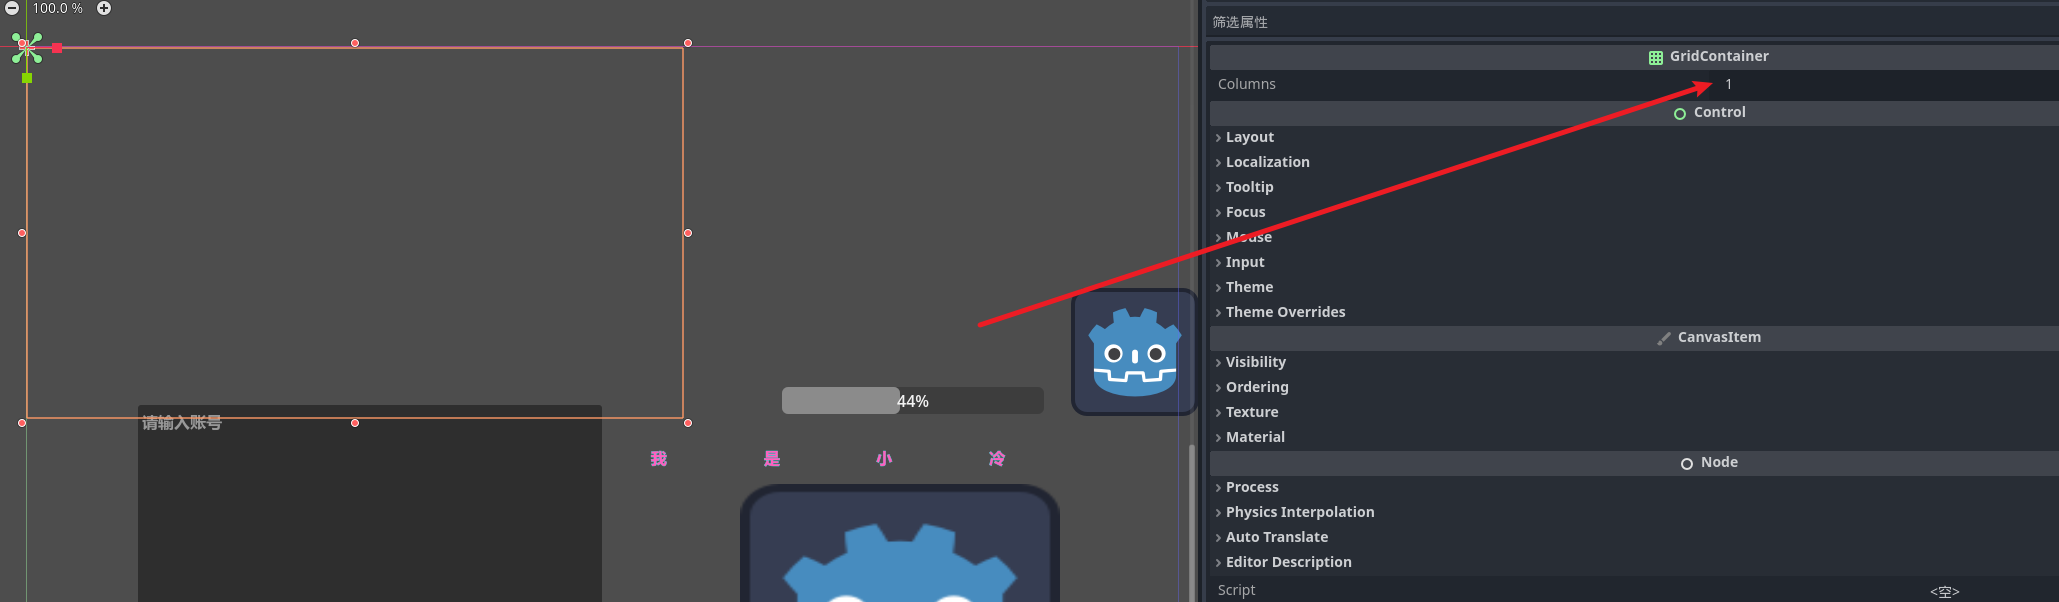
设定好行数 节点就会自动的去排列
那如果我们空间沾满了需要滚动条呢 godot也提供了对应的滚动条容器 加入就可以使用基本的功能了 很方便

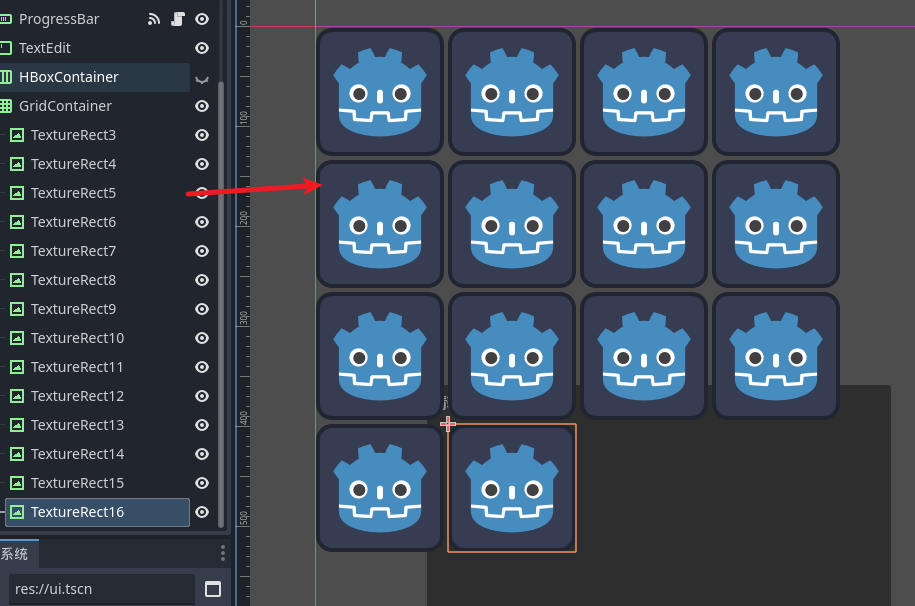
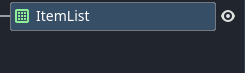
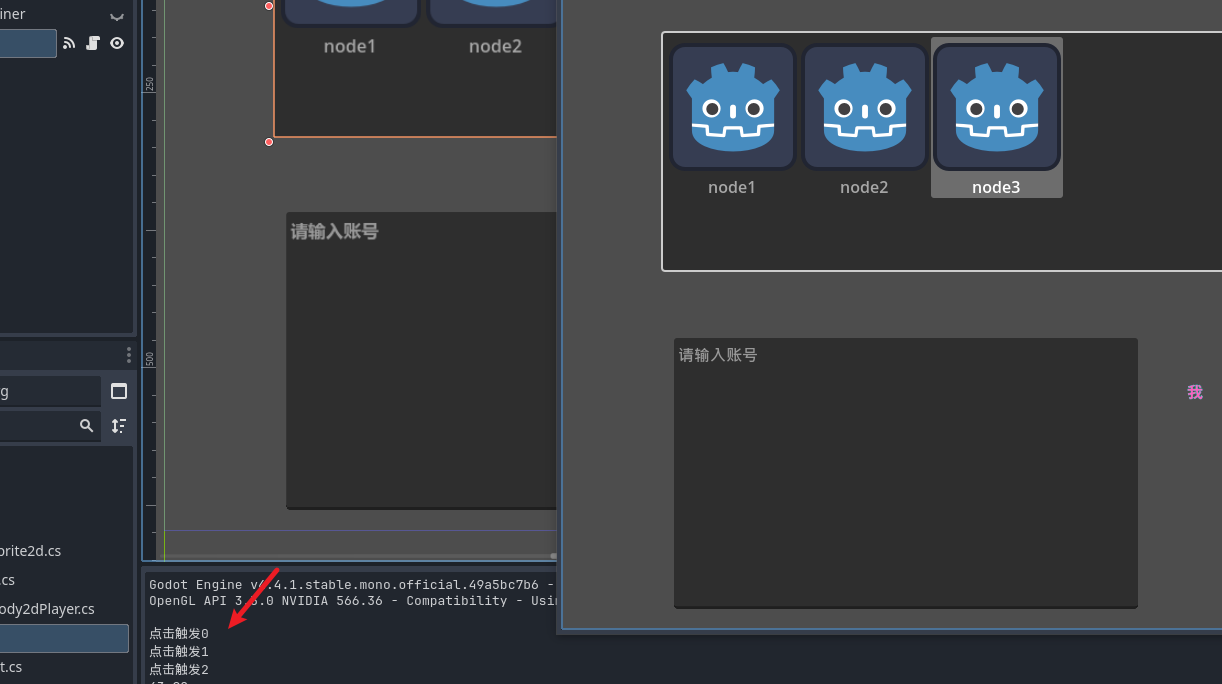
选项列表
类似于节点容器 我们可以在里面创建出所需要的item并且自带响应事件
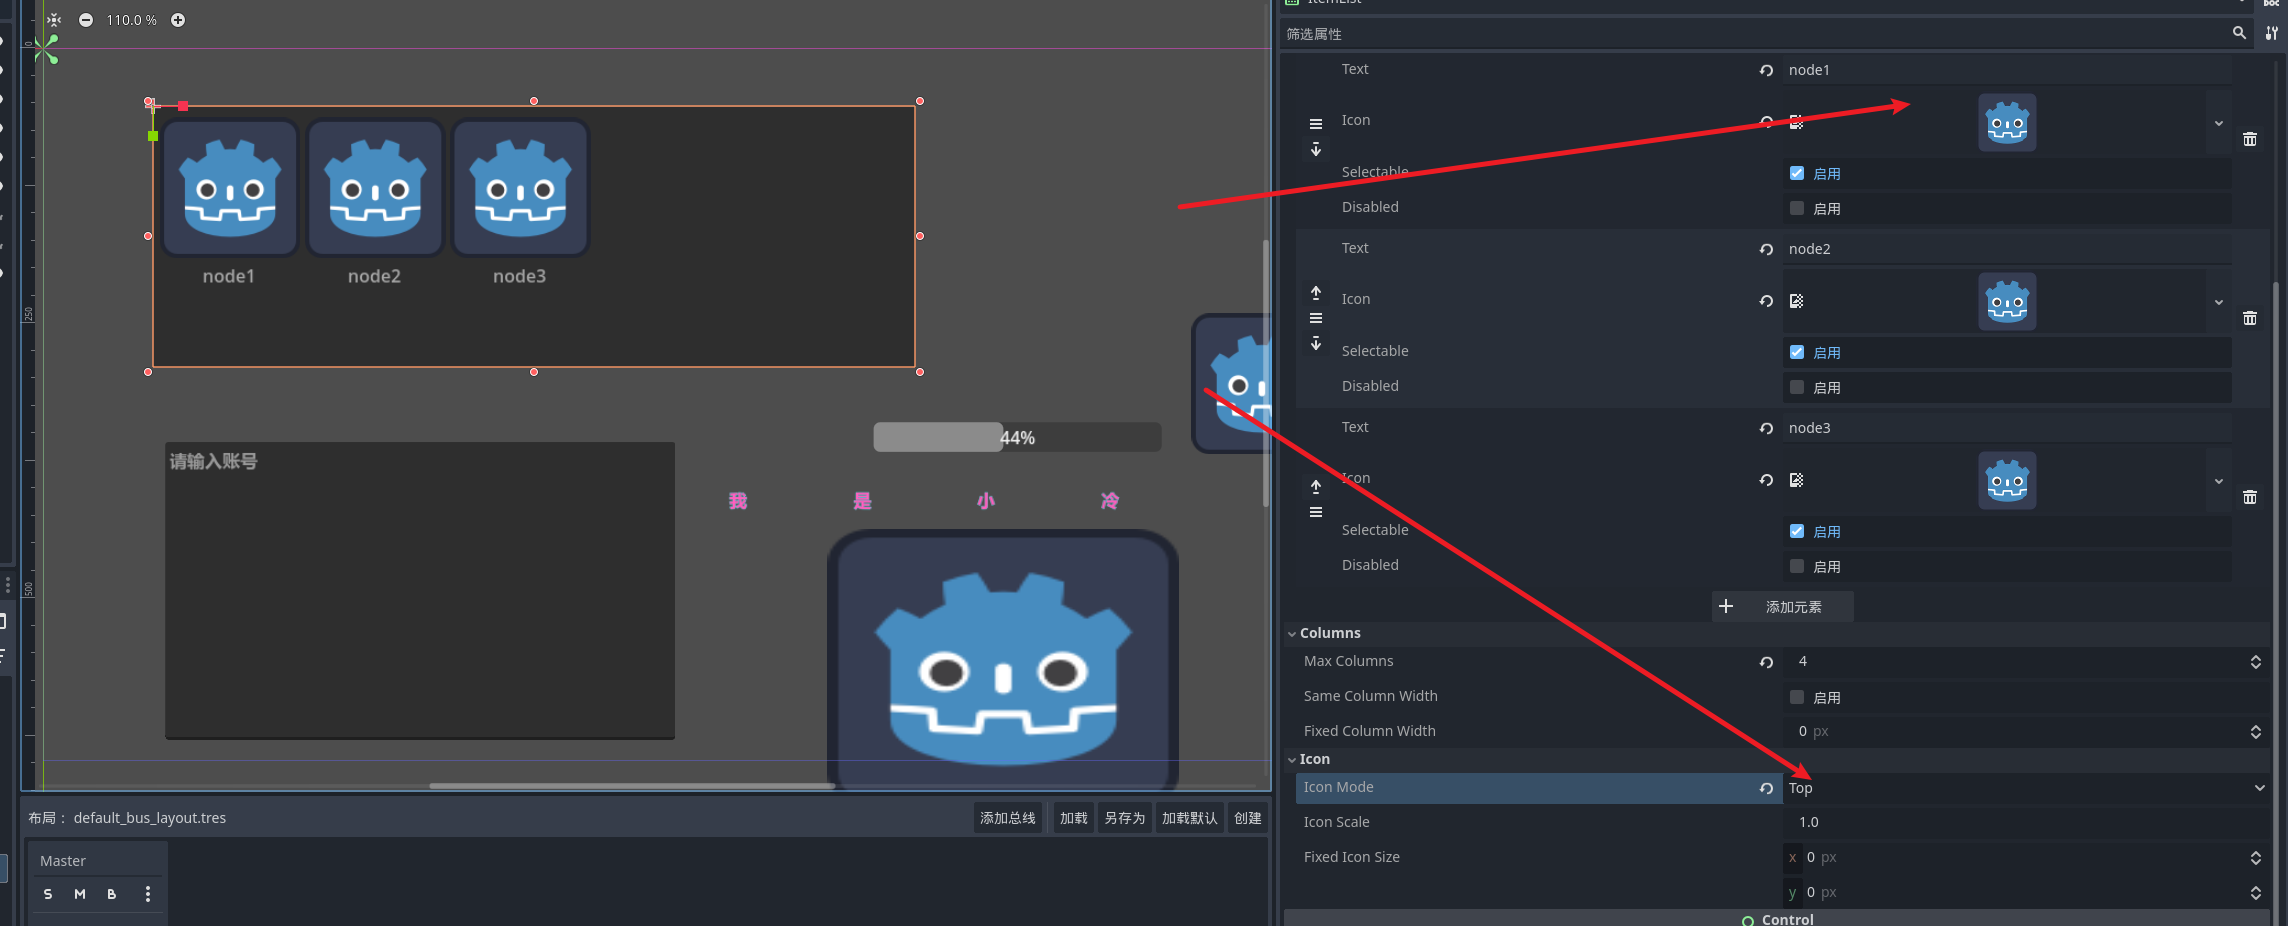
我们可以通过选项卡的设置 来完成对item展示的控制 同时可以通过信号来接收到item触发的点击回调
比较重要的item信号
using Godot;
using System;

public partial class ItemListTest : ItemList
{
	// Called when the node enters the scene tree for the first time.
	public override void _Ready()
	{
	}

	// Called every frame. 'delta' is the elapsed time since the previous frame.
	public override void _Process(double delta)
	{
	}

	public void ItemClickedFunc(int index,Vector2 pos,int mbi){
		GD.Print("点击触发"+index);
	}
}
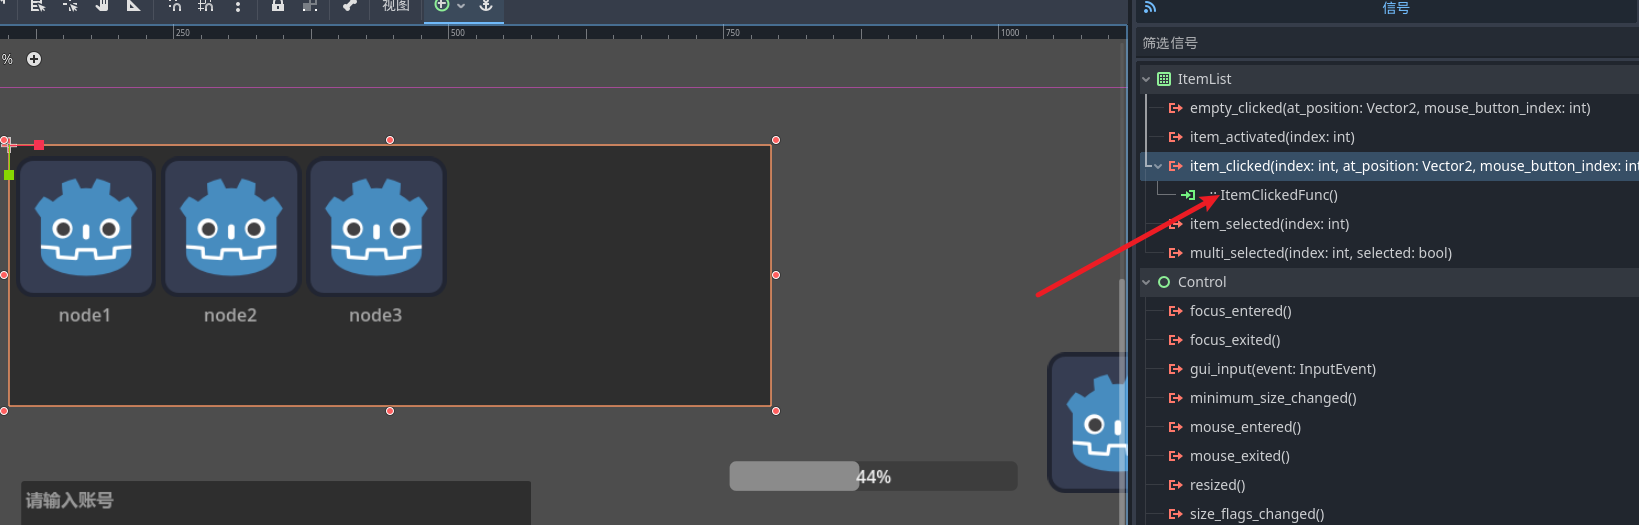
启动项目 就可以看到点击的结果了
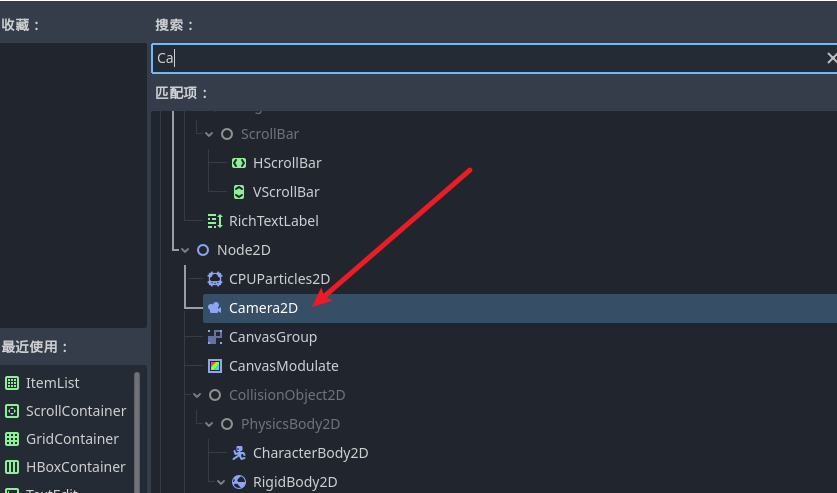
2d相机
创建一个新的 Game场景, 创建一个 2d相机节点, 接下来我们搭建一个角色的基础场景 来学习相机
场景结构
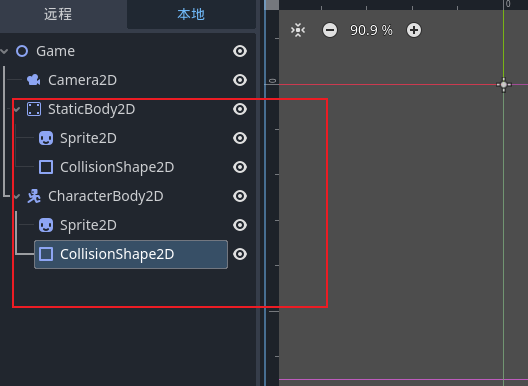
然后我们给角色node加入基础的移动脚本 直接创建脚本实现godot的模版就可以了, 问题就来了 我们启动了之后 一致往右边走 会发现走出一定的距离之后 角色就消失了 这里我们就要用到相机了 我们可以用2d相机绑定到人物上来实现视角的跟随
godot的规则中 父节点会带动子节点移动 那么我们在只有一个相机的情况下 直接将2d相机加入到角色节点下 就实现了效果
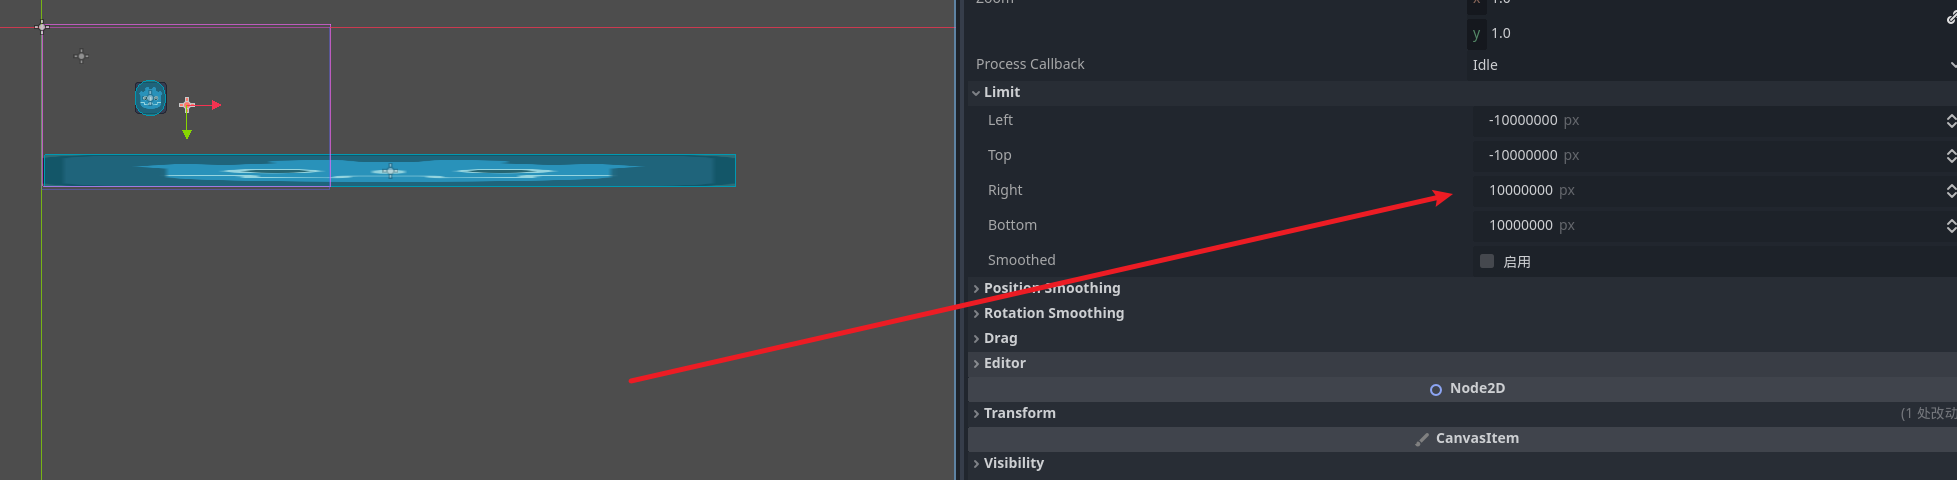
相机选项卡中比较重要的设置就是limit
在godot中不希望相机到地图的最左边 left设置为 0 就可以保证不溢出了
地图
基础
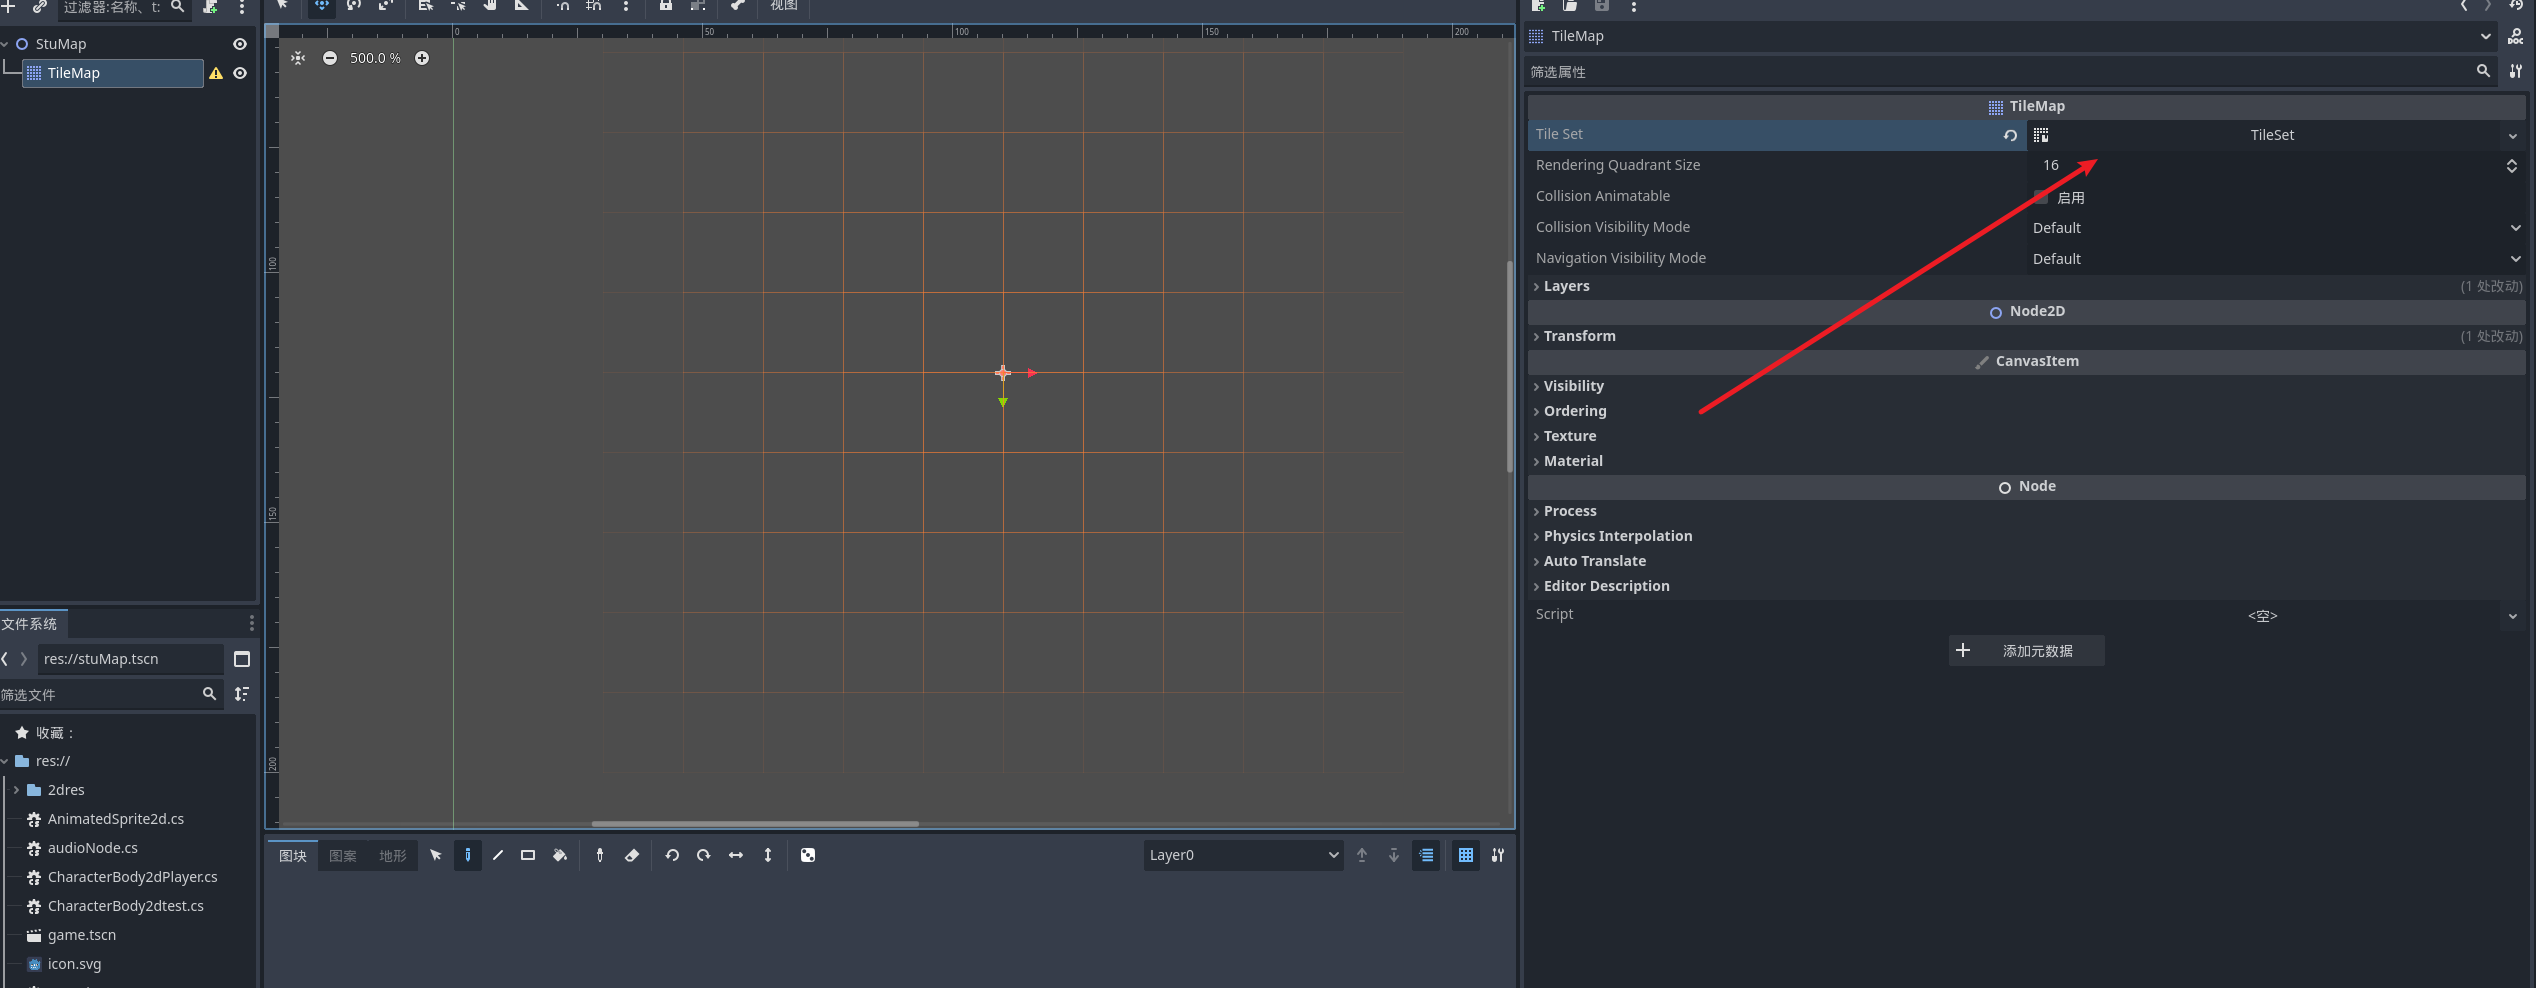
瓦片地图 2d中很常用的地图节点 创建新的场景 stumap 并且设置主场景
设置一个全新的tile种子 这样就可以开始设计我们的图块地图了
然后我们导入资源文件中的 tileset 需要注意的是我们每个格子的大小要和tilemap一致 比如图片中都是 16*16px一个格子
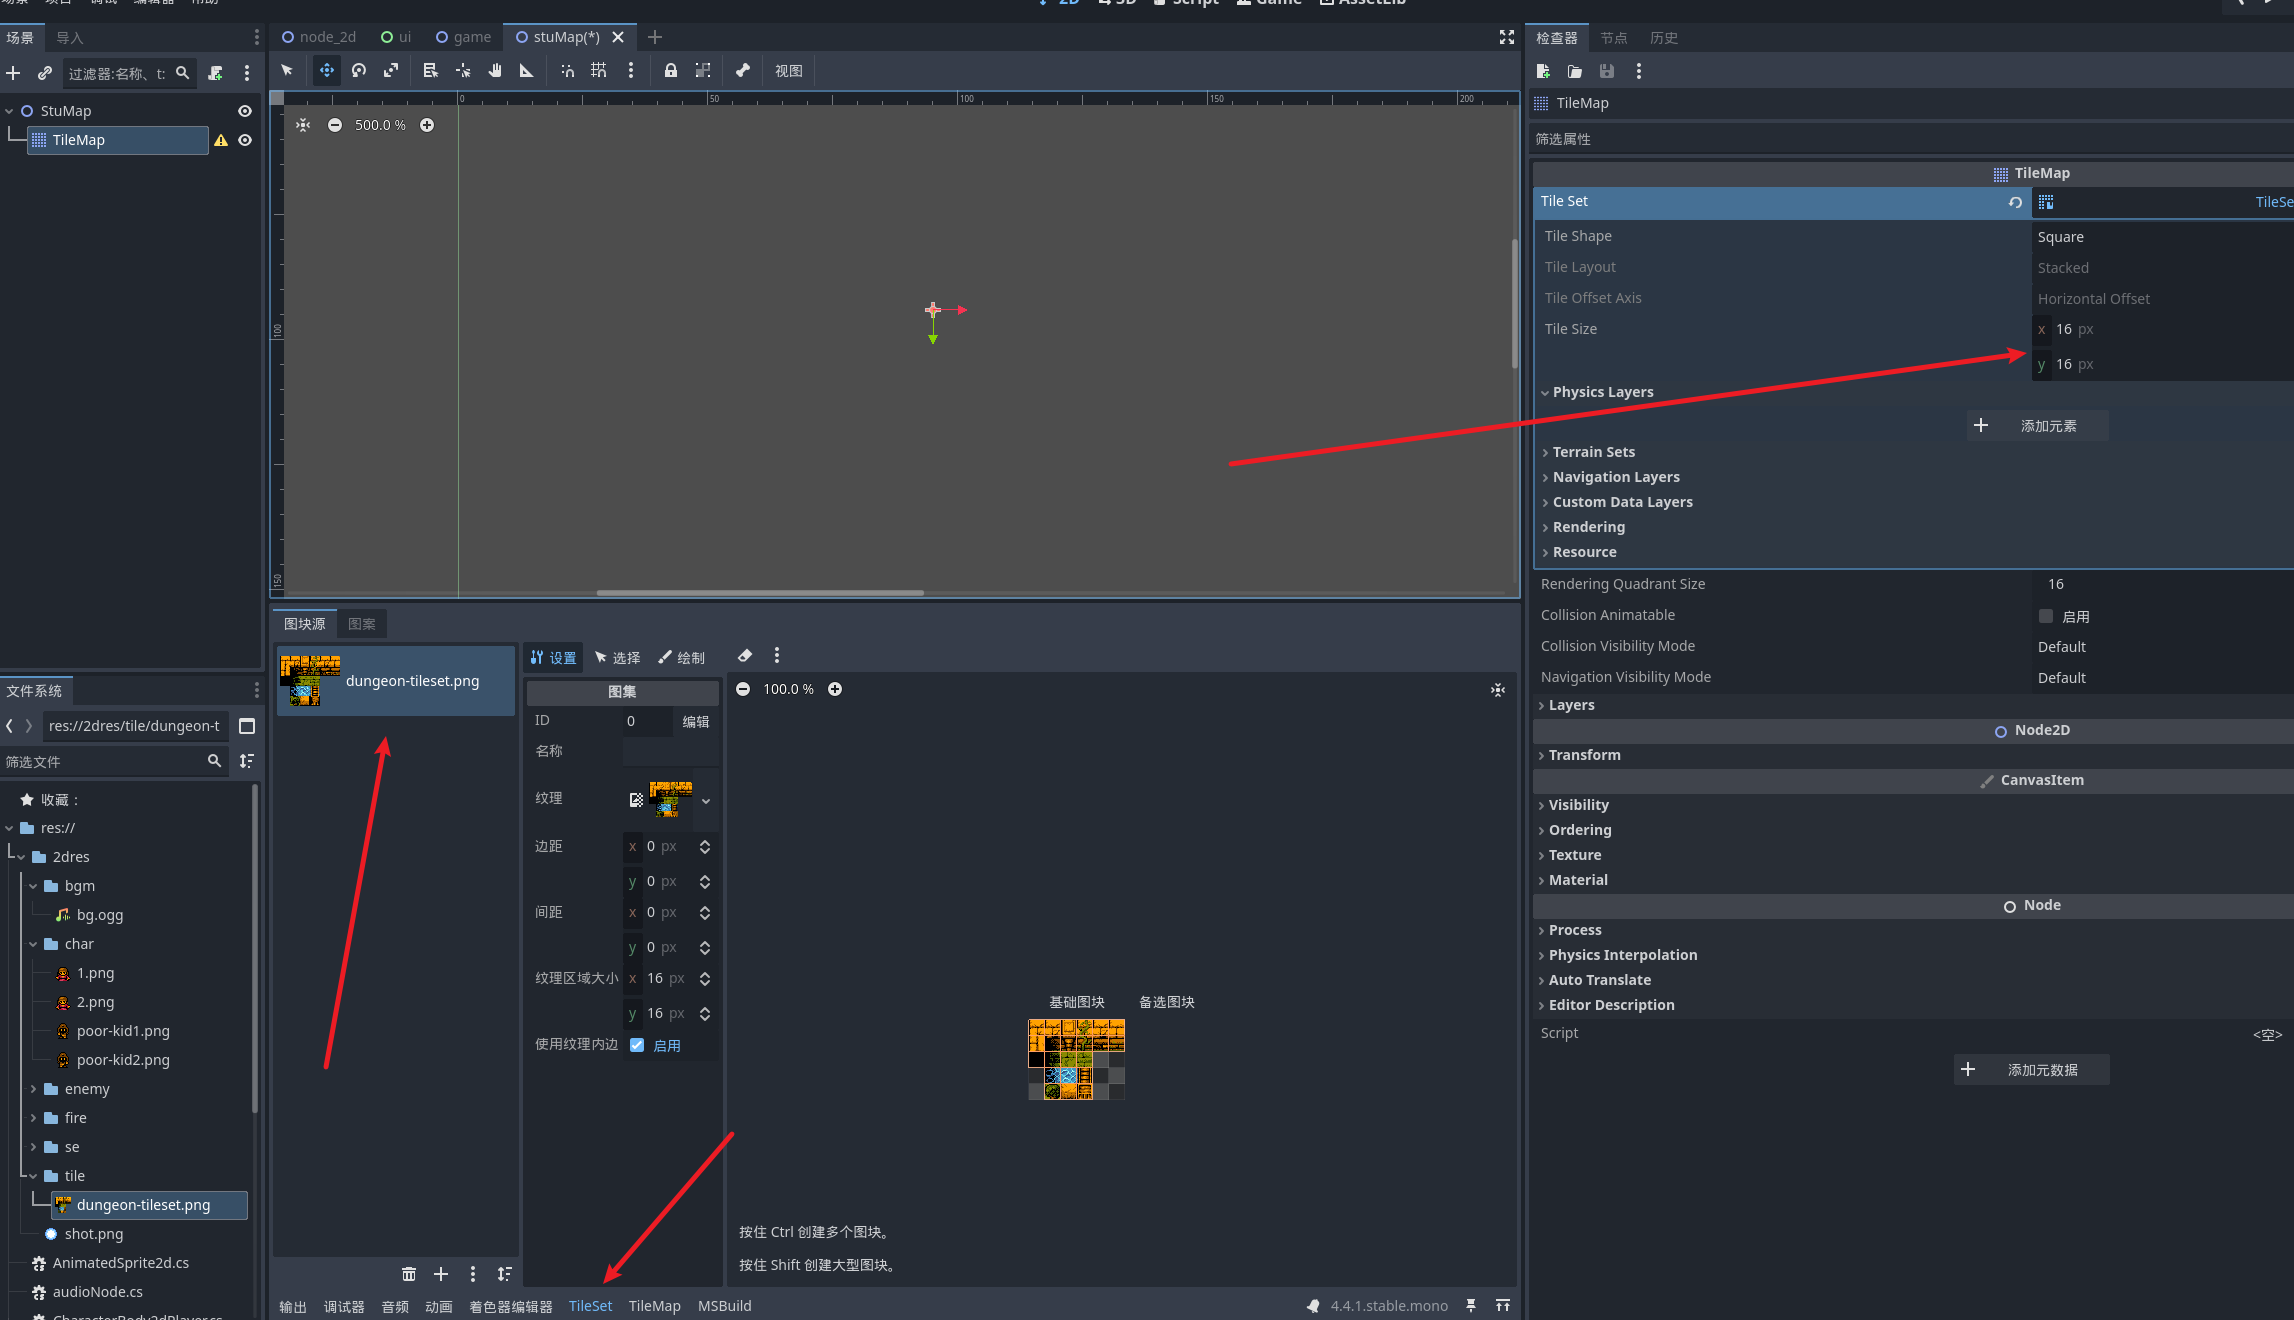
之后打开选项卡中的 tilemap就可以看到我们的图片资源 可以选择格子开始绘制了
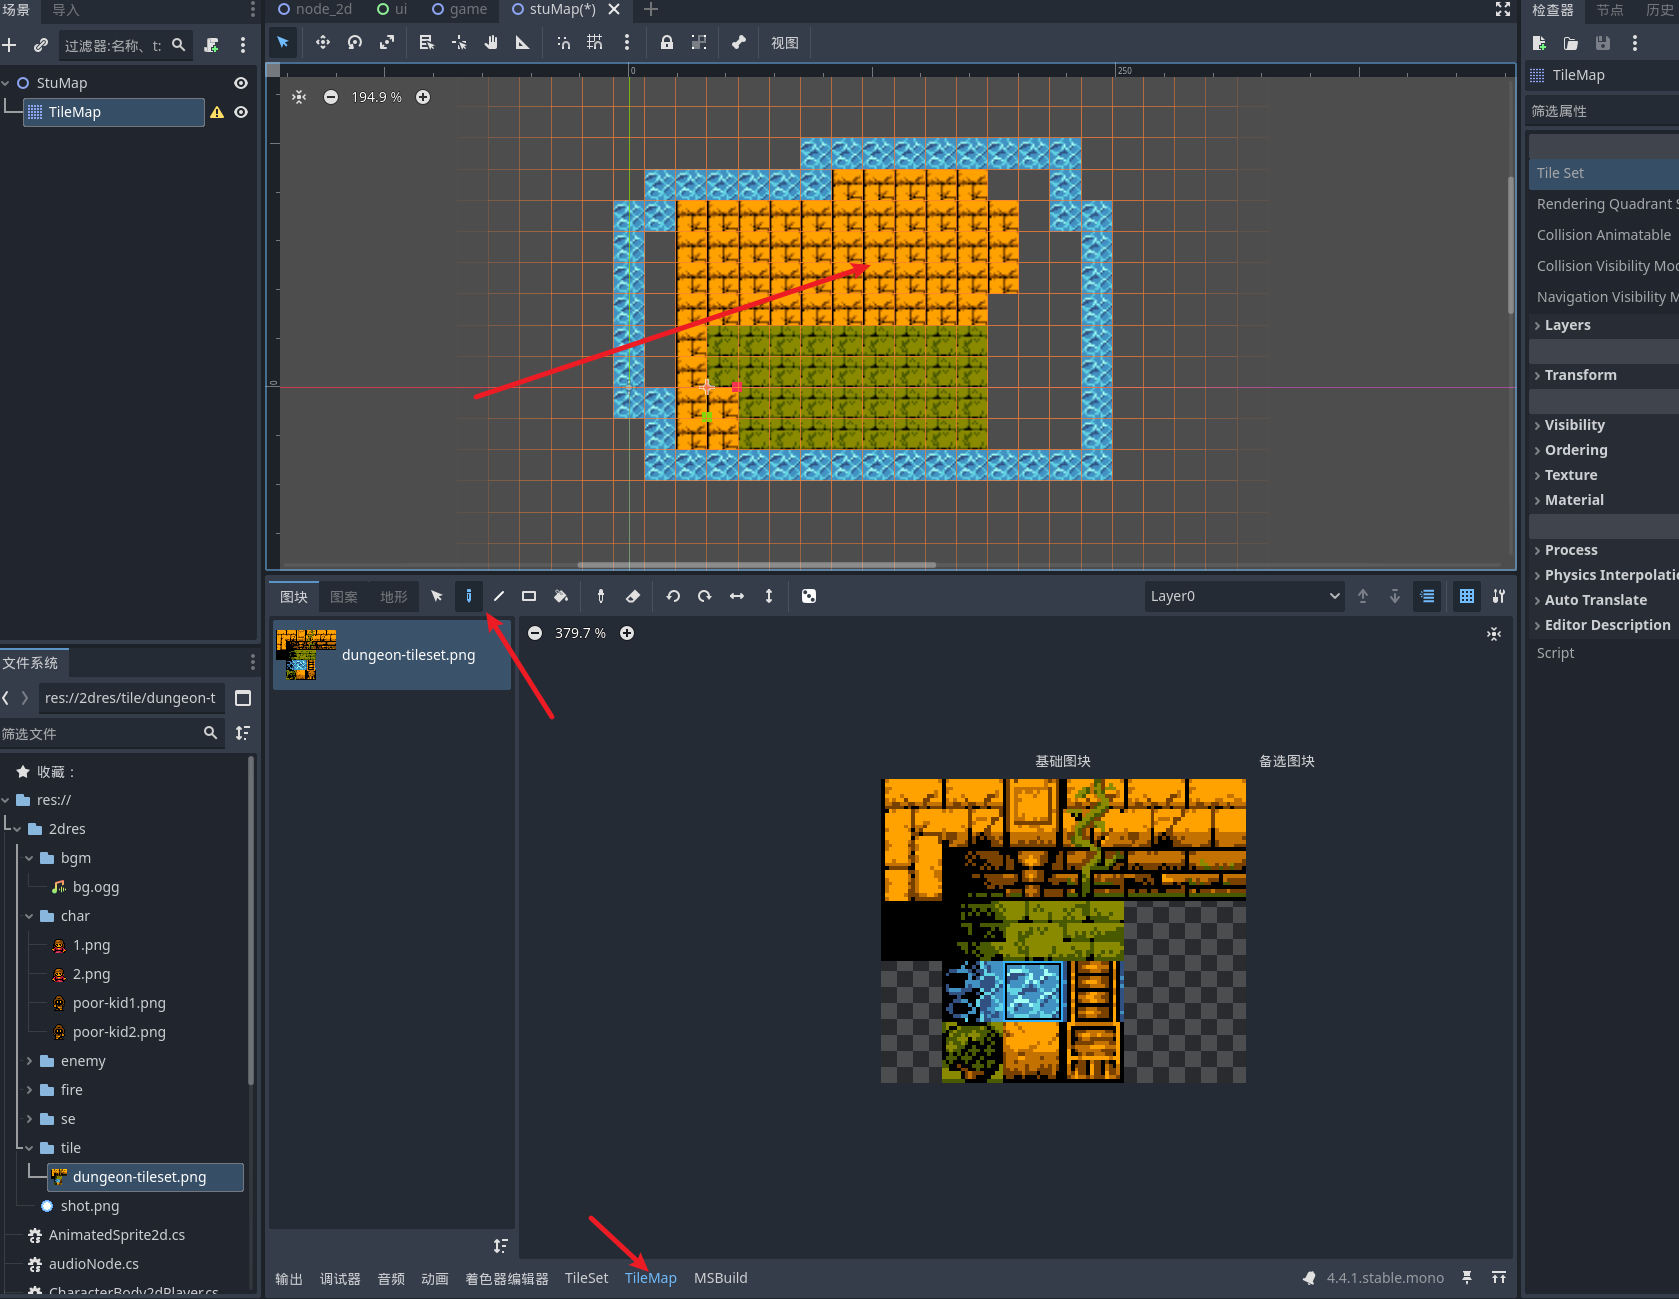

地图分层
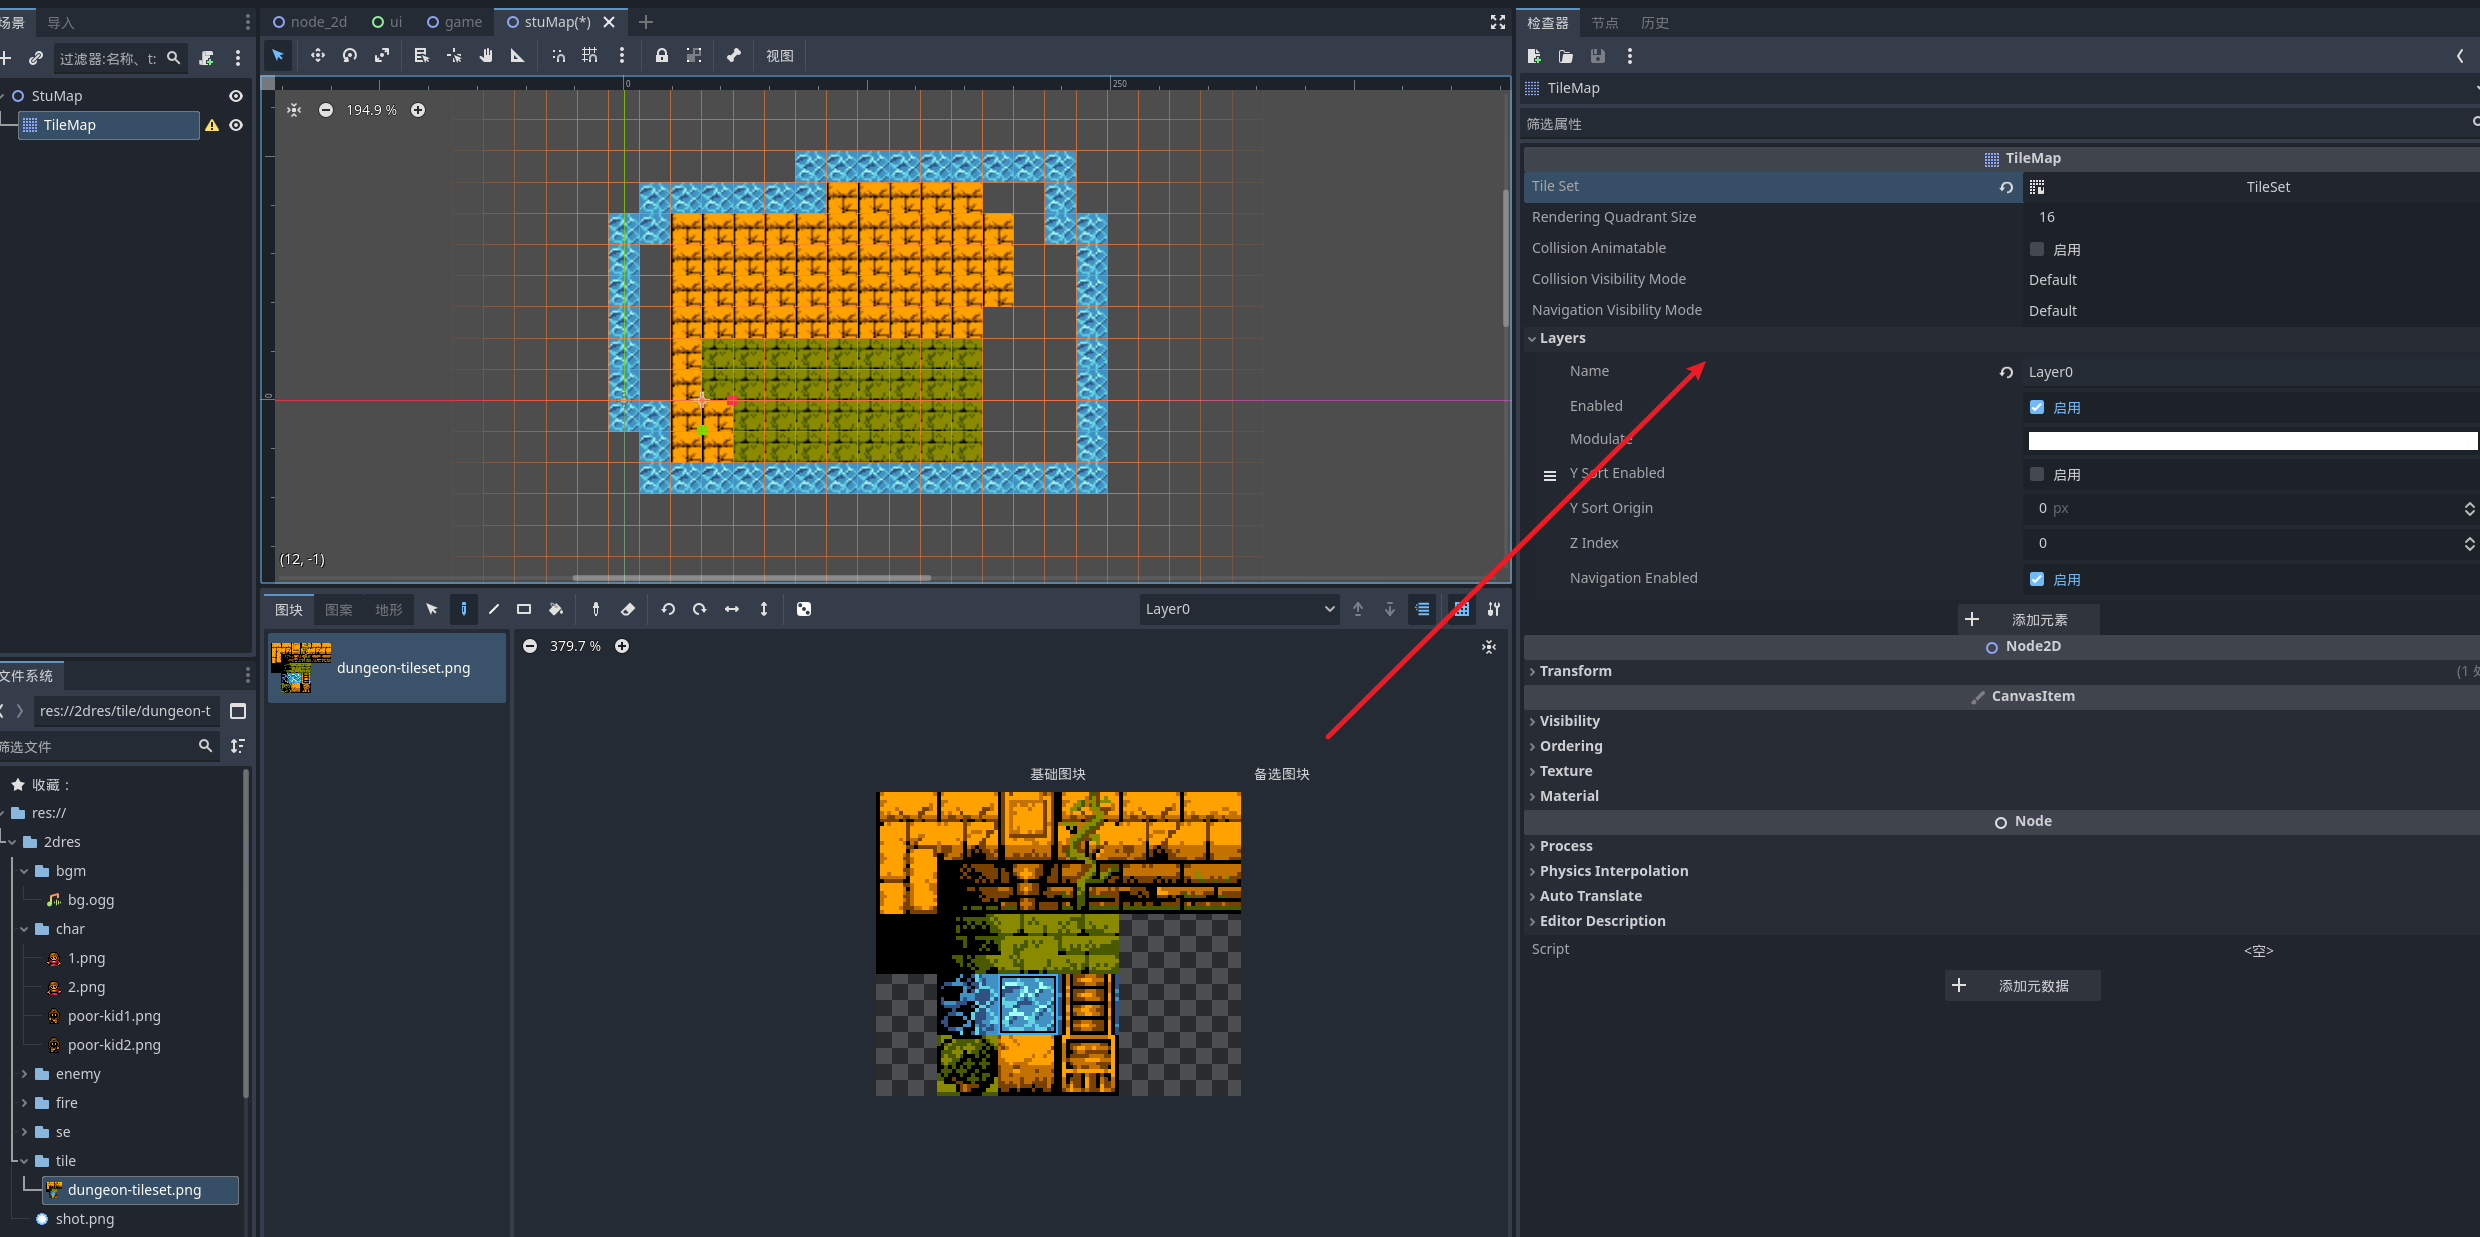
可以选择什么元素展示在什么层中,在编辑中其他层数的元素会变暗 , 运行的时候不会有展示

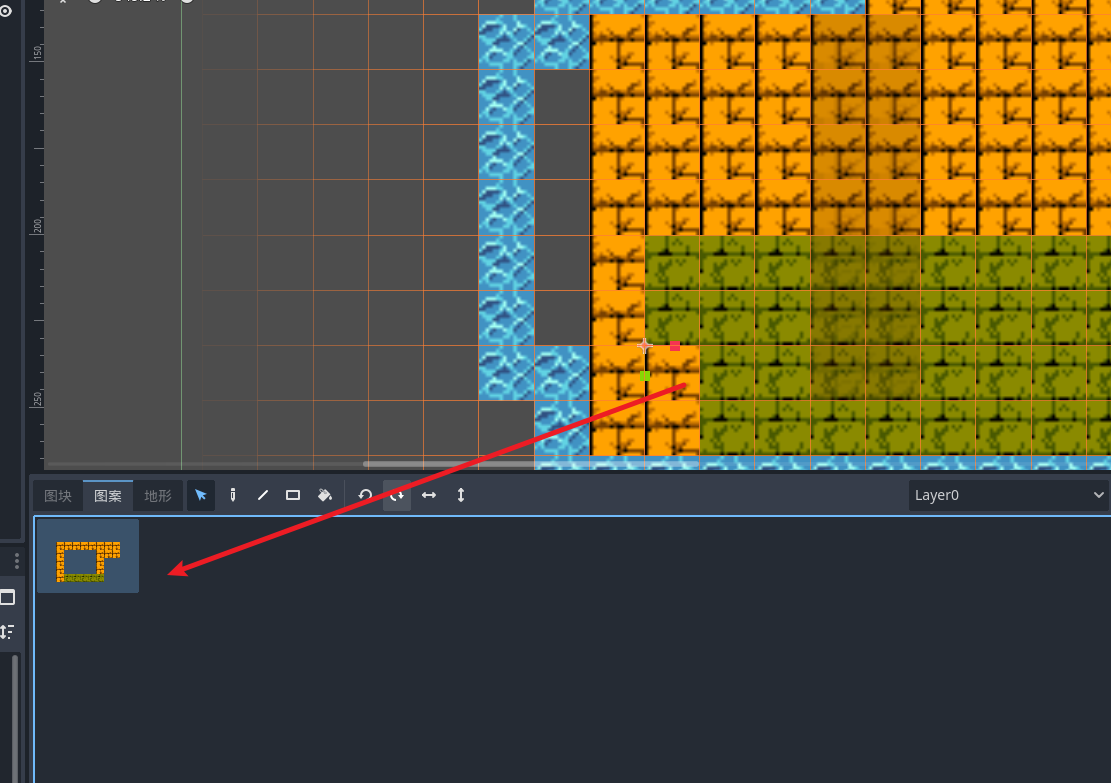
元素复用
我们可以将画好的地图元素 复制到图案中复用 选中编辑器里的元素 复制到突然即可
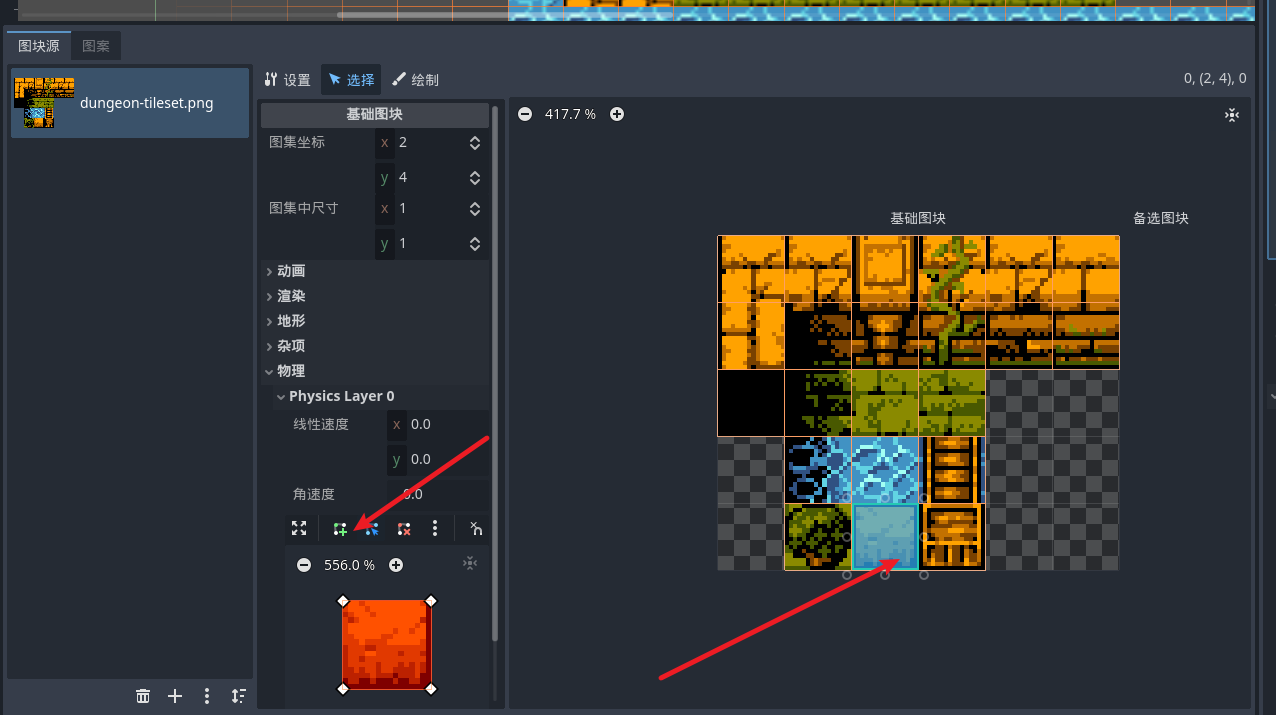
元素碰撞
比如我们希望某一个元素块 有物理元素 可以当障碍物使用 , 就可以开启tilemap的物理层 然后选择地图块

为图块添加物理层 然后你就会发现 我们预览其中可以看到图块被添加的碰撞体积
导航寻路
寻路和导航 在任何角色扮演类游戏中都必不可少 接下来学习一下 godot中如何去完成寻路与导航吧
创建一个全新的场景 用于学习导航寻路, 创建一些精灵节点 作为障碍物

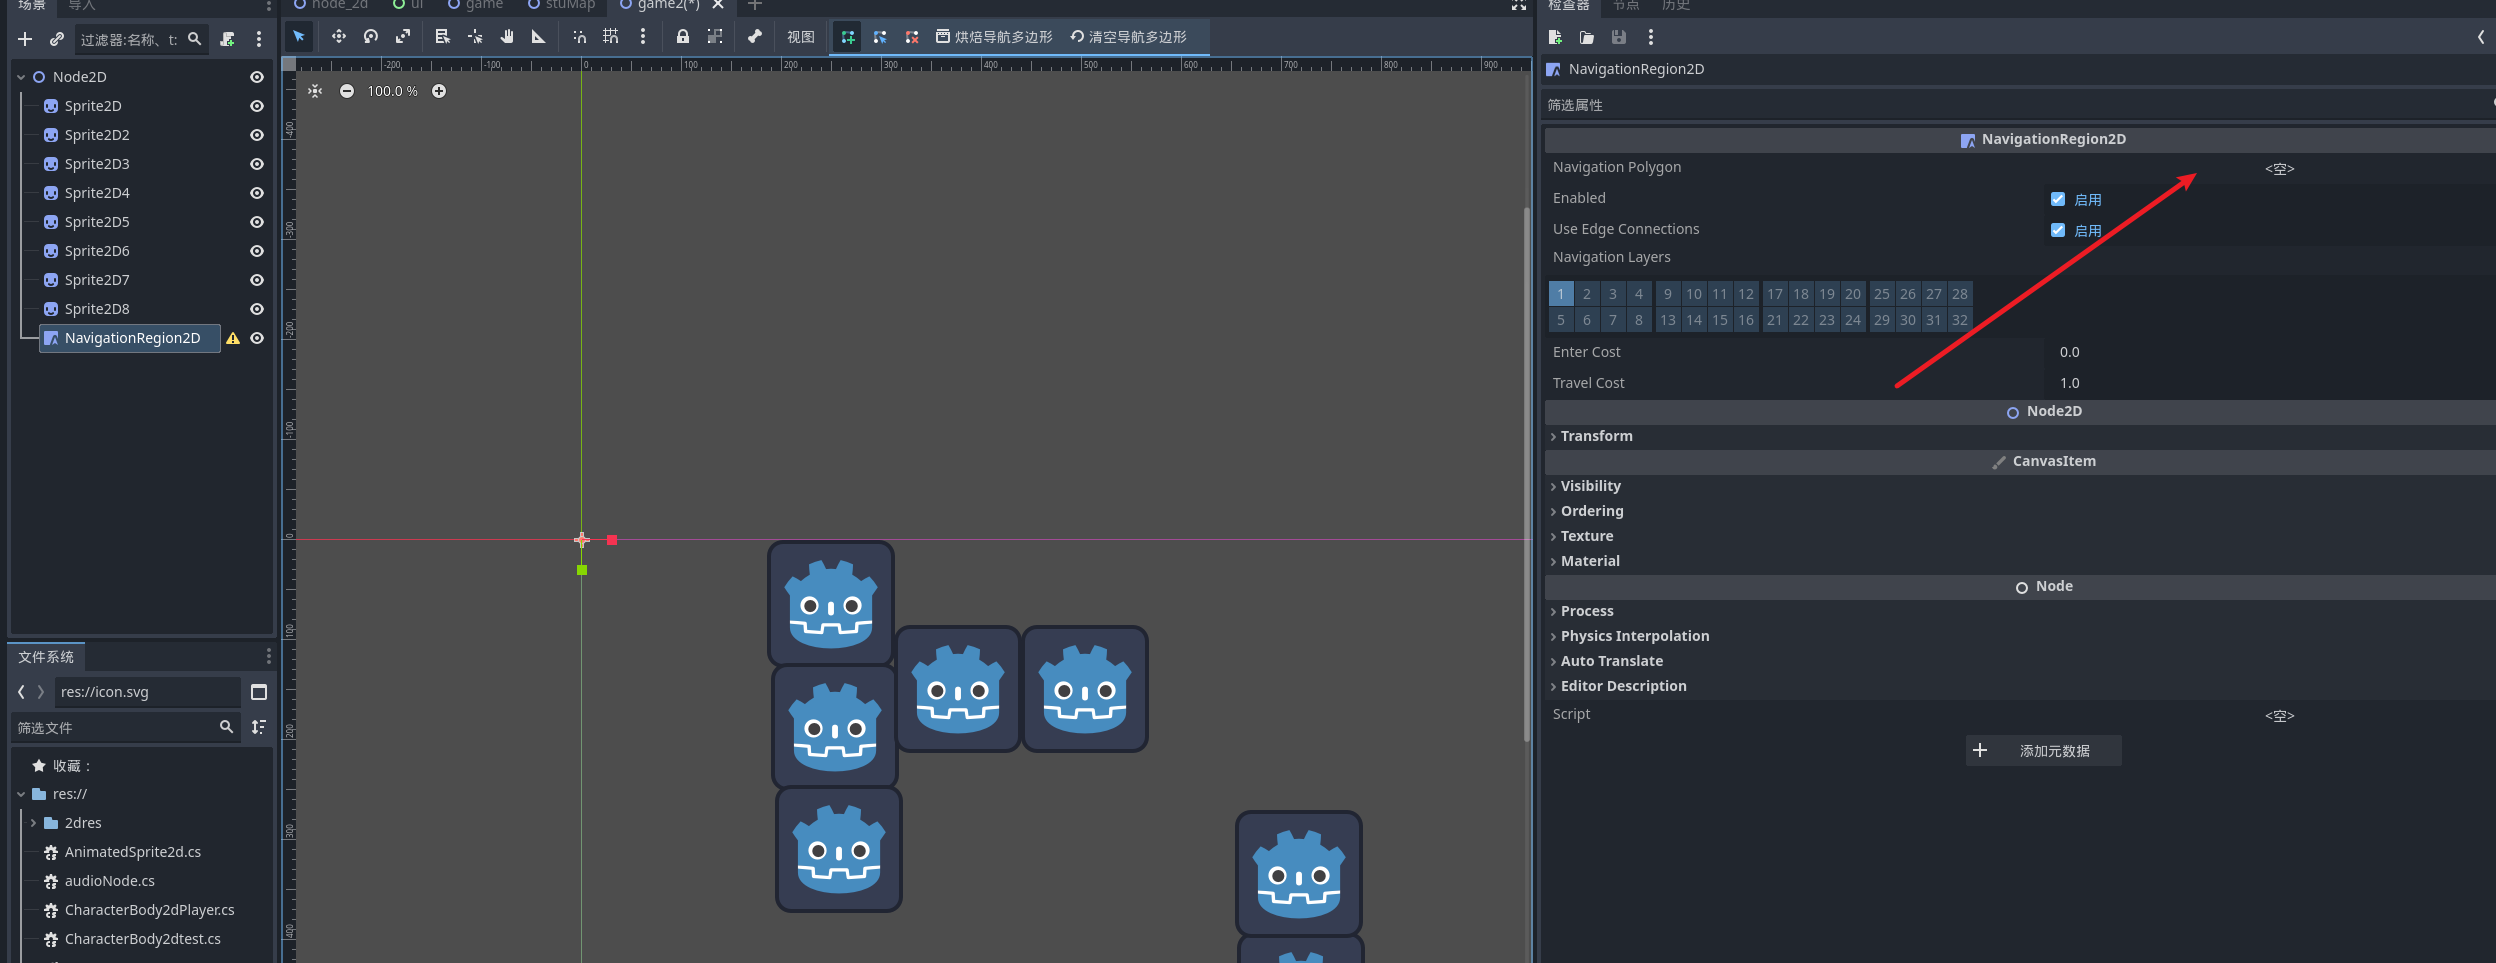
想要添加导航 我们需要为场景加入导航区域
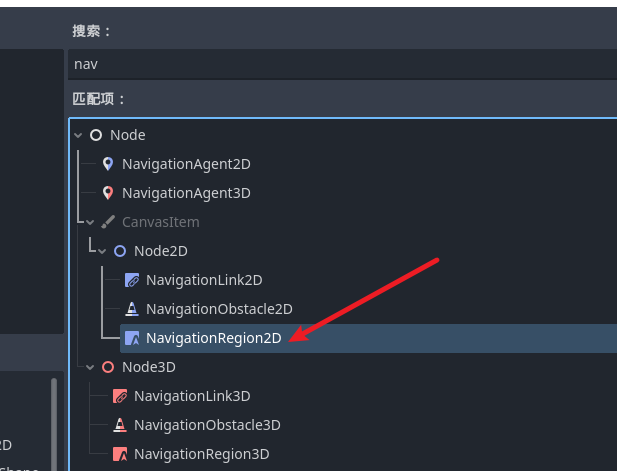
创建完成后我们需要再选项卡创建一个绘制多边形

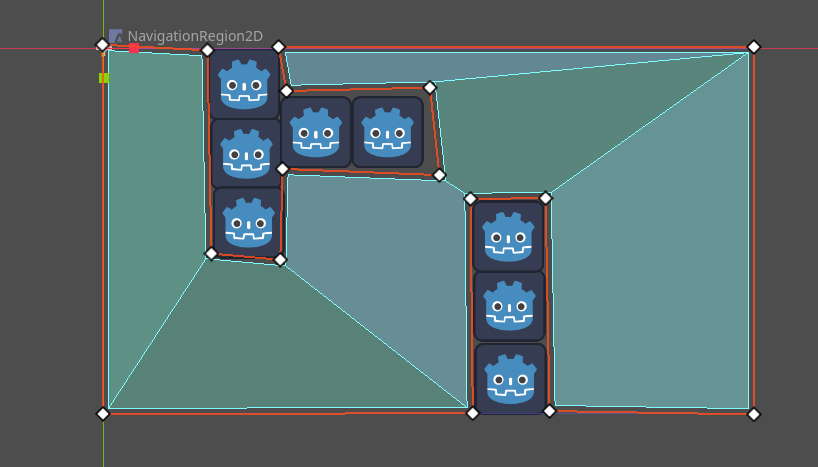
之后就可以绘制导航区域了 同样的这也支持分层, 绘制区域 避开障碍物
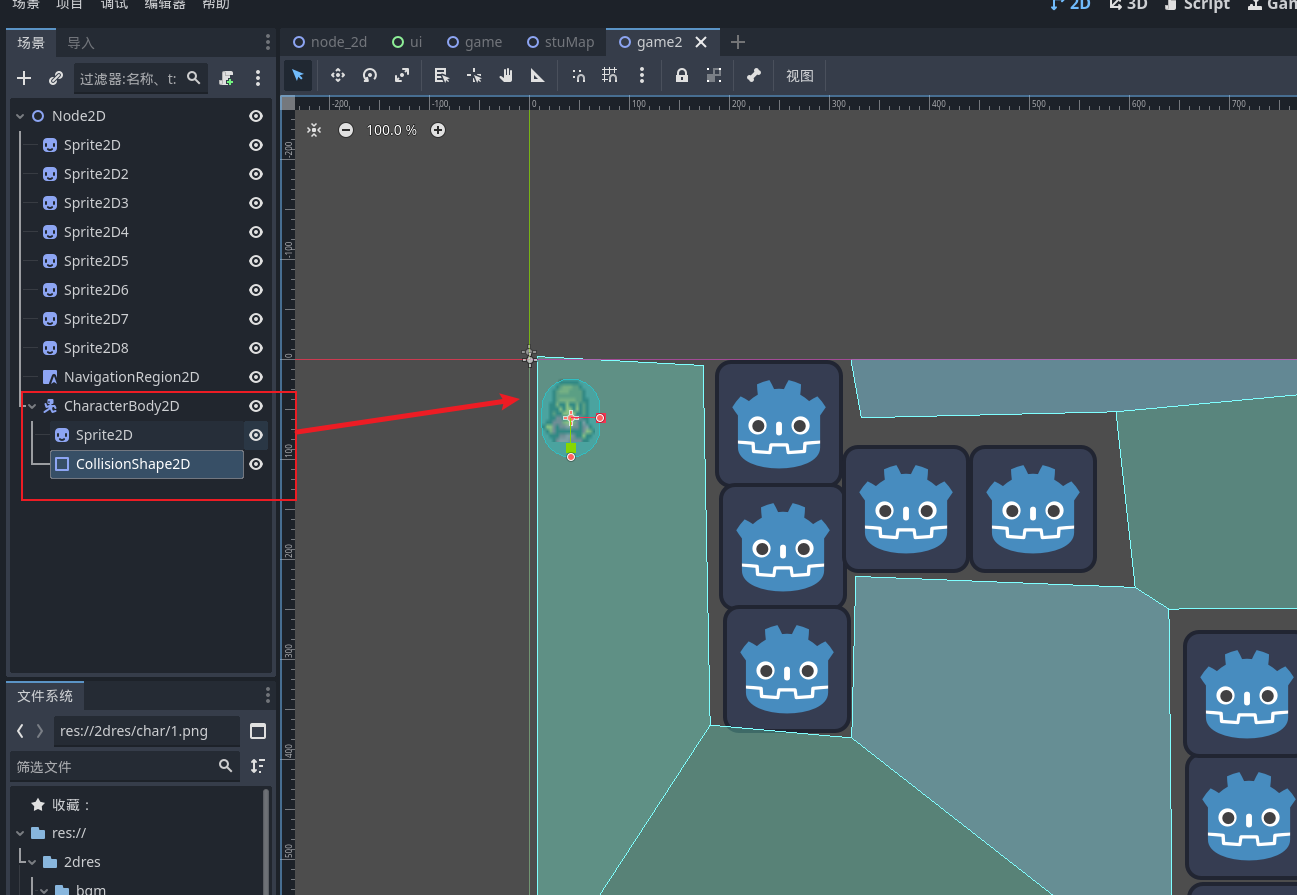
创建一个角色控制器
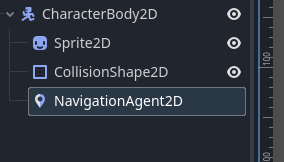
之后为角色导航加入一个 导航代理节点 携带这个代理节点就可以在导航区域使用导航
接下来我们需要实现一个思路 就是让角色移动到我鼠标点击的方向 来看看角色是否可以避开障碍物
using Godot;
using System;

public partial class CharacterBody2dTestNavi : CharacterBody2D
{
    //导航使用节点
     NavigationAgent2D nav;
     public override void _Ready()
     {
         base._Ready();
         //获取 agent节点
         nav = GetNode<NavigationAgent2D>("NavigationAgent2D");
     }

     public override void _PhysicsProcess(double delta)
    {
        //设置鼠标位置为导航目标点
        nav.TargetPosition = GetGlobalMousePosition();
        //朝着该方向移动 不断的生成路径点
        Vector2 nextPathPosition = (nav.GetNextPathPosition() - this.Position).Normalized();
        Velocity = nextPathPosition * 300;
        MoveAndSlide();
    }
}
基于当前场景运行 就实现了简单的寻路 这里的寻路默认是基于 A*算法
粒子特效
他有两个节点 一个是基于cpu计算 一个是基于显卡计算
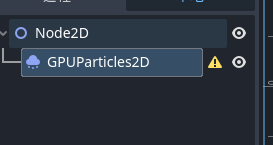
通常只要可以使用gpu那么我们都有先用 gpu 性能更加的好
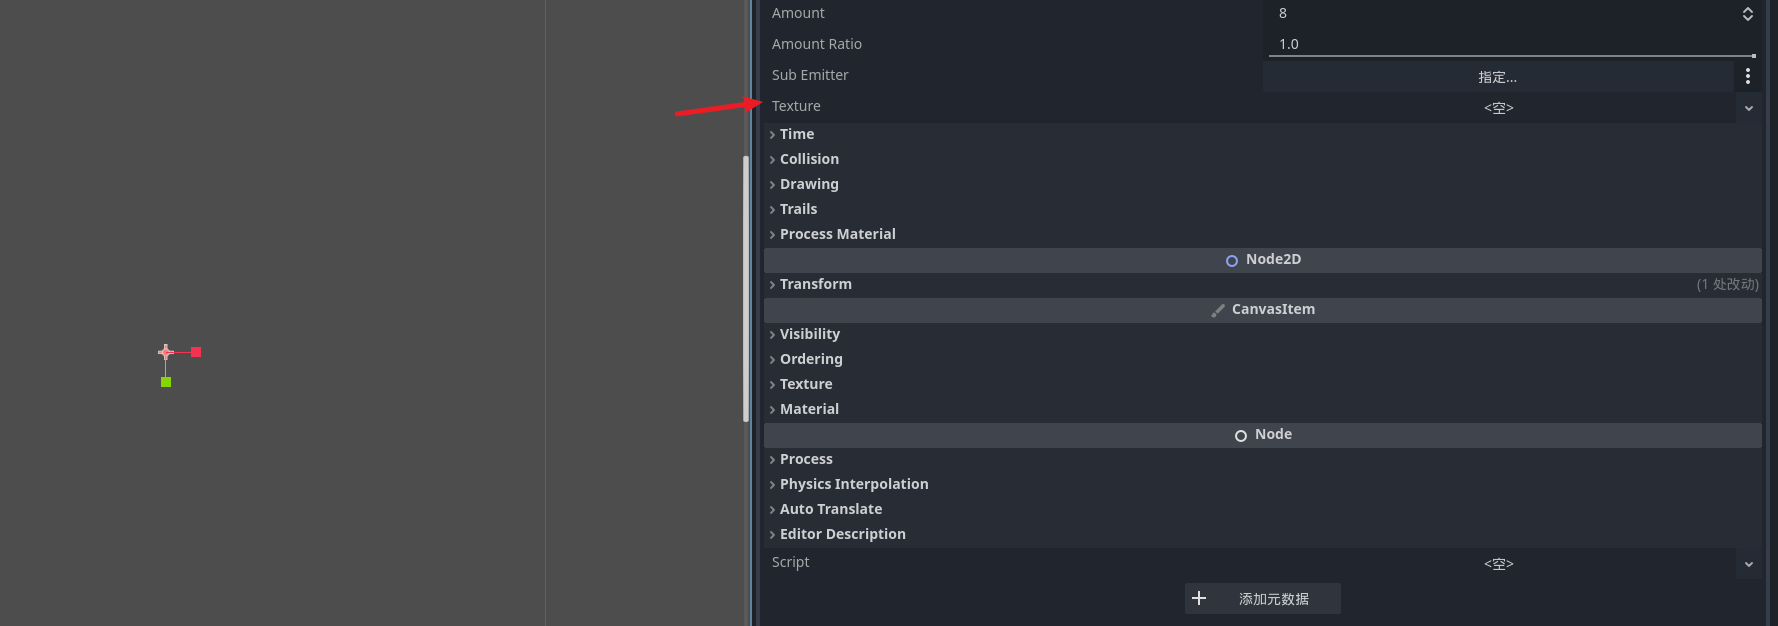
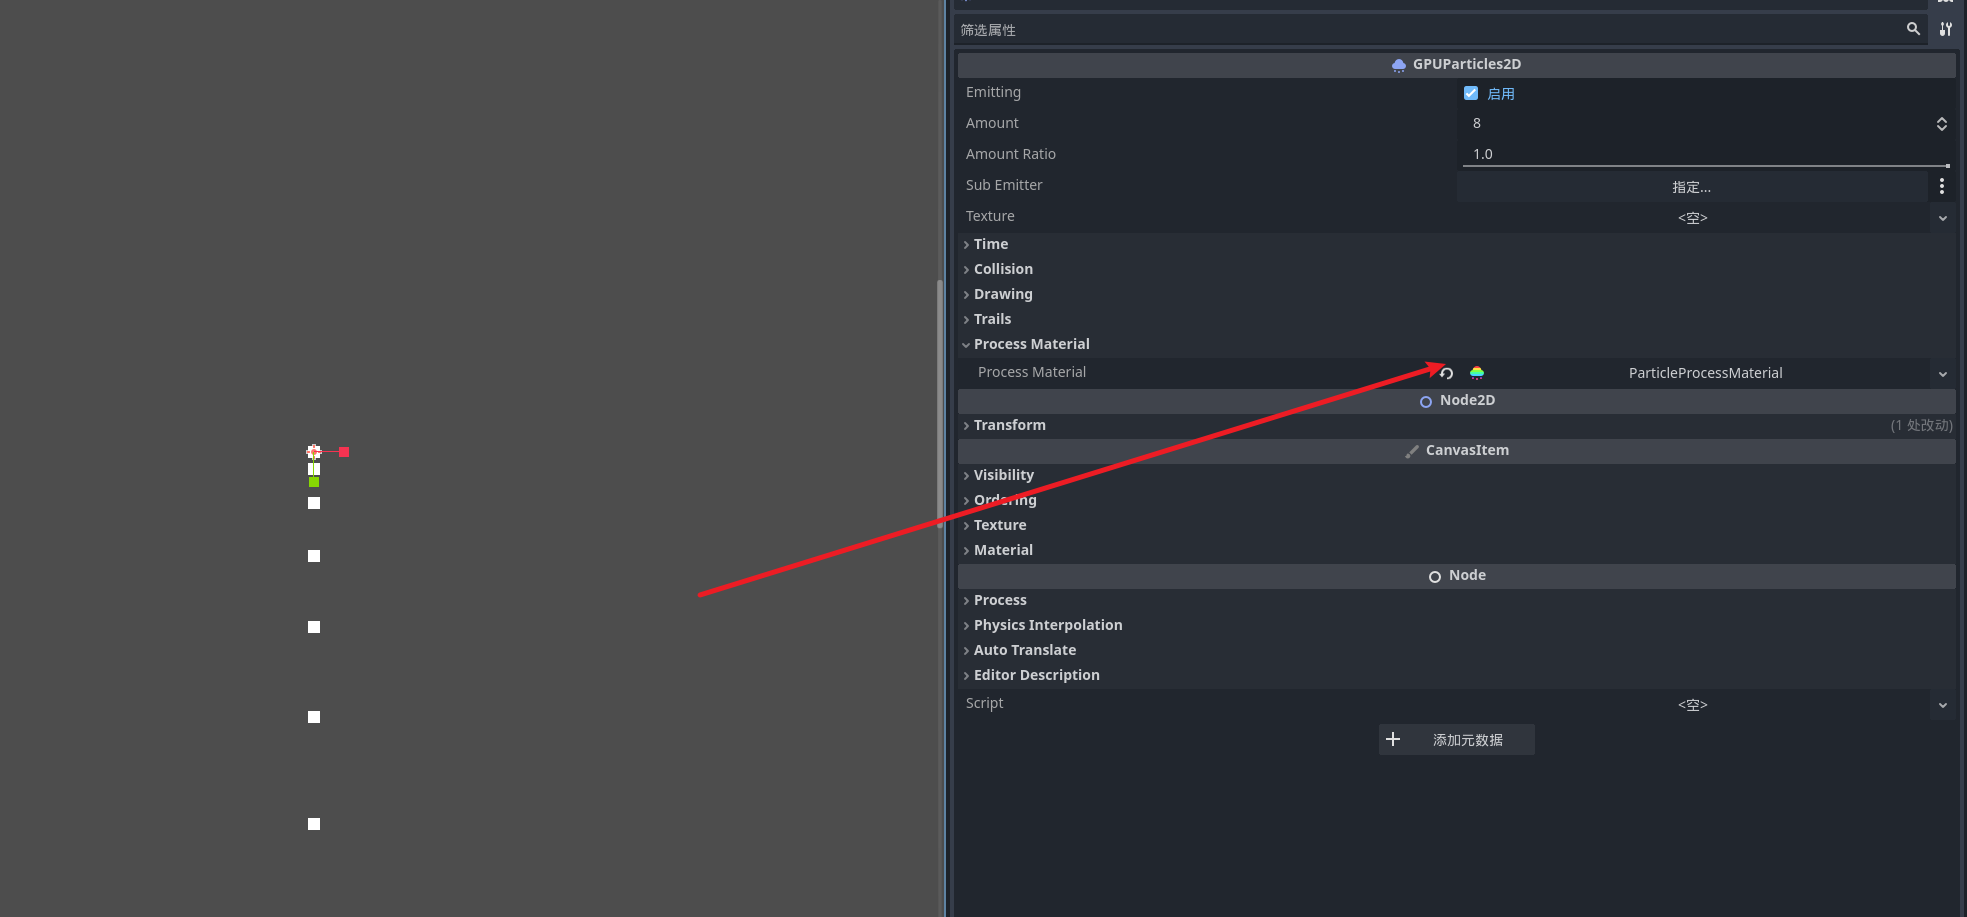
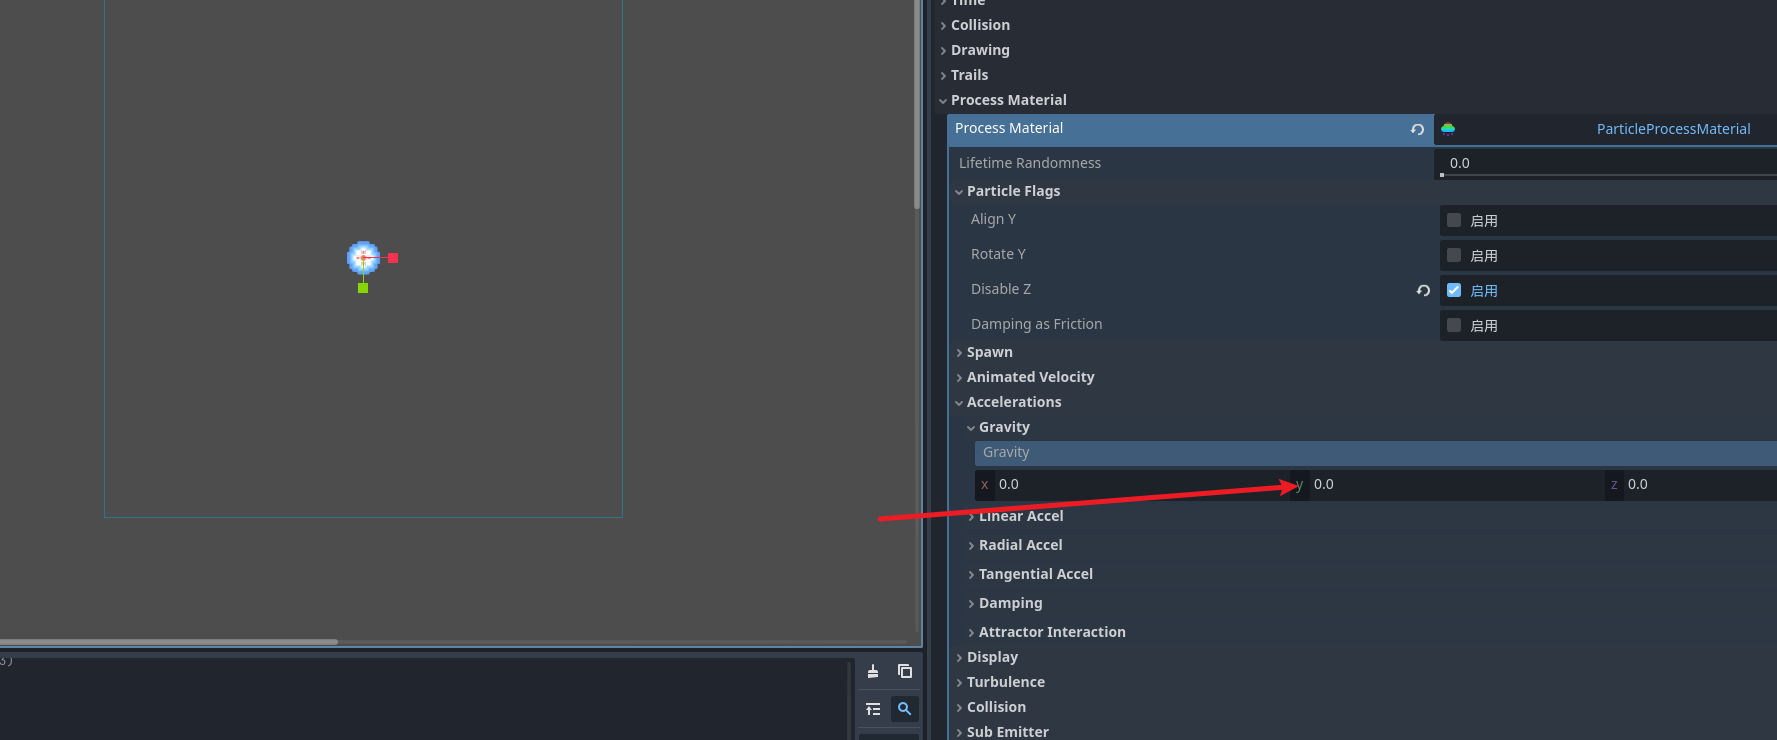
比较重要的就是纹理了 粒子发射实际上就是使用贴图绘制特效 , 选择材质. 创建完之后我们就可以看到粒子的发射了 为什么是向下掉落呢 因为默认是开启了重力
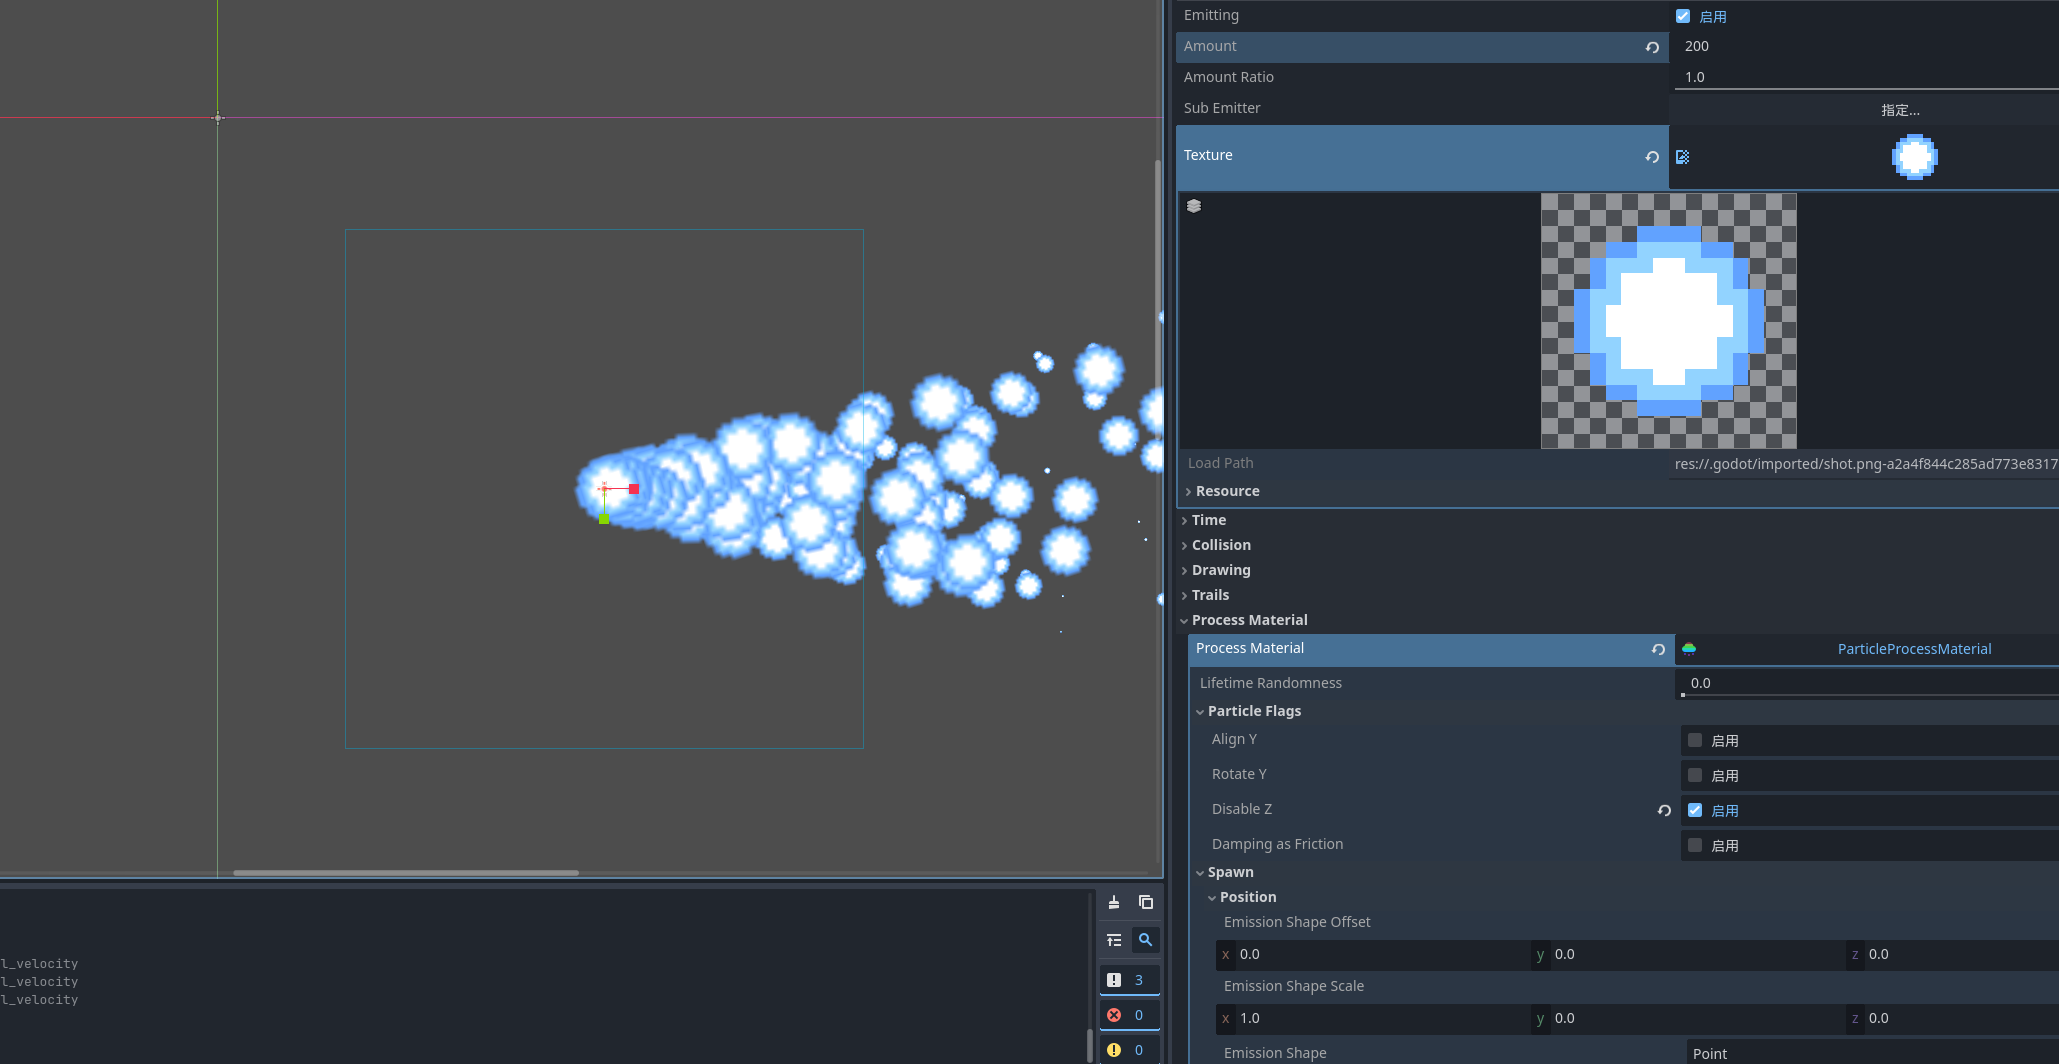
设置纹理
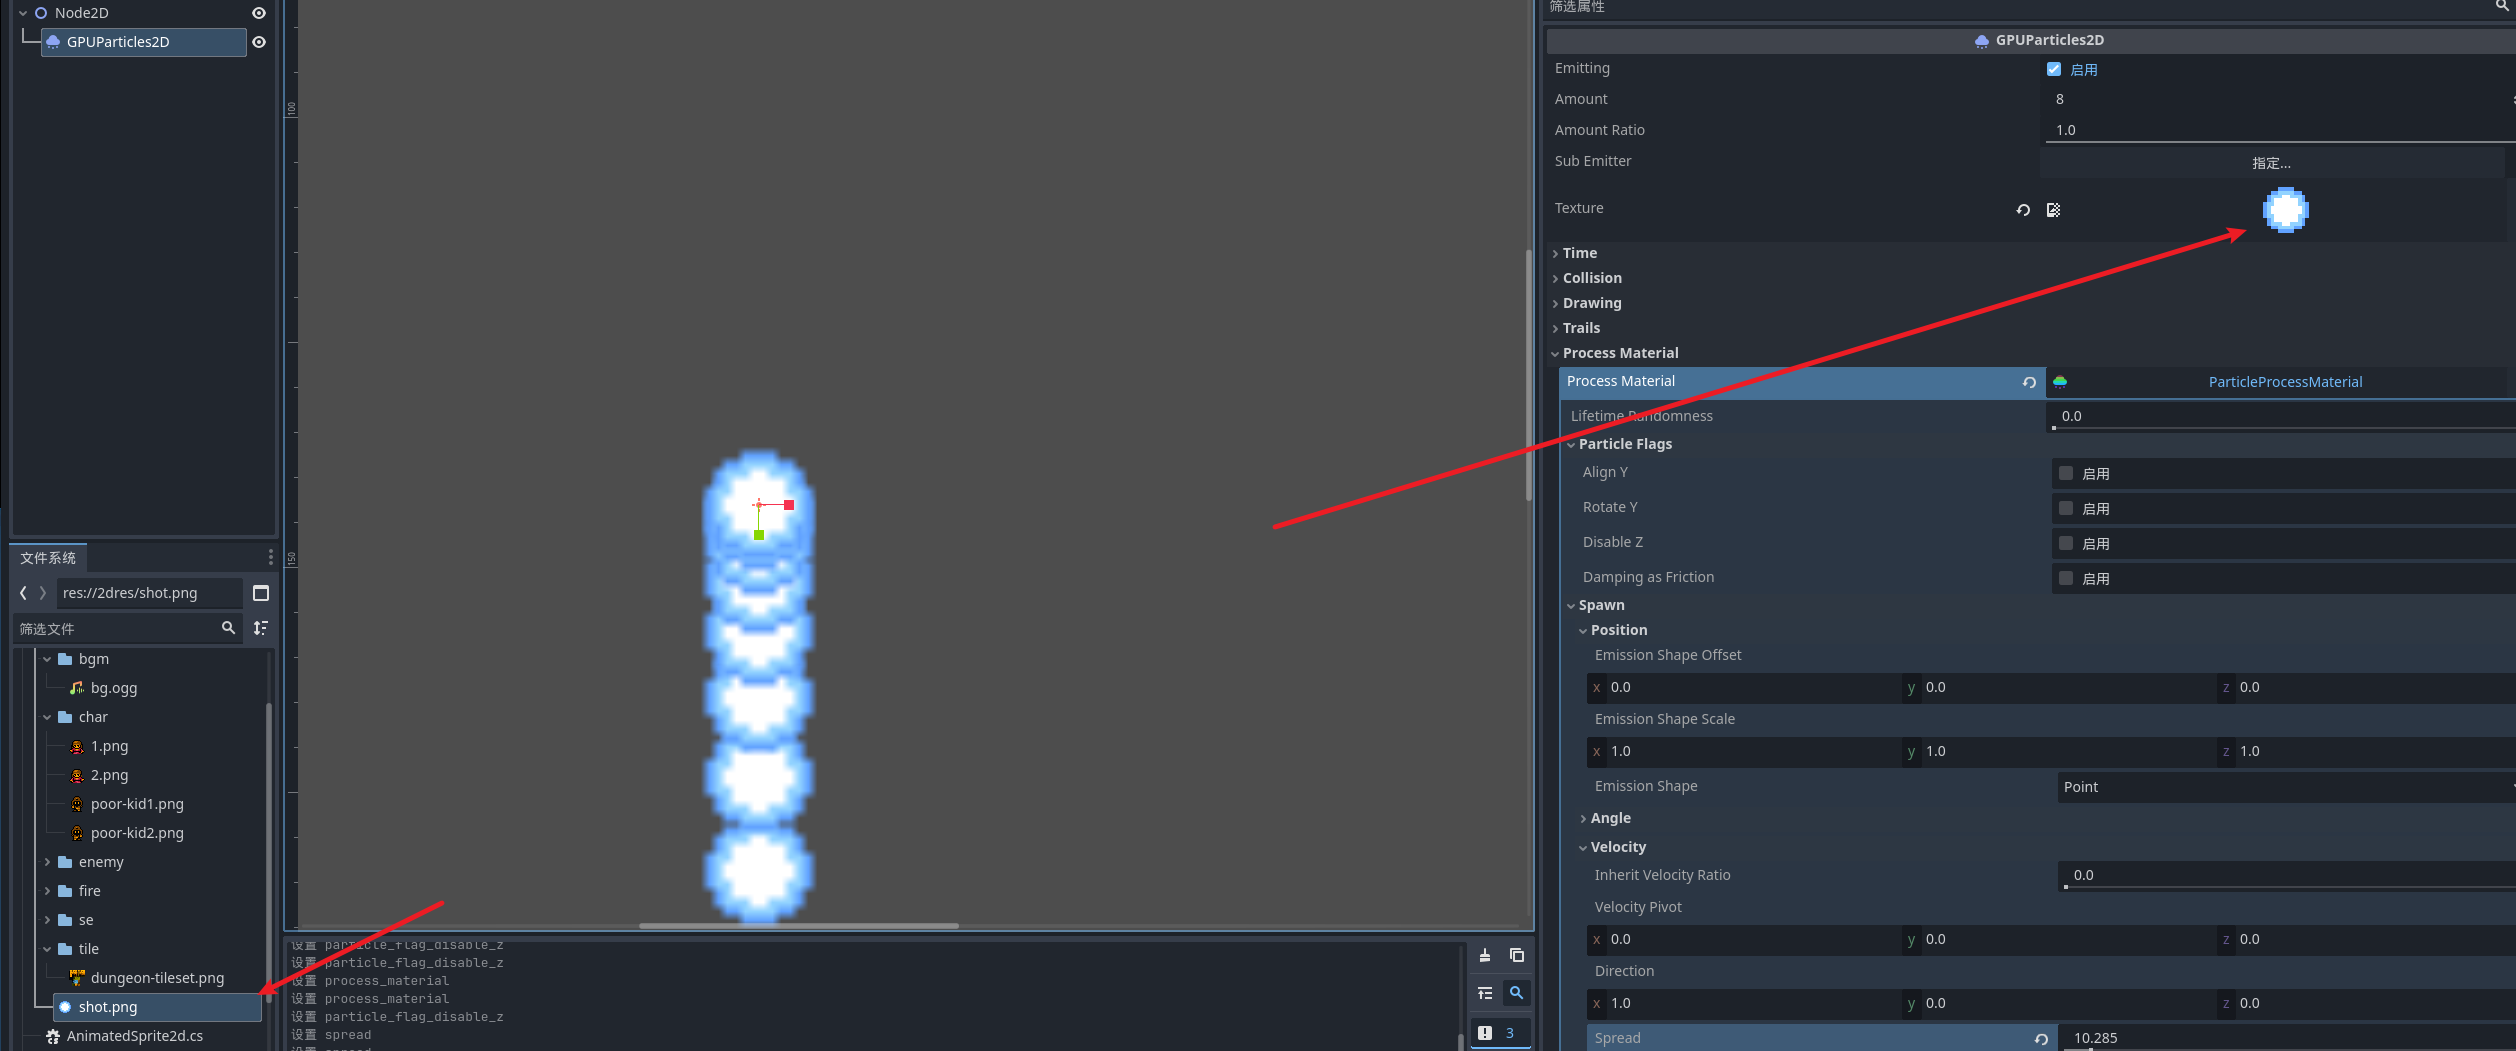
就可以看到发射出来的粒子了 我们可以关闭重力
比如我们想朝着x方向发射粒子
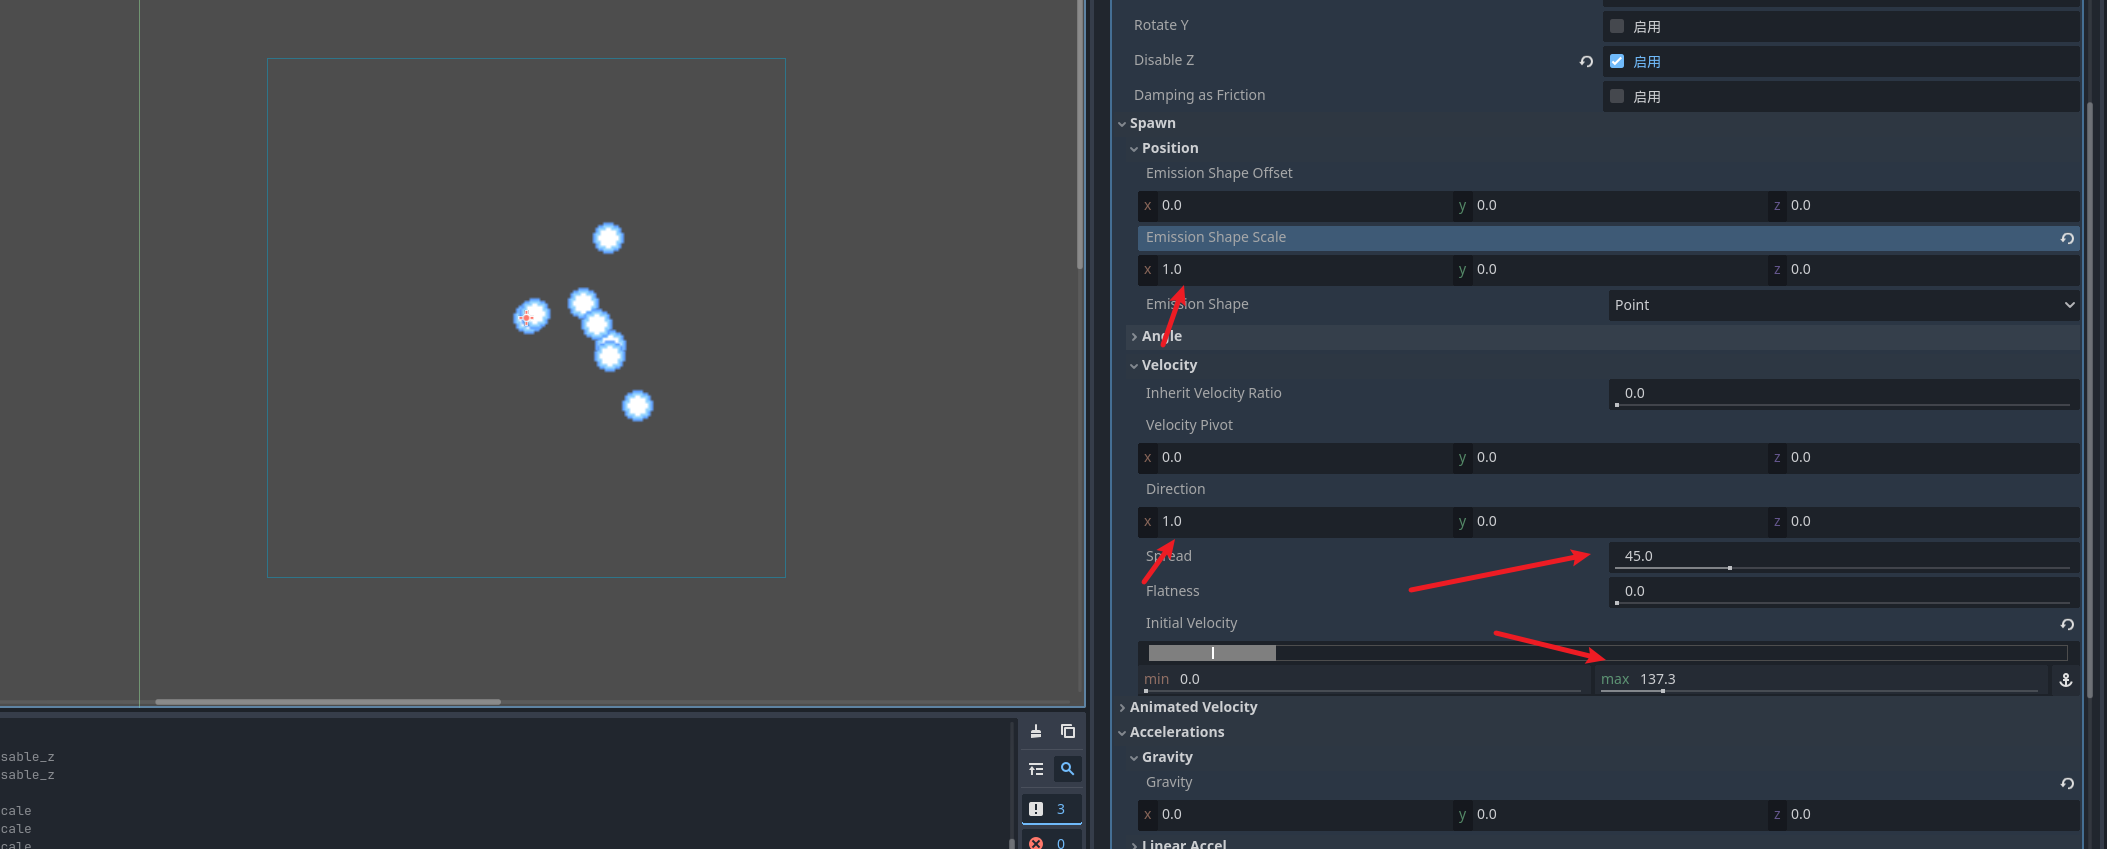
我们可以随意的实验选项卡的选项 来达到各种效果
颜色渐变
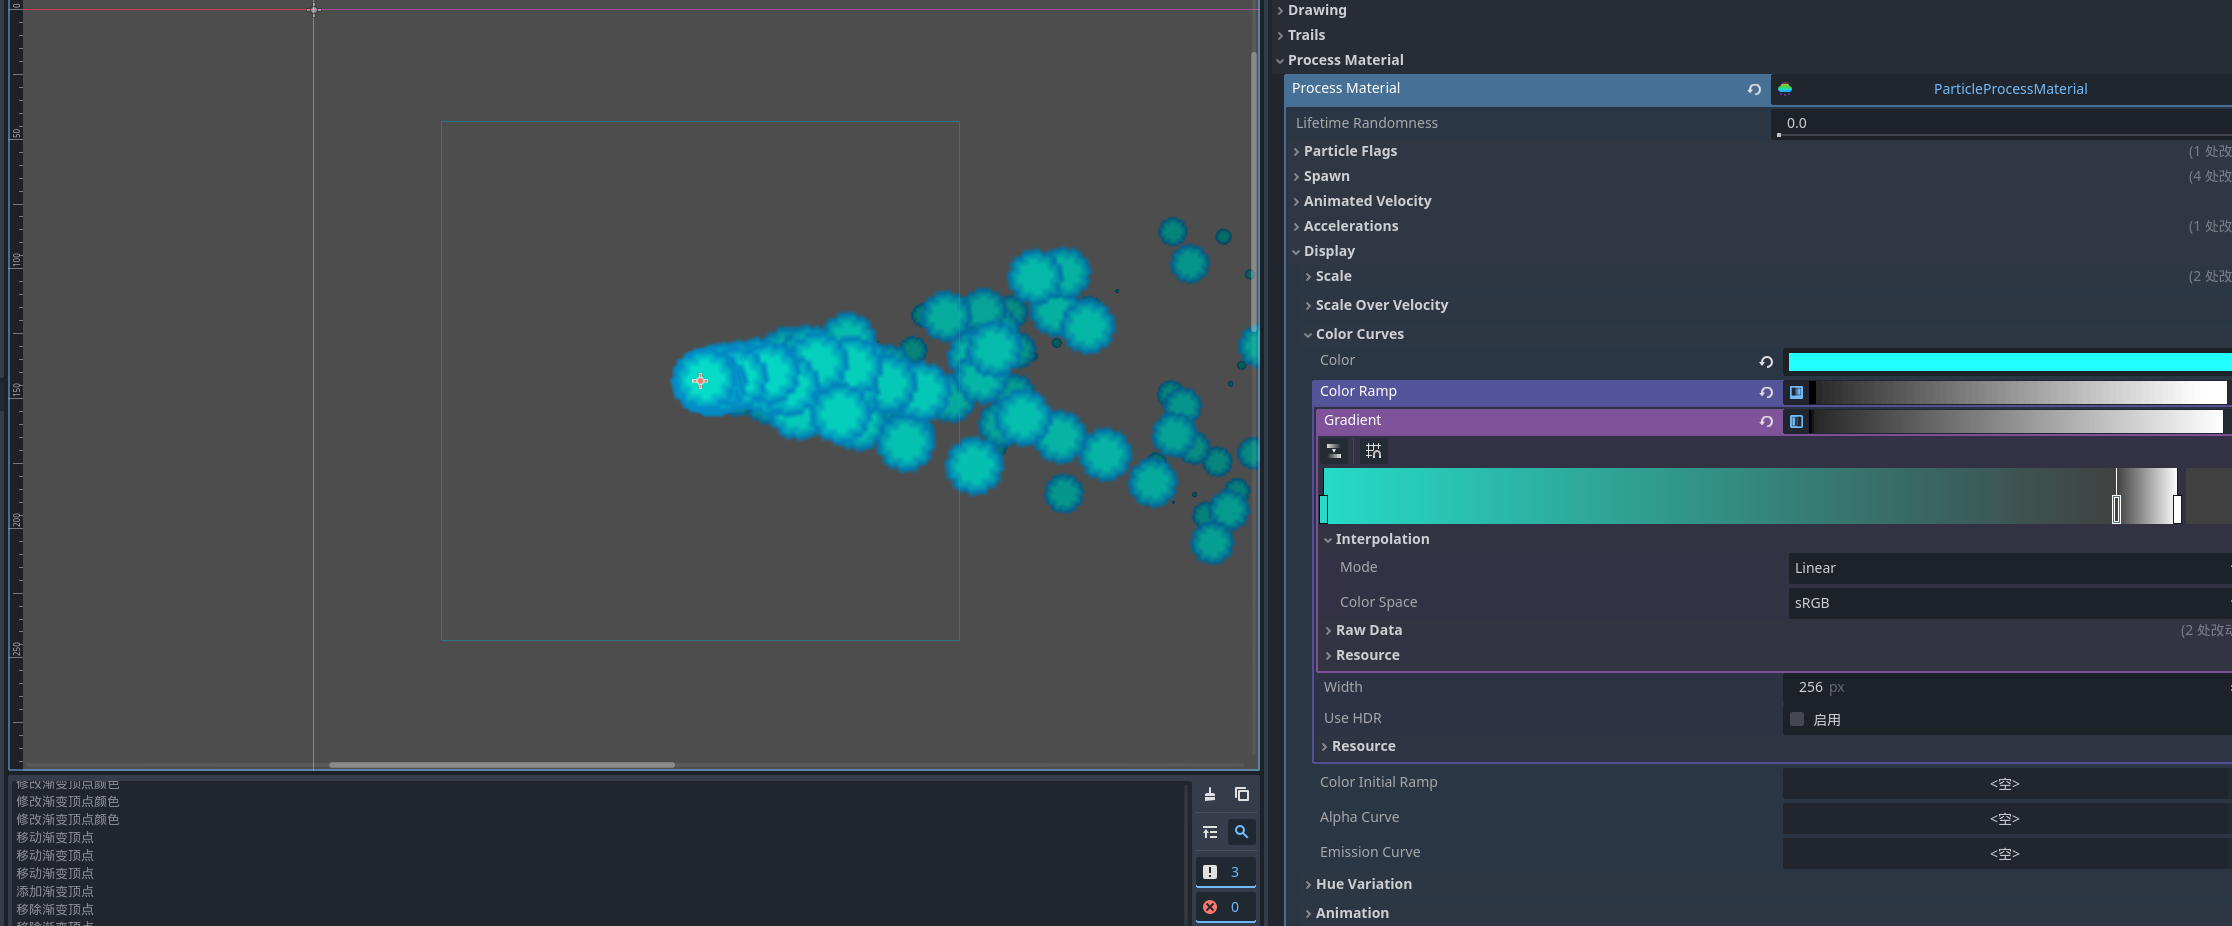
我们可以通过设置粒子的展示方式来实现下雪的效果 将持续时间设置5s左右


数据持久化
游戏需要存档 也就是本地持久化 我们需要读档 存档 所以需要以文件的形式 存入到客户端主机里 尤其是我们的引擎是跨平台的 这里我们需要利用godot为我们提供的持久化路径 user:// 它会在不同的系统转为不同的路径
using Godot;
using System;

public partial class localtest : Node2D
{
	// Called when the node enters the scene tree for the first time.
	public override void _Ready()
	{
		string path = ProjectSettings.GlobalizePath("user://1.txt");
		GD.Print("路径为" + path);
	}

}
创建一个空节点 绑定一个脚本 ,这里我们来演示存储数据
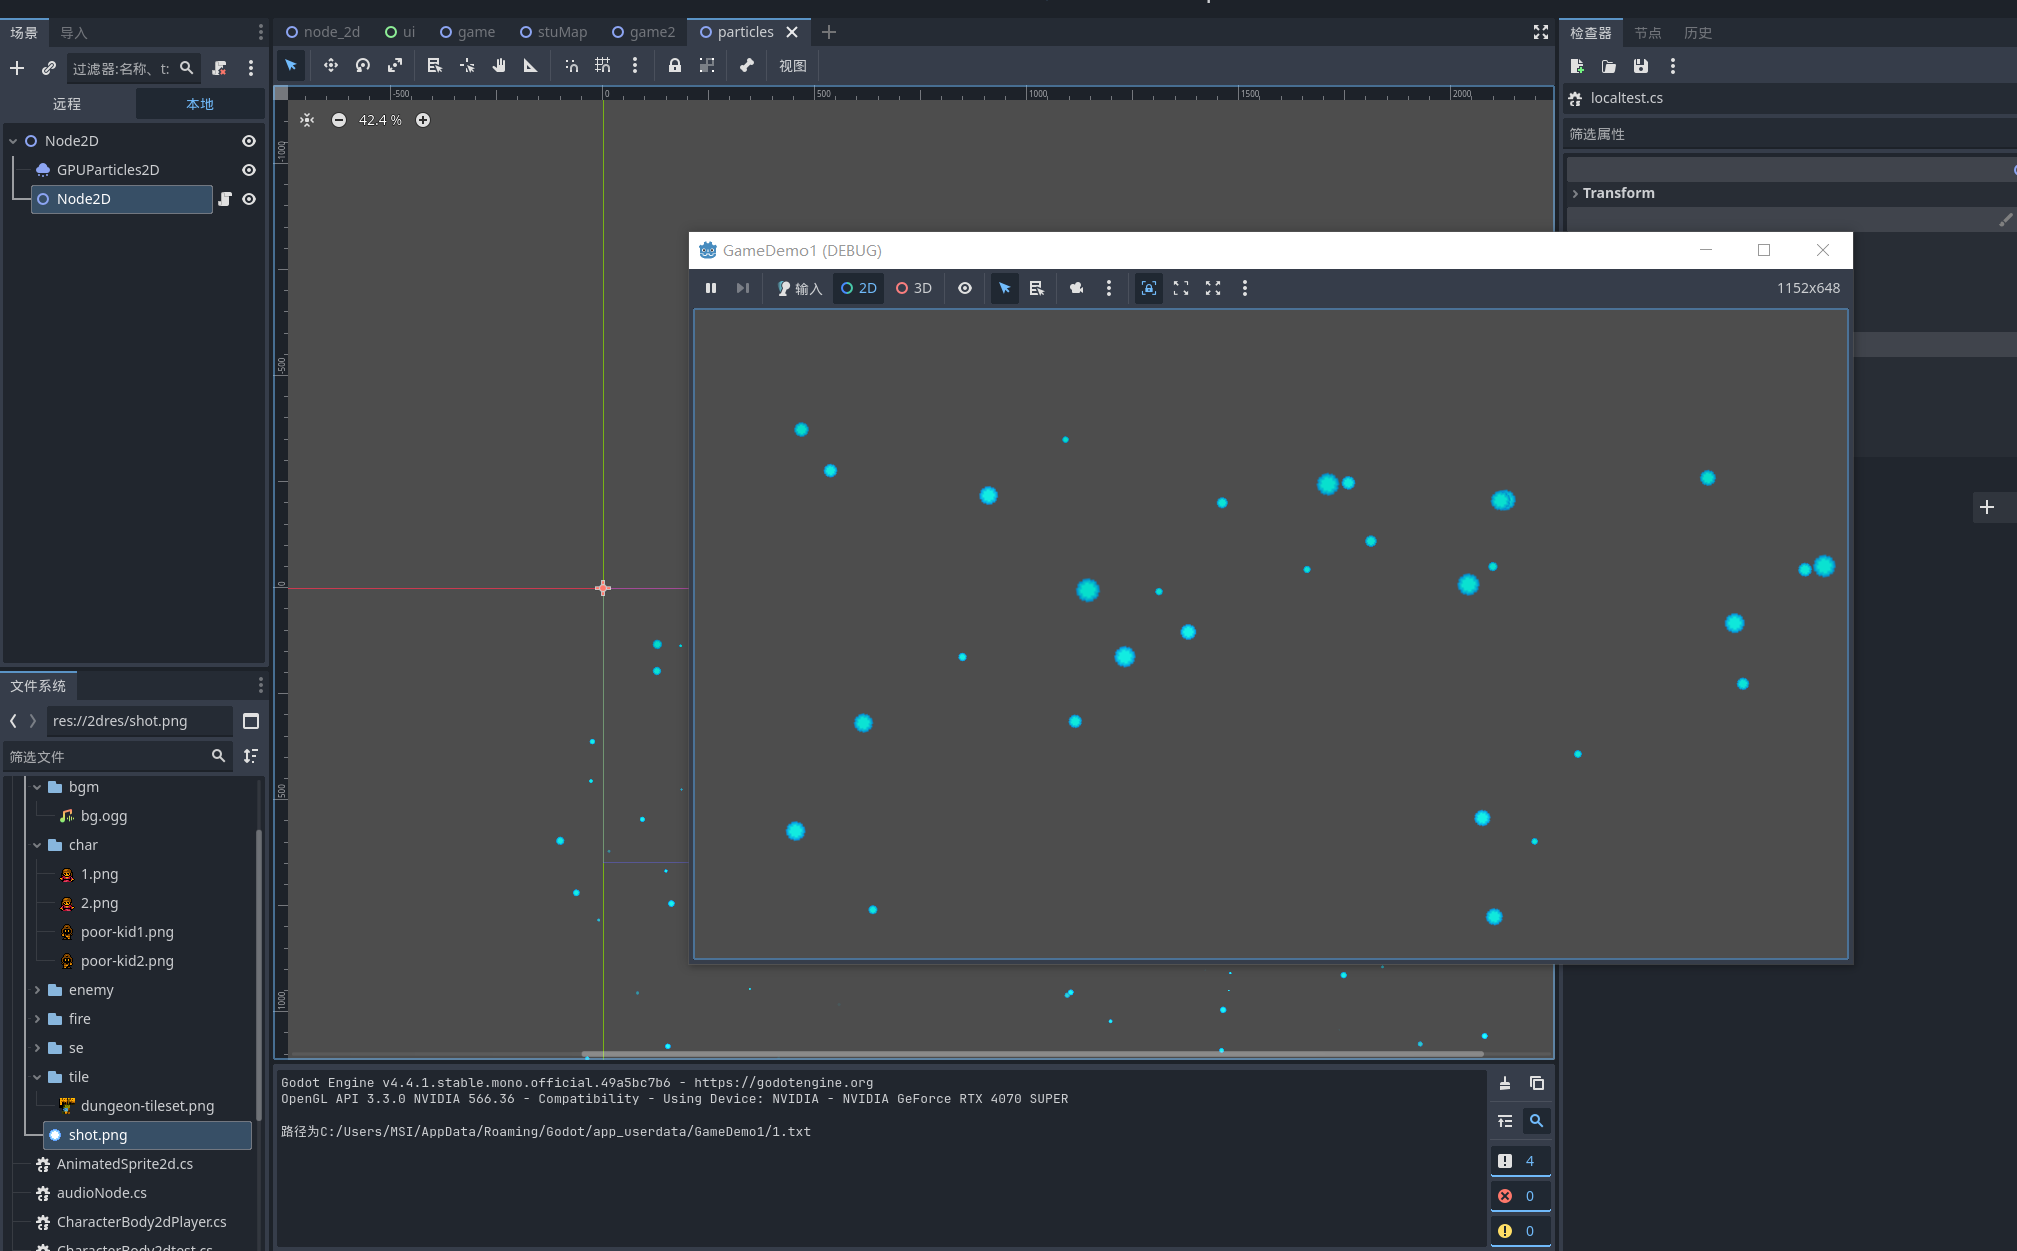
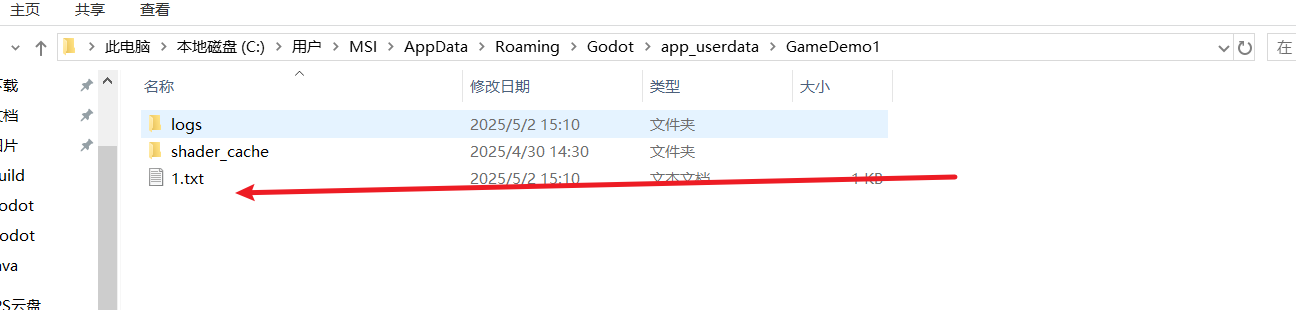
可以看到控制台输出的路径 这就是godot为我们win系统生成的文件持久化路径

这里我们只是展示了一下路径转换并没有创建文件 所有没有 1.TXT
存一个简单的文件
using Godot;
using System;
using System.IO;

public partial class localtest : Node2D
{
	// Called when the node enters the scene tree for the first time.
	public override void _Ready()
	{
		string path = ProjectSettings.GlobalizePath("user://1.txt");
		GD.Print("路径为" + path);
		File.WriteAllText(path,"唐唐唐唐唐唐唐唐唐唐唐唐唐唐唐唐唐");
	}

}
使用json来完成更优质的数据存储
我们使用字典格式来存储为json
using Godot;
using System;
using System.IO;
using Godot.Collections;
using Microsoft.VisualBasic;
using Array = Godot.Collections.Array;

public partial class localtest : Node2D
{
	// Called when the node enters the scene tree for the first time.
	public override void _Ready()
	{
		//{user:[{"name":"小冷"},{"血量":"100"}]}
		//第二层的数据
		Dictionary user1 = new Dictionary();
		Dictionary user2 = new Dictionary();
		user1["name"] = "小冷";
		user1["血量"] = "100";
		user2["name"] = "猫头";
		user2["血量"] = "114514";

		//创造一个字典数组
		var array = new Array{user1,user2};
		Dictionary dic = new Dictionary();
		dic["user"] = array;
		string stringify = Json.Stringify(dic);
		GD.Print(stringify);
	}

}
效果

总结
到这里 我们的Godot基础学习与认识 笔记就完结了 之后就可以去尝试学习和创造一些demo 将自己的想象力通过godot实现出来